Your Quest Bar orders help create more giveaways. Order today!

NEW! Working Search Button! USE IT!!!

Love BF as a blog? You'll love it even more as an e-mail newsletter. Get recipes, tips and more!

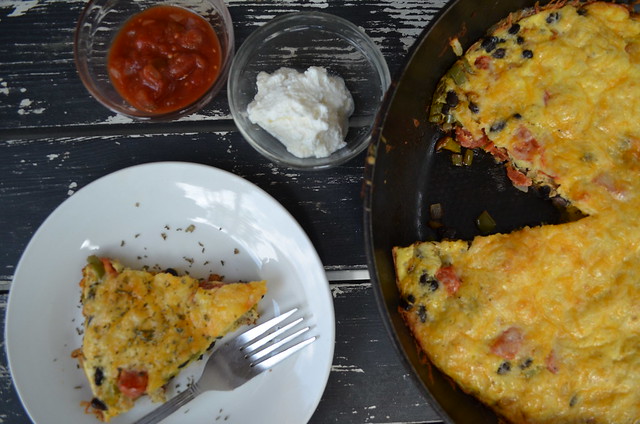
Meatless Mexican Frittata (Featuring McCormick Perfect Pinch Mexican Spice)

Mexican Veggie Frittata (featuring McCormick Perfect Pinch Mexican Spice)

Saturdays are cooking days in my house. That's when most of the week's blog posts (if I have any) get cooked. I also like to make a nice breakfast or brunch.

Today I was in a bit of a bind though. The girls leave for Texas for the summer next week (they live with their dad during the summer) and I fly out to Haiti to do some videography work for my job. So I'm not stocking the kitchen until I get back. So that is to say, there isn't much in there!

I knew this morning I wanted a Mexican-themed frittata but I knew I didn't have all the ingredients called for in the Bariatric Foodie Breakfast Book recipe. So I played with my food!

Nik's Meatless Mexican Frittata
(Makes a family sized, which is about 8 servings, which all freeze great when cut and wrapped tightly.)

Ingredients:
  • 1 small green pepper, diced
  • 1 small yellow pepper, diced
  • 1 medium tomato, diced (I used a hot-house)
  • 1 small yellow onion, diced
  • 1 c. cooked black beans (I had some left over from lunches the previous week)
  • 1 tsp. McCormick Perfect Pinch Mexican spice
  • 1/2 tsp. baking powder
  • 6 eggs, beaten (or equivalent of egg substitute)
  • 1 c. shredded Mexican blend cheese
  • Optional: Unflavored Greek yogurt and salsa for topping
Directions:

Preheat oven to 350 degrees.

Spray an oven-safe skillet with non-stick cooking spray, set it over medium heat and allow it to get hot.

Add peppers, tomatoes, and onions and sautee 1-2 minutes, or until softened.Add black beans and spice.

Place baking powder in a bowl and pour a little of the egg into it. Beat that with a fork until it's incorporated, then add the rest of the egg (if you just add the baking powder to the egg it will clump).

Pour eggs onto cooking vegetable/bean mixture and spread it around until it resembles a big, flat egg pancake. 

Gently stir inside the circle of eggs with a wooden spoon, but do not disturb the edges, you want them to set. 

Once edges set, top with cheese and place the entire skillet in the oven for about 10 minutes or until the top of the frittata is done and cheese is browned to your liking. 

Cut and serve while hot!

NOTE: In the Bariatric Foodie Breakfast Book all frittata recipes come in single-serve varieties (like this one!) requiring just one egg and a tiny oven-safe skillet! Perfect for cooking for one. 

This was a good breakfast because everyone but one member of my family (my oldest daughter who hates eggs) will eat it. My boyfriend will eat it, I will eat it, my pescetarian younger daughter will eat it. It's in that wonderful Venn diagram of meals most of us will enjoy. #Winning.

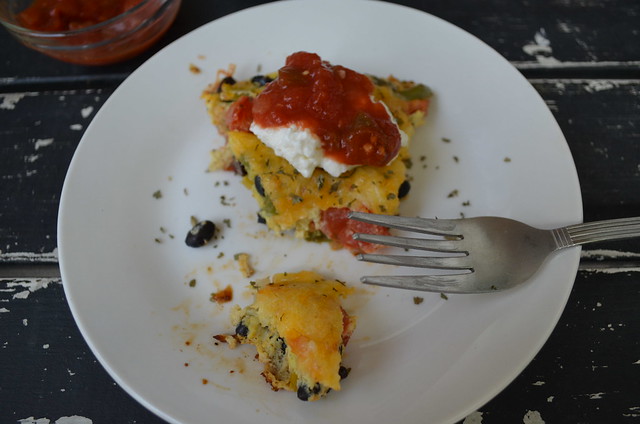
Here are some outtake pics:

Mexican Veggie Frittata (featuring McCormick Perfect Pinch Mexican Spice)
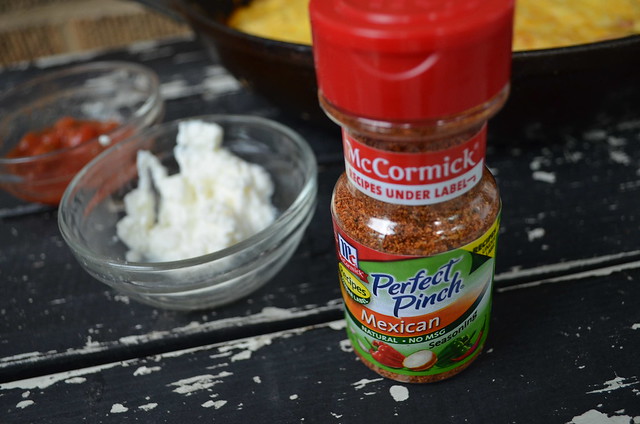
While this post was not a review for the McCormick Perfect Pinch, it really did make this frittata. It's full of flavor and took it from plain to Mexican in just a few shakes!
Mexican Veggie Frittata (featuring McCormick Perfect Pinch Mexican Spice)
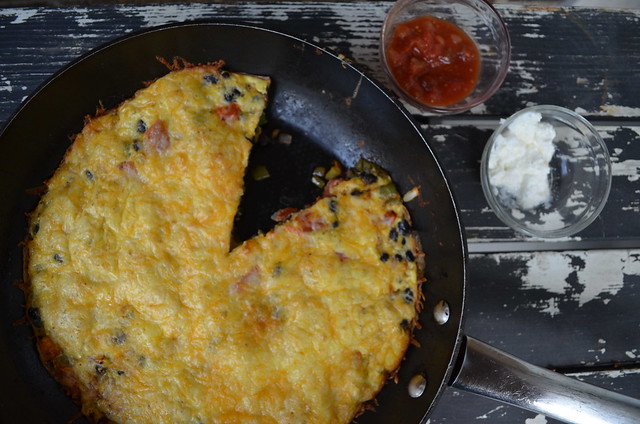
I like this shot but the kid in me always sees Pac-Man when I do this kind of shot of a cut frittata!
Mexican Veggie Frittata (featuring McCormick Perfect Pinch Mexican Spice)
Sometimes I wish I could invite you guys over for a Saturday breakfast. I love weekend breakfast. I think it's because I get to actually wait to be hungry instead of having to eat when time allows.

Foodies, breakfast does not need to be a challenge after WLS! 

In the Bariatric Foodie Breakfast Book I've done the hard work for you. The book features single-serving recipes for things like eggs, frittatas, and protein pancakes, as well as make-ahead/grab-n-go breakfasts like protein baked oatmeal and protein muffins.

I'll also teach you how to amp up the protein in your favorite breakfast dishes, 11 creative ideas for cottage cheese, new ways to enjoy Greek yogurt (like cheesecake!) and lastly, I show you how to make an awesome "Un-Breakfast" (a dish that uses breakfast foods but doesn't feel like breakfast). 

Check out the crave-worthy recipe pics on the Bariatric Foodie Breakfast Book board on Pinterest, then you can browse and buy the book on hard-copy or Kindle on Amazon - you won't be sorry you did!

Easy Breakfast: Spinach & Eggs


I think I've said before, I'm a visual eater. And unlike when I first started this blog, I'm sort of a lazy cook now. These days I LOVE meals that don't take long to make. This is a quick throw-together IF you are the sort of person who preps veggies weekly (I am!).

Spinach & Eggs (and a few other things)

Ingredients:

  • Red pepper strips (I cut up peppers each week and stow them away for easy access)
  • Sliced onion (I used a regular yellow onion)
  • Sliced mushrooms
  • Spinach (I used about 1.5 c. since it cooks down but go with your instinct on the amount)
  • 1 small clove garlic, minced (or 1/4 - 1/2 tsp. already minced garlic)
  • Nonstick cooking spray (or olive oil, about a teaspoon is enough)
  • salt, pepper, Paremesan cheese
  • 1 egg (I used a large, again go with what's right for you!)
Directions:

Spray a pan down with nonstick cooking spray and set it over medium heat. If you're using olive oil put the pan on the heat and let it get hot before adding oil. 

Add peppers and onions and sautee 2-ish minutes or until they are softened. Add mushrooms and sautee an additional minute followed by the spinach and any seasonings you are using.

I like to just toss the spinach with a pair of tongs until it's soft, but not completely limp. Transfer to a plate.

In the same pan, cook an egg any way you like it (obviously I like mine sunny-side up!). Place egg atop veggie mixture and sprinkle with Paremesan cheese. NOM!


#PWMF2014 Recipe Contest Breakfast Winner: Vicky's Strapatsada


I’m still working on the free recipe e-book for this year’s “Play With My Food” recipe contest, but I thought in the meantime I’d showcase the winning recipes. So check back this week as I post each of the five winning recipes in the following categories: breakfast, lunch, dinner, snacks and dessert.
First up, breakfast!

The winner of the breakfast category also has the honor of having submitted a recipe I had never, ever, EVER heard of in my life. But it’s kinda fun to say. Stapatsada!

This is a yummy breakfast recipe from Greece, where Vicky lives. (How awesome is it that we have Foodies, everywhere?)

Vicky’s Strapatsada
Ingredients:
  • 1 egg
  • 1 teaspoonful of olive oil
  • 1/2 tomato finely chopped
  • 1/2 green pepper finely chopped
  • 50 gr feta cheese (1/4 c. for us non-metric using Americans!)
  • Pepper, to taste
In a non-stick frying pan heat the olive oil with the green pepper until soft (2-3 minutes). (Nik-note: I’d set a pan over medium heat, allow it to get hot [2-ish minutes] then add olive oil.)

Add the tomato and let simmer for about 5 minutes.

Beat the egg and add to pan along with the feta cheese crumbled.

Cook for another 3 minutes. Add pepper to taste (no need to add salt as feta is quite salty), turn off heat and let stand for another 5 minutes. It will continue to cook.
Serve hot.
Here’s what the Breakfast Foodie-Judge had to say about why this was a winning recipe:
This recipe was super flavorful, the simmered tomatoes gave this dish a fantastic rustic flavor...and while I would have probably added a tiny bit of salt (not recommended in the recipe) they flavors were fabulous together. I also chose this recipe because 90% of the time when I choose to prepare an actual breakfast and not a breakfast drink, I am the only person who will eat said breakfast.
This recipe had all the flavors I love, and was a perfect portion for me. I started out with half of the finished portion (as the recipe said it was filling) but I found that the full portion with a couple slices of tomato was just the right size for me. No leftovers!
Before the judges could make a final decision on a winning recipe, they had to prepare the dish they were considering. Here’s Shannon’s Strapatsada.


Congratulations to Vicky, who will win a $50 Amazon gift card for her winning entry.

Breakfast Week: Nik's Warm Asparagus Salad


This blog post title is something of a misnomer. I started wanting to remake a warm asparagus salad I had at Cheesecake Factory. Oh it was lovely! It was on their Skinnylicious Menu and had fresh asparagus, pine nuts, basil, Parmesan Cheese and a fried egg on top.  It was a bit heavy on the oil though so I knew I could do better.

But as I was writing this post I thought to myself, "Self? Since you're doing this recipe to highlight the Unbreakfast chapter of The Bariatric Foodie Breakfast Book...technically you've thrown eggs on top of a lot of stuff...so really you should also highlight that!

And so I will.

But first the salad recipe!

Nik's Warm Asparagus Salad (Cheesecake Factory Knock-Off)

Ingredients:
  • 5 or 6 stalks of asparagus of medium thickness (not super thick, not pencil thin)
  • 1 small tomato, cored and sliced into wedges
  • 1/2 tbsp. extra-virgin olive oil
  • 1/4 tsp. Italian seasoning (fresh basil and oregano, finely chopped would be better but I had neither on hand!)
  • 1-2 tbsp. (depending on your caloric limits) shelled sunflower seeds (I'll explain why the switch in a moment)
  • 1 large egg
Directions

Spray a skillet with non-stick cooking spray, set it over medium heat and let it get HOT.

Cut off the woody stems of the asparagus (HINT: Usually grocery stores rubber band them at the cut mark but if not, usually where they are definite green and not any white). Then chop asparagus into bite-sized pieces (whatever that means for you).

Add asparagus to the skillet and stir to cook for about 2 minutes. Add tomato. WARNING: The tomatoes are going to release a good deal of water when they hit the heat. It will evaporate quickly.

Add olive oil and spices and toss it all to coat.  Transfer to a plate and set to the side.

Re-spray your pan and fry an egg the way you like it (as you can see, my preferred way is sunny side up!). As your egg is cooking, sprinkle asparagus and tomato with sunflower seeds. I used sunflower seeds because...um...HELLO? Have you checked out the price of pine nuts lately?!?! I mean I love you guys but $13 for a small bag was a bit steep and these work just fine!

Slide your egg on top of the mixture once it's done and go. To. TOWN!!!

Adding an egg to something is an easy way to make an Unbreakfast, which I define one of two ways in the book. An Unbreakfast is either:
  1. A food that uses traditional breakfast food but could easily work as lunch or dinner. OR...
  2. A food that doesn't use traditional breakfast food but has great nutrition to start your day.
So with that, here are a few other things I've plopped an egg on in the spirit of good eating!

Nik's Turkey TVP Chili...with a fried egg
Veggie hash...with a fried egg
Spinach, red peppers and mushrooms...with a fried egg
Matchstick peppers...with a fried egg
So those are just a few ideas to get you started. I love putting a fried egg on things mostly because the luscious yolk adds a richness to things that I love. Yes, it's added fat but it's added fat with NUTRIENTS which, much as I love it, butter just can't claim!

Nik's Mini Farm-Stand Frittata

This is a close-up but this frittata fits on a SALAD sized plate!

So in case you haven't heard, my third book, The Bariatric Foodie Breakfast Book, was released today in hard copy on Amazon! (My e-book loving Foodies, hold tight! I just got what I hope is the final draft of the Kindle, Nook and iPad versions so I hope to have them for sale this week also.)

To celebrate, we're doing "Breakfast Week" here on the blog where I'm going to share four BONUS recipes corresponding to the four major sections of the book.

First up, eggs!

In the book, I go over some of the challenges post-ops have with eggs. I know some folks have problems with eggs, especially after they've been reheated. For me, they've always been a safe food so I do a lot with them.

But one thing I heard from you guys in the past about my books was that the recipes seemed a little daunting for folks with smaller appetites (I'm not one of you but I do LOVE you!). So in this book I made a real effort to give folks options. For instance, all the scrambles in the book have mini-sized and SUPER mini-sized versions so that you can pick which version works best for you!

TIP: Read the intro pages to each of the recipe sections. There's valuable tips. For instance, in the intro to the section on Egg Casseroles there is guidance on how to make them into mini-quiches using a mini-muffin tin. In the intro to the Egg Scrambles, I show you how to make those individually-portioned meals into a breakfast your entire family can enjoy!

To make this recipe you'll need a 7-ish inch oven-safe skillet. You can click this link to see one but I got mine from K-Mart. :)

Nik's Mini Farm-Stand Frittata

Ingredients:
  • 1/4 of a small yellow onion, cut into slivers
  • 1/2 a small tomato, diced (seeded if the seeds bother you)
  • A handful (or about 1/3 c.) baby spinach
  • 1 clove garlic,  minced
  • 1 large egg, beaten
  • 1/4 tsp. baking powder
  • 1/4 c. shredded cheese of your choice (I used Kraft 2% Mexican-blend cheese)
Directions:

Preheat your oven to 350 degrees.

Spray your skillet down with non-stick cooking spray, set it over medium heat and allow it to get hot.

Add onions and cook about a minute, or until softened. Add tomato, spinach and garlic. Toss and cook about another 2 minutes or until spinach just starts to wilt (NOTE: It should still be a nice, verdant green!). Drop your heat to medium-low.

In a separate bowl, whisk together egg and baking powder (this is one of the rare instances where you can actually use baking soda instead - and usually I do - but sources tell me it can sometimes produce a slightly metallic taste in the finished product. I've never noticed one but just to disclose!).

Pour egg into skillet and swirl skillet so that the egg gets into the nooks and crannies of the veggies and forms a circular shape.  Cook (stirring insides gently with a wooden spoon) until edges begin to set.

Top with cheese and pop the entire thing in the oven. Cook for about 10 minutes or until the center is done (it will puff up slightly) and cheese is browned to your liking.

Remove from oven and place skillet on a cooling rack. If this is too big a portion for you, from here you can cut it. If not, slide that sucker onto a plate and be happy!

If you have leftovers, wrap them well in plastic wrap and stash in the fridge. They do fine on the reheat IF you generally do well with reheated eggs. (If not, tread carefully!)

Here's another variation I did with peppers and onions. Frittatas are so versatile you can make them a million different ways!


The Bariatric Foodie Breakfast Book is HERE!

http://www.amazon.com/The-Bariatric-Foodie-Breakfast-Book/dp/0991077024/ref=sr_1_5?ie=UTF8&qid=1398644739&sr=8-5&keywords=bariatric+foodie


I'm extremely happy to announce that The Bariatric Foodie Breakfast Book is now available for sale in hard copy on Amazon!

(For those who want the e-book version, hold tight! I'm finishing up the Nook, Kindle and iPad versions as you read this and hopefully they'll be ready within the next week or so!)

In celebration of the release of the book, this week will be "Breakfast Week" on Bariatric Foodie.

There are four sections of recipes in the book and this week I'll share a special BONUS recipe for each of those sections here on the blog. The bonus recipe isn't in the book. It can only be found here on the blog!

So stay tuned for:
  • Later today - To get things started we'll talk about eggs! It's the first section of recipes in the book and I'll share a mini-sized version of one of my favorite egg dishes.
  • Tuesday - We'll talk  Smart Carbs! And I'll share one recipe that can be made FOUR different ways to yield a high-protein, high-fiber, reduced-carb breakfast!
  • Wednesday - We'll turn dairy into indulgence.
  • Thursday - We'll talk about the "Unbreakfast" section of the book and I'll show you a recipe knock-off from a favorite restaurant of mine.
I hope you all enjoy this week in celebration of the most important meal of the day!

Nik's Roasted Pear Butter

See the "HOW TO USE" section for details on what this is!

Ok, so I’m really, really, really REALLY behind on stuff lately. For those who have followed this blog more than a year, this is a familiar song and dance.

But I’m trying to get caught up because next week will be all about the release of The Bariatric Foodie Breakfast Book! I’m so excited about that (and nervous).

But first we have some unfinished business to attend to. I owe you TWO recipes that I demonstrated on social media. I’ll post one today, the other tomorrow. First up, let’s talk pears!

Have you ever had fruit in your refrigerator too long? It goes through some stuff! It deepens in color, softens in texture and, in some cases, begins to bruise to the touch. And there’s a point where you look at it, remembering that you really did buy it for a purpose (you really did!) but the fruit has gone past its ability to fulfill that purpose and it is all. Your. Fault.

Ok, so maybe that’s a bit dramatic, but my main point here is that over-ripe fruit can still have a place in your food plan! But first a few words:
  • Over-ripe and rotten are NOT the same thing. You should be able to tell the difference just by looking at the fruit but if there is any doubt, cut a piece of fruit in half. If it is mostly still healthy inside with only a few soft/bruised spots, cut those out and keep it moving.
  • However, note that over-ripe fruit is fruit whose sugars have developed and intensified. That means it’s naturally sweeter than the day it was picked and therefore when you prepare stuff with it, you’ll need to adjust additions accordingly.
  • My ultimate rule for over-ripe fruit goes like a page from the Johnnie Cochran playbook: “If in doubt, throw it out!”
So anyway. One day I was in the grocery store and noticed in the produce section that they had the “last chance” bin out. That’s where the produce folks package up fruits/veggies that are older and sell them for deep, deep discounts. It is a well-known fact in my household that I have the physical inability to resist this cart. I can. Not. Do it!

On the cart this day was a pack of 6 pears. Very, very ripe pears. I bought them, endeavored to do something yummy with them, then put them in the fridge.

And then…four days later…they were very, very VERY ripe pears. When I have very, very, very ripe pears, I start thinking pear butter!

This probably isn’t true pear butter to pear butter officianados (I wonder what they are called) but it was easy and can be used a bunch of different ways.

Nik’s Roasted Pear Butter

Ingredients:
  • 4-6 whole pears (Nearly any kind works, but the ones in the picture are Bosk. Also note they don’t have to be over-ripe. They can be freshly bought.)
  • 2 tsp. lemon juice
  • Optional: ½ c. no-calorie sweetener (I used Splenda) or to taste, 1 tsp. cinnamon or 1 tsp. apple pie spice and I’ll say below how you can add protein, if you wish.

Directions:

Preheat your oven to 350 degrees.

Cut pears in half. (If they are over-ripe, this will be a “juicy” process. You don’t have to peel or seed them at this point.)

Spray a cookie sheet down with nonstick cooking spray. Place pears, cut side down, on the cookie sheet. 

Roast your pears for 15-25 minutes (the more ripe they are, the less time they’ll take to roast). When they come out of the oven they should be easily pierced with a fork, the skin should have darkened considerably (mine already had dark skins because they were over-ripe, but look for an olive color).


Allow the pears to cool thoroughly before easily removing the skin with a spoon or paring knife. Flip them over and then use a teaspoon to easily remove the seeds.

Place your roasted pears in a bowl (or the bowl of a food processor if that’s what you’ll use to pulverize them) and add lemon juice, sweetener (if using) and spice. If you are using protein powder, you’d add that at this stage as well. I recommend using ¼ c. (or four tablespoons) of protein powder for every four pears you use, but play around with it. You can use vanilla, unflavored or any other kind you like!

If using a food processor, pulverize your pears until they reach your desired consistency (they can be chunky, they can be smooth…go with what you like best!). I don’t have a food processor so I used an immersion blender and did the same.

Chill until ready to use.

HOW TO USE

Well for me I like this straight out of the bowl but I did add some to some protein oatmeal and the kids have been noshing on it as well. I also put some aside and added some black chia seeds, stuck it in fridge (so that the seeds could fill up with water. Post-ops should NOT consume un-hydrated chia seeds as they take in fluid and expand in the gut in their un-hydrated form). What I ended up with is this:


It’s interesting. It tastes good, has a little bit of a crunch, it thickened the whole deal and it gave it an almost…dare I say…carbonated mouthfeel. So…if you’re interested give that a try. 

I also used it to make the dessert at the top of the post which I called "deconstructed pear crumble." It's basically 1/3 c. of the pear butter, about 1/4 c. of Bear Naked protein granola (I also used Fiber One another time but did not photo that) and a little poof of whipped cream. Yummy!

Nik's Chicken Chorizo Skillet

This, along with many other nummy recipes, will be included in The Bariatric Foodie Breakfast Book, coming in April!


(But before we get to that, have you read about the opportunity you have to get YOUR favorite recipe into the forthcoming Bariatric Foodie Breakfast Book? If not, go read about it!)

I go to Denny’s. Quite a bit. That may be a bad thing for a post-op to admit but what the heck. If nothing else, you know I keep it real!

S’anyway. I go to Denny’s. Quite a bit. This is mostly because I know what to order there. I know my options and I exercise them!

But every now and again they get something new. Such is the case on the day that I tasted the dish that became this knock-off.

They have these sizzling skillet deals. Now if you ever go to Denny’s let me give you some advice on the sizzling skillets, if you ever want to try them.

Firstly, don’t feel limited to the ones marked healthy. With a few simple modifications you can make nearly any skillet work for you. This dish is a knock-off of the Chicken Chorizo Skillet. The first time I got it I simple asked for them to omit the red skinned potatoes. That taught me how the dish is generally, which is wonderfully yummy…but full of oil!

So the next time, and every time thereafter, I’ve asked for my food to be cooked with non-stick cooking spray, not oil (I don’t say it explicitly but I hint at a food allergy), nix the red skinned potatoes, use half the usual amount of cheese and sub in scrambled egg whites instead of the potatoes. This usually yields two lighter, but still deliciously yummy meals.

But this weekend I didn’t want to go out and I didn’t want to spend money on breakfast! It occurred to me I have all the ingredients needed to make this, so why not?

Thus…

Nik’s Chicken Chorizo Skillet
(Family size OR good for several day’s lunches. This reheats pretty well!)

Ingredients:
  • 3 links of chorizo sausage, casings removed, chopped into small pieces (NOTE: Chorizo comes in lower-fat chicken and turkey varieties if you don’t want to use pork)
  • 4-6 oz. chicken breasts, cubed
  • 1 small onion, cut into strips
  • 2-3 different colored bell peppers, cut into strips
  • 4 eggs, beaten (or egg whites, or liquid egg substitute)
  • 2 tsp. minced garlic
  • ¼ tsp. ground cumin
  • ¼ tsp. ground coriander
  • ¼ tsp. chili powder
  • Salt and pepper
  • 1 – 1 ½ c. Mexican blend shredded cheese

Optional: (Used here because my kids are potato fanatics) 3 red-skinned potatoes, diced and dry roasted.

You’ll need a large, oven-safe skillet for this.

Directions:

Set your oven to the broil setting.

Spray a large, oven-safe skillet with non-stick cooking spray, set it over a medium flame and allow it to get hot.

Add chorizo and cook, stirring about 2 minutes before adding chicken (the chorizo needs time to omit some oil). Stir chicken and sausage until both are cooked through.

Add onions, bell pepper, garlic and spices and sauté until softened. If you are using roasted potatoes, add those here as well.

Clear a well (hole) in the middle of your skillet, re-spray if needed, and pour in your eggs. Use a wooden spoon to scramble them completely before mixing into the meat/veggie mixture.

Top with cheese and place under the broiler for about 1-2 minutes to allow the cheese to melt and brown as much as you like.

This was Sunday brunch. For the kids/significant other, I also fixed a batch of my killer homemade buttermilk biscuits (no I’m not putting that recipe on BF…my blog software might blow up!). I usually eat a tester sized biscuit and call it a day. Nummy!

Play with your food!

The Bariatric Foodie Guide to Making a Frittata


This one goes out to all my 4-6 person families. Because weekends can be brutal. During the week you have a good measure of control on food, don’t you? Perhaps the kids get lunch from the cafeteria (try though I might I can’t seem to beat the price they charge for school lunch so since my girls lunches have gotten way healthier I allow them to get lunch from school now). Worse-case scenario, you send them to school with a lunch that is very portioned so as not to wear out your food resources.

But then comes the weekend. Everyone is home! And everyone is hungry.

I have a good Saturday morning option for you AND as a bonus it’s something you and they can eat together! Yay!

Frittatas. I love them. But I admit I was intimidated by the process of making them. However my friend Pepper over at Pepper Scraps inspired me to try. When I was in Portland I watched her do it and thought “Pfft! I got this!”

Wait…let’s back up. In case you haven’t heard of a frittata, it’s sort of like a huge omelette that’s started on the stovetop and finishes in the oven. Or maybe a better way to think about it (since the good stuff goes in the frittata instead of being folded like an omelet) a frittata is like a big, round, flat quiche. Without a crust. And most of the fat. If all those descriptions fail, look at the picture!!!

So here’s my three step easy guide to frittatas (just in case you need a place to start).

To make any frittata you’ll need:

Eggs (obviously). For a family-style one like the one above, use six of them. I used the whole eggs. If you are into Egg Beaters use the equivalent amount of that. If you are into egg whites, I would suggest four whites to two whole eggs but it’s entirely up to you!

“Stuff” – meat (and this is where it can get fun. For Mexican you can use chorizo, for Cajun you can use Andouille or you can just go with bacon, diced sausage, soy sausage crumbles etc.), veggies (nearly any veggie works well but if you’re dealing with cruciferous veggies like broccoli or cauliflower, or tough ones like kale or chard, you may need to increase your cook time). You’ll need about 2 – 2.5 cups of “stuff” for a family sized frittata. (NOTE: For mine I simply used onions, green peppers and tomatoes.)

Cheese – because what is life without cheese? Just be sure if you are making a themed frittata (Mexican, Greek, Italian, etc.) you use the appropriate cheese! You’ll use about 1 – 1.5 cups for the entire recipe (depending on how cheesy you are). Set aside ½ c. just for the top. (NOTE: I used shredded sharp cheddar and a little extra Mexican blend I had on hand.)

1 teaspoon of baking soda

Your favorite herbs/spices (I used garlic, salt, pepper and Herbs de Provence, which my daughter says makes the frittata taste like lavender – which she did not like – so I will omit in the future!)

An oven-safe skillet. 

Here’s how to make a frittata:

Pre-heat your oven to 350 degrees.

Spray down an oven-safe skillet (read: one with a metal handle) with non-stick cooking spray (be generous with the spray!), set it over a medium-flame and allow the pan to get hot.

Add your “stuff.” If you are using veggies, add them first, sauteeing until soft before adding your meat. If your meat is uncooked, cook it fully.

In a bowl, whisk your eggs until they are frothy. Add in the baking soda and whisk to mix and finally add the larger portion of cheese.

With a spatula, make sure your “stuff” is distributed evenly around the pan (this is both to make sure everyone gets a bit of everything in their slice AND because it just plain looks prettier!).

Pour the egg mixture into the pan and make sure it gets all the way around the pan, in those nooks and crannies! (Tilt the pan to distribute the egg). It should take on a circular shape.

Drop your heat a bit lower and let it do its thing. When the edges of the eggs start to set (become solid),  sprinkle remaining cheese on top, remove the pan from the stove and stick it in the oven.

Cook for about 7-10 minutes or until the whole thing puffs up (it won’t be terribly tall or puffy but still) and is done through (no liquidy parts).

Remove from oven, allow it to cool about 5 minutes then slice!

Here's mine all fixed up Mexican-style with unflavored Greek yogurt, diced avocado and salsa!
A few notes about frittatas:

They are highly customizable if you K.I.S.S. (keep it simple, sweetie!). The one above is vegetarian because my youngest has again decided she does not eat meat. But I set out a nice little “fixins” bar that included some diced onions, Greek yogurt, salsa, more shredded cheese, avocado, etc. Go crazy with the fixins if you want. Kids love customizing their food!

For those watching their food budget, this cost me approximately $6 to make ($1.25 for the portion of eggs I used, $2 for the portion of cheese about $2.75 for the portion of “stuff” I used.) For a family of four that amounts to $1.50 per person. Each of us had a slice and I made homemade biscuits for the rest of the clan (no, I’m not giving you the recipe for my homemade biscuits lest Mama Foodie haunt me for life!) I will say, however, that biscuits (for the fam, not for you!) are about the cheapest and easiest accompaniment to a meal. They really aren’t hard to make and only require 5 ingredients: flour, butter, salt, milk and baking powder. Look it up if you don’t believe me!

Some folks have asked me what's the baking soda for? It actually makes your frittata fluffy without the use of milk or cream and it also keeps it fluffy on the reheat! This tip came by way of a co-worker's wife who suggested it for a quiche I made. It worked so well I started using the tip in frittatas as well!

At any rate, I am waiting on the arrival of a smaller oven-safe skillet so I can make mini-frittatas just for me. When I do, I’ll post recipes but for now, enjoy breakfast with the family!

(More) Fun with Eggs!


Continuing my eternal love for eggs, I have two offerings this week.

The above photo was the first I made, for breakfast on Saturday. It was so delicious that I felt COMPELLED to share it with my Facebook Foodies right then and there!

So...you know how sometimes you end up with a really random amount of leftover taco meat? Like it's not enough to make another full serving of taco, but you don't want to throw it out (starving children and yadda, yadda)? Or everyone is so full they can't eat another bite and it almost doesn't seem worth saving?

Well stick it in the fridge. And then the next day (or up to five days later) make this!

Nik's Taco Scramble
(I've heard from a lot of you that you'd like more smaller portion recipes, so this is my attempt!)

Ingredients:

  • 1 oz. leftover taco meat (1 oz. = 2 tbsp by the way)
  • 1 oz. diced onions
  • 1 serving (usually 1/4 c.) liquid egg substitute OR 1 egg, beaten OR 1 egg white beaten (your choice!)
  • 2 tbsp salsa 
  • 1/2 oz. taco blend cheese
  • (Not pictured above) 1-2 tbsp unflavored Greek yogurt
Directions:

Spray a pan with non-stick cooking spray and allow it to heat up thoroughly.

Add onions and cook for about a minute before adding cold taco meat (do not reheat it before adding). Cook until meat starts to get a crust on it and onions are brown.

Add your egg and gently fold with a spatula or wooden spoon until the eggs are cooked. Transfer to a plate.

Top with cheese, salsa and Greek yogurt and dig in!

Adding the meat, cheese and yogurt is one way to bump up the protein count on your eggs without adding a huge amount of volume.


And here's the second. For many post-ops, meat is problematic. But I personally have always done well with deli meat. As long as you chose lower-sodium varieties these can be a good option to replace some of the meat you're trying to eat. PLUS, deli meat offers a lot of flavor variety.

Take this scramble,which I am calling a "Cajun Scramble." The base of this recipe is this stuff:


This is NOT low-sodium (true fact: Nik has always had low blood pressure so I've never been advised to do a low sodium diet, but I try to use that information for good and not evil. Consequently my salt intake seems to keep my blood pressure at or near 120/80). But if you go to the deli counter you may be able to find a lower sodium Cajun lunch meat. Anyway, here's what I did with it.

Nik's Cajun Scramble

Ingredients:
  • 1 oz. diced onions
  • 1 oz. diced green peppers
  • 1 slice Cajun chicken breast lunch meat, chopped
  • 1/8 tsp. cumin
  • 1/8 tsp. coriander
  • 1/8 tsp. garlic powder
  • Ground black pepper, to taste (I also used a "splick" of cayenne pepper)
  • 1/4 c. liquid egg substitute (or 1 egg, beaten)
  • For topping; 1 oz. your favorite shredded cheese (I used taco blend) or salsa
Directions:

Spray down a pan with non-stick cooking spray and let it get HOT.

Add onions and peppers and let them cook for about 2 minutes or so. Add chicken and spices and cook until onions begin to caramelize and chicken gets a bit of a crust on it.

If your pan has gone dry, reapply some non-stick cooking spray then add your eggs. Gently fold egg into the veggie mixture until eggs are thoroughly cooked.

Transfer to plate and top with cheese.

India's Chunky Monkey Baked Protein Oatmeal


Now that we're all settled with week two of the Bariatric Foodie Pledge, I thought we might talk about some...oh I dunno...food?

Protein baked oatmeal! I like it. You guys seem to like it. But I LOVE it when a Foodie sends me their recipe!

Here's what India sent me. And bonus points for shouting out BF in her pictures!

India's Chunky Monkey Protein Baked Oatmeal

Ingredients:
  • 1.5 cups of oatmeal
  • 3 scoops of chocolate protein
  • 2 pinches of salt
  • 4 tbsp of unsweetened cocoa powder (Nik Note: 4 tbsp also = 1/4 c.)
  • 1/3 cup of Splenda
  • 2 eggs
  • 1.5 cups of milk
  • 1/4 cup of PB2
  • 1/4 cup of peanut butter (Nik Note: If you have PB2 handy that works well and cuts a LOT of the calories!)
  • 1/4 cup of sugar-free Kaluha or sugar-free chocolate syrup (Torani/Davinci-style syrup, not Hershey's)
  • 2  very ripe bananas sliced (Nik Note: If you can't or don't want to do bananas, try doing 2 tbsp sugar-free banana pudding)
Directions:

Preheat your oven to 350 degrees.

In a bowl, mix together oatmeal, protein, salt, cocoa powder and Splenda (if you're subbing PB2 for peanut butter and/or banana pudding for bananas you can also add that in at this point).

In another bowl, mix together milk, eggs, syrups and peanut butter if you're using it.

Add wet ingredients to dry and stir thoroughly. Add in banana slices after mixture is stirred.

Transfer to a casserole dish (Nik uses 8x8 but your choice. Just remember the larger the dish, the thinner the oatmeal slices will be).

Bake for about 25 minutes for baked oatmeal, 30 minutes for oatmeal bars. Cool completely before cutting or serving. Your squares should look something like this:


Here's more protein baked oatmeal recipes to play with:

Salted Butter Toffee Protein Oatmeal


It's been all about oatmeal around here, hasn't it?

We've had high-protein baked oatmeal, scrambled oatmeal...well this morning I just wanted a plain bowl of oatmeal. But for me it has to have protein. Why? Because in my old bariatric age (just turned 5 years post-op), I seem to be developing blood sugar control problems (I refuse to call it hypoglycemia yet) and so starch has to be accompanied by protein!

S'anyway. I have a good bit of leftover sugar-free Torani English Toffee syrup from the Protein Shake Sample Kits so I decided to see how that would work in my protein oatmeal.

Nik's Salted Butter Toffee Protein Oatmeal

Ingredients:
  • 1/2 c. quick oats (That's what's in the above. I realize that might be WAY too much for some of you, so if need be, cut down to 1/4 c. I'll give modification directions with the other ingredients.)
  • 1/4 c. Torani sugar-free English Toffee syrup (or use 1 tbsp. for every ounce of oatmeal)
  • 1 scoop of your favorite protein (I used Any Whey unflavored. If you are using less than the 1/2 c. serving, use a 1/4 scoop of protein per ounce of oatmeal. So 1/4 c. would be half a scoop of protein).
  • 1 c. skim milk (use twice the amount of milk than oatmeal)
  • A small pat of butter or low-calorie butter substitute
  • A generous pinch of salt (this works especially well if you have large-crystal salt)
Directions:

In a bowl combine your oats, protein powder and syrup until thoroughly mixed. 

Then add syrup until a coarse, thick paste forms.

Add your milk and stir it in thoroughly.

Pop it in the microwave for about three minutes but stop half-way through to stir.

It is done when the oats have absorbed all the liquids. You'll need to stir again to incorporate the protein all the way.

Top with your pat of butter and your pinch of salt and...


NOM!!!! I think I found a new favorite oatmeal flavor!

Brandi's Oatmeal & Egg White Scramble


I love it when a Foodie starts their message to me about their recipe with, "I know this may sound strange but..."

Isn't that a condition of post-op eating? I mean, we do eat pretty weird stuff, at least according to the non-op world. I personally eat REALLY weird stuff (for instance, my favorite dinner is simply cottage cheese with...you guessed it...peanut butter!). 

I know I'll get comments from folks who are hopelessly normal. But you know what? That's fine too. My point: Bariatric Foodies do it THEIR way. So whatever your "thang" is, I always love to know about it! 

Here's the recipe Brandi sent me.

Brandi's Oatmeal & Egg White Scramble

Ingredients:


Nik Notes: Brandi didn't specify if she uses any additional sweetener. I probably would. Between 1/4 -1/3 c. for the entire recipe (remember, when you heat things with sweetener you up the sweet factor. When you chill things with sweetener you dull it). And I'd also put in a "splick" of salt (again, don't ask me how much a splick is...it's a splick!). Salt and sweetness work well together in oatmeal (as in most places, actually). 

Let all ingredients sit together in a bowl for 30 minutes.


Scramble together in a non stick frying pan until cooked. Usually takes about five minutes, sometimes less.

Each batch makes 6 servings of 1/2 cup with 160 calories and 12 g of protein (See? Brandi is even nice enough to give you stats!). She adds one tablespoon sugar-free blueberry jam and one tablespoon sugar-free breakfast syrup as well (she said this is included in the 160 calories).

Her verdict? I'll let her tell you:


"I find it super filling. I nuke my portion in the microwave for 90 seconds in the morning. It's easy to grab especially on the mornings I run before I go to work. I know it sounds and looks odd but I swear by it!"

Considering I got away with inventing something called an "Eggchilada" I think you're good, Brandi. Thank you for sharing your kitchen inspiration with the Foodie Nation!

Do you have a great recipe to share? Email it to bariatricfoodie@yahoo.com.

Nik's Cinnamon Raisin Baked Protein Oatmeal


I have to tell on myself.

This post could have been up two hours ago but I am becoming increasingly persnickety about my photography and was trying to get the perfect shot to represent the lusciousness of what was on that plate. Because it was luscious. Ohhhhh...yes it was...

Nik's Cinnamon Raisin Baked Protein Oatmeal

Ingredients:

  • 1.5 c. quick oats
  • 1/8 tsp. salt
  • 1/3 c. no-calorie sweetener (I used Splenda)
  • 1/4 c. Torani Brown Sugar Cinnamon syrup (in the absence of that the same amount of sugar-free pancake syrup + 1/2 tsp. of cinnamon will do)
  • Up to 1/2 tsp. extra cinnamon if you are really into cinnamon (I am so I used it)
  • 1.5 c. milk
  • 2 eggs, beaten
  • 2 scoops protein powder (Any powder, any size scoop, doesn't matter. I used unflavored Any Whey but vanilla or a cinnamon flavored protein would be nice, just omit the extra cinnamon if you use the latter along with the syrup.)
  • 1/3 cup natural raisins (Some raisins have a sugar coating. I think Sun-Maid in general does not so they are a good one to go with.)
Directions:

Pre-heat your oven to 350 degrees.

In a bowl, mix together the oats, salt and sweetener.

In another bowl combine syrup, cinnamon, milk, eggs and protein powder and mix with a whisk until thoroughly combined (there should be no protein powder lumps).

Pour liquid mixture into the oat mixture and stir well. 

Finally, stir in raisins and mix through.


Spray down a square casserole dish (I used an 8x8) and empty mixture into it. Bake for about 15-20 minutes or until oatmeal is set and the edges are slightly brown.


Cool thoroughly before cutting.


Now you may be wondering what that is on top. Well...this tasted very "Cinnabon-ish" to me so I had to make a topping. BONUS RECIPE!

Nik's Cream Cheese Topping (Individual Serving)

Ingredients:
  • 1/2 tbsp. Neufchatel cheese (1/3 less fat cream cheese)
  • 1 tsp no-calorie sweetener
  • A "splick" of cinnamon (don't ask me how much a splick is...it's a splick)
  • 2 tsp. milk
Directions:

Nuke cream cheese in the microwave about 30 seconds. 

Add remainder of ingredients and stir with a fork until smooth. Enjoy!

So this makes THREE protein baked oatmeal varieties: Fall Harvest, Nutty Apple and this. Which flavor should I take on next?

Nik's OTHER Protein Banana Bread Recipe


Before we go into this have you guys entered this week's "Mother of ALL December" giveaway yet? I have a feeling a lot of you have vitamins you like already so you don't want to enter. To that I say, it never hurts to try something new!

Look for a video review in the next day or so for Building Blocks Vitamins, our lovely prize sponsor for this week. And enter the contest! You have a year to redeem your certificate and goodness knows a lot can happen in that time. It may come in handy when you least expect it!

Moving right along...

So I already have a perfectly lovely, no-flour protein banana bread recipe here on the blog. Lookit:


But yesterday I played with my food to come up with another recipe, this one using Atkins Baking Mix. I like both versions but this one is a heartier banana bread. Whereas I can eat a whole mini-loaf of the no-flour version, I am hard pressed to get through half of one of these suckers.

And since I am a complete push-over incapable of following my own no-stats rule, I will give the nutritional information after the recipe, k?

Here we go.

Nik's OTHER Banana Bread Recipe
(Makes 6 mini-loaves)
Ingredients:

  • 3 seriously over-ripe bananas (I'm talking heavily spotted and even all brown on the outside!)
  • 1/2 - 3/4 c. no-calorie sweetener, depending on your sweetness preference (if you don't use Splenda use the amount of your favorite sweetener that correlates to the above amount of sugar)
  • 2 large eggs
  • 1 tsp pumpkin pie spice
  • 1 tsp. vanilla extract
  • 1 c. Atkins Baking Mix
  • 3 scoops of your favorite vanilla protein powder (Here's mine)
  • 1 tsp. baking powder
  • 1/2 tsp. salt
  • 1 c. chopped walnuts
Directions:

Pre-heat your oven to 350 degrees.

Meanwhile peel your bananas and place them in a large mixing bowl and mash them (I use a potato masher but if they are really ripe a wooden spoon would do). TIP: If you want to make these today and don't have over-ripe bananas, stick them in that 350 degree oven for about 10 minutes, skin and all. Speeds up the process of nature!

Add sweetener, extract and pie spice and mix thoroughly. Add eggs, one at a time and mixing the first thoroughly before adding the second. 

In a separate bowl mix together the baking mix, protein powder, baking powder and salt. 

Add dry ingredients to wet and mix well. Mixture will be THICK.

Finally, add walnuts and mix them through.

Spray down either a regular loaf pan or a mini-loaf pan with non-stick cooking spray (or this, which is a baker's best kept secret to prevent sticking!). If using the mini-loaf pan, I used a half cup measure to empty equal parts of the batter into each loaf slot. Then I divided the extra batter between the slots. 

Bake for 15-20 minutes or until top is done and edges are browned.

Another tip for successfully releasing quick-breads and cakes. Take them straight from the oven to a pan of really cold water. Just dip the bottom in the cold water for about 5-10 seconds. It helps seal the bottom and ensure that after you completely cool your baked good, it comes loose from the pan fairly easily.

Ok, so...stats...(full stats available here):

Per loaf:

Calories: 348
Fat: 17.41g (from the nuts mostly)
Carbs: 25g
Fiber: 6g (so 19g NET carbs)
Protein: 27g

I have a sneaking suspicion that the half I ate after I took the above picture is the only part I'll get. The divas each ate half of one last night and then this morning for breakfast! Sigh...story of my life. 
Related Posts Plugin for WordPress, Blogger...