Your Quest Bar orders help create more giveaways. Order today!

NEW! Working Search Button! USE IT!!!

Love BF as a blog? You'll love it even more as an e-mail newsletter. Get recipes, tips and more!

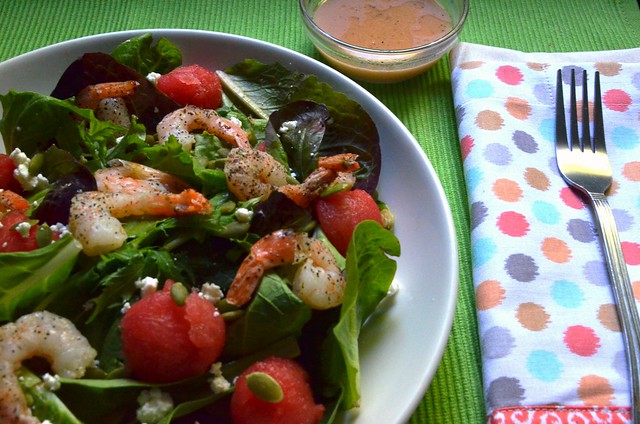
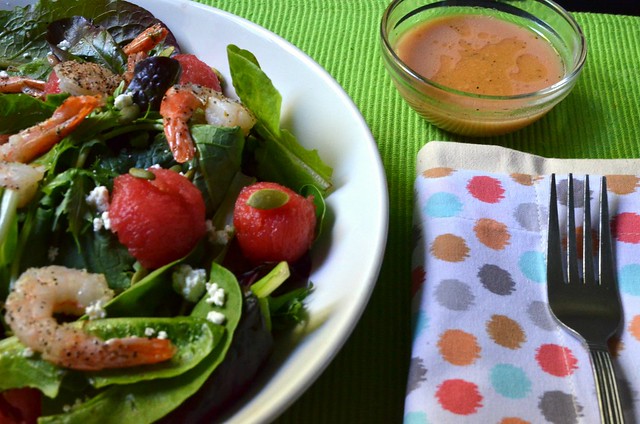
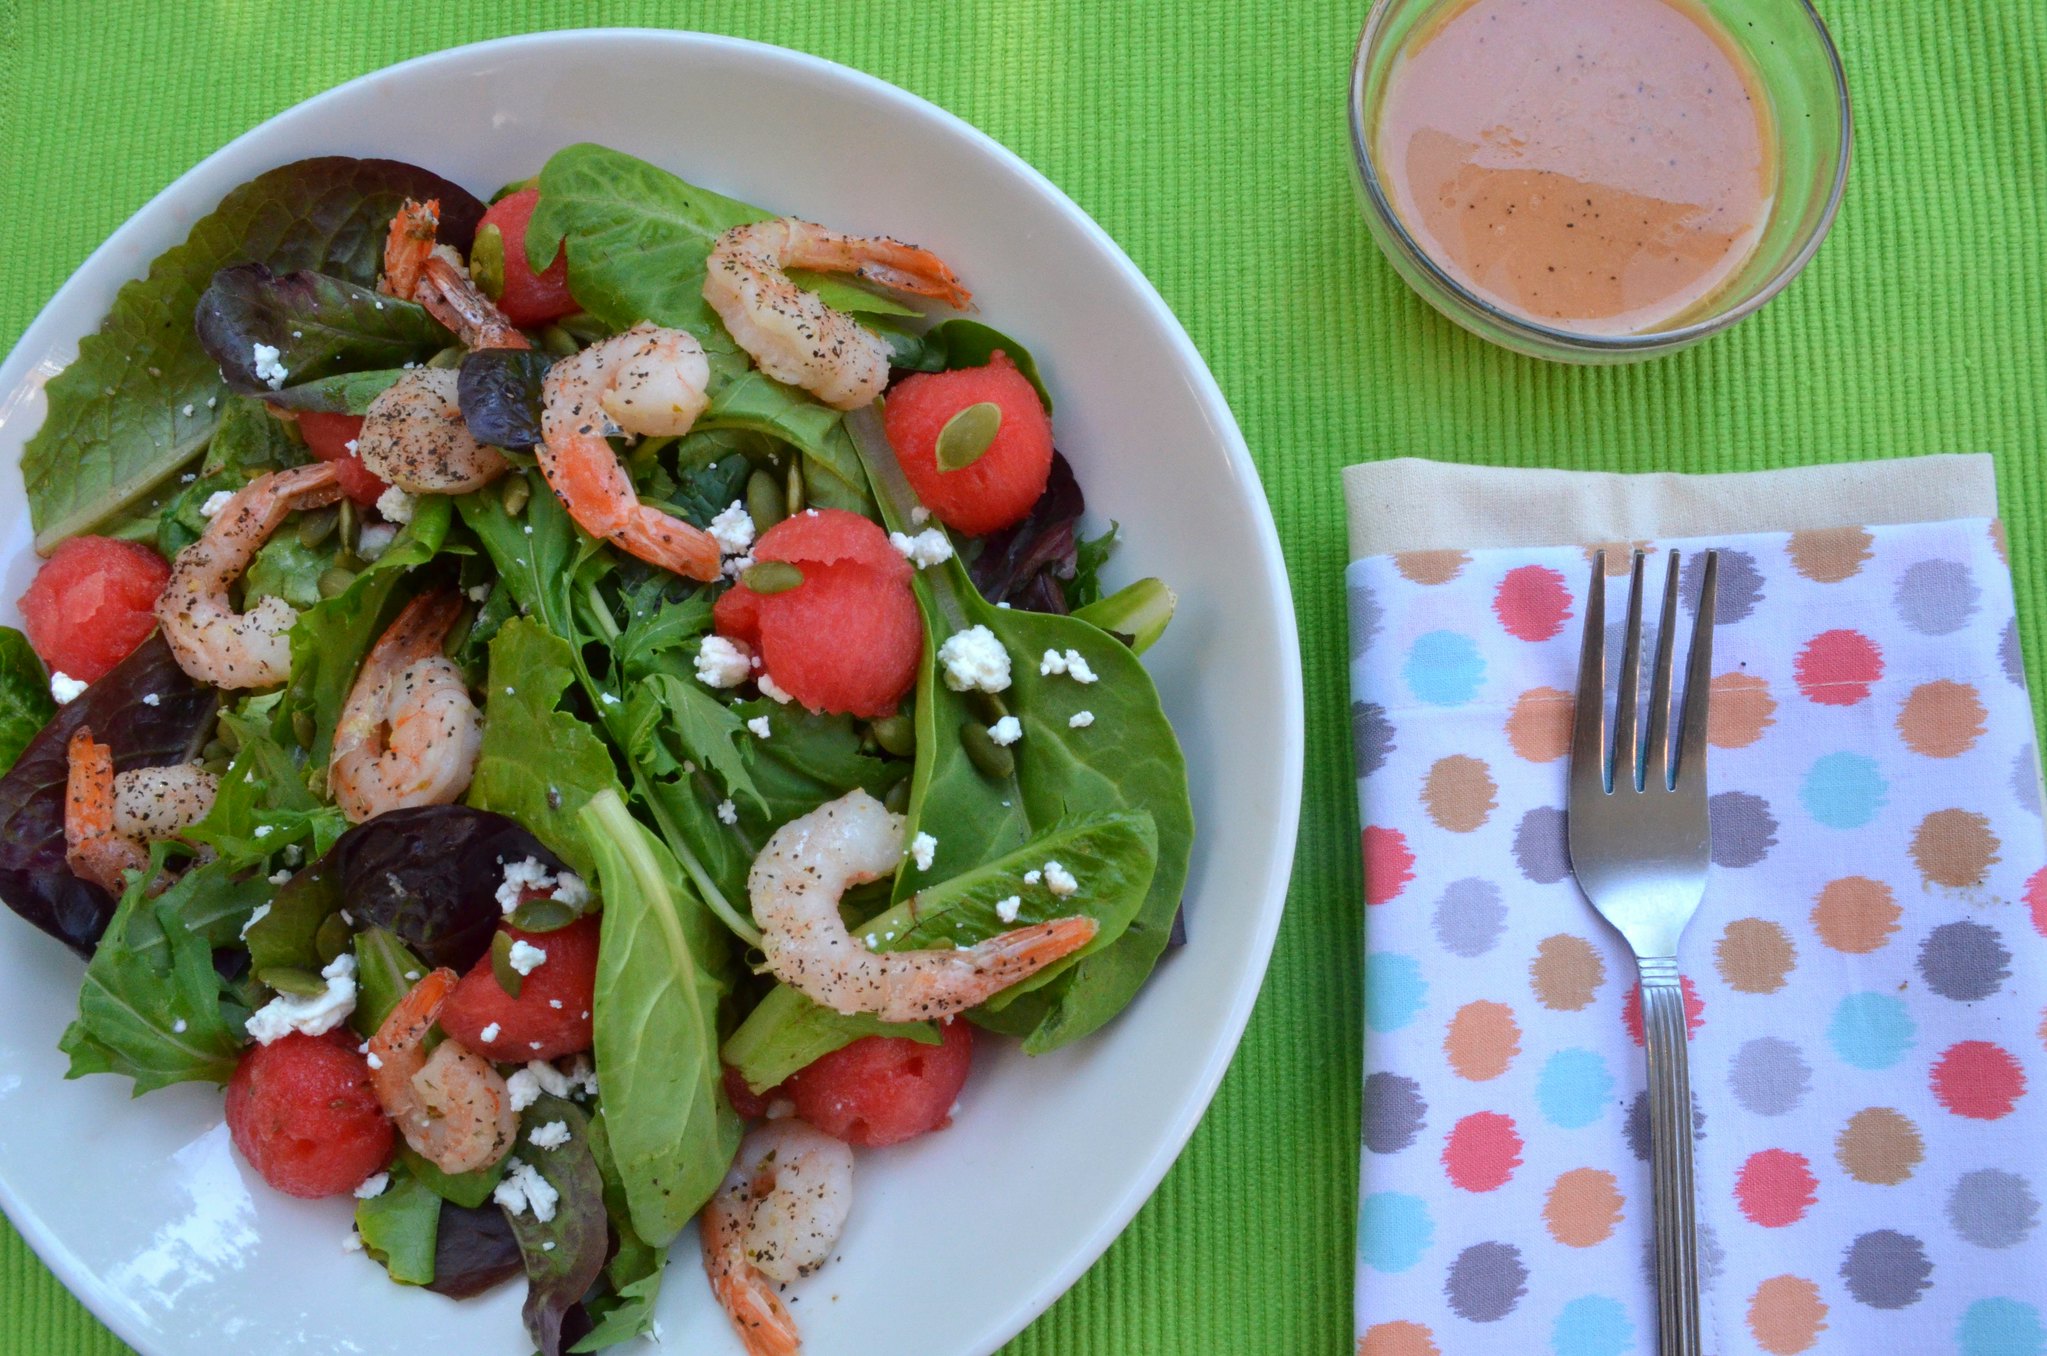
Summer Shrimp Salad with Watermelon Champagne Vinaigrette


Summer Shrimp Salad w/ Watermelon Champagne Vinaigrette 

Ok so let me set the scene of this meal for you.

It’s Wednesday – Hump Day – mid-summer. It’s warm, but not offensively so. There’s a slight breeze that feels really nice against your skin and it’s evening so there’s just enough shade for you to think to yourself, “It would be nice to have dinner outside tonight.”

And maybe you have a spouse or significant other arriving home soon. Or, if not, maybe you have a good friend who doesn’t live that far away and you invite them over. Because this evening feels like the kind of evening for good conversations and relaxation. After all, you’ve only got half the work week to go and you feel kinda good.

Thinking about what you want to prepare, you don’t want anything fussy. It should take maybe 30 minutes to prep. You don’t want anything too heavy – it’s just a tad too warm for that. You want something fresh, light and good. But since this evening feels so breezy you also want something that feels a little fancy. Because…well…you deserve it!

This is the meal you make for that occasion. Ladies. This is a meal to put on a maxi dress to eat!

A word about the dressing. It totally makes the salad. So I tried to limit the amount of fat in other places in the recipe so you could spend it on the dressing. I can't even describe how good it is. And with the watermelon...swoon! It feels fancy because it is fancy - but not fussy!

Nik’s Summer Shrimp Salad with Watermelon Champagne Vinaigrette
(The above picture is either one non-op portion, two post-op portions, or a combination thereof)

Ingredients:

For the salad
  • 10-12 cooked/shelled shrimp in the size of your choosing (I used medium, 24-30 ct.)
  • Garlic powder
  • Salt and Pepper
  • 4 c. salad mix (I used spring mix…just make sure to use something hearty)
  • About 10 chunks/balls of seedless watermelon (I bought a small personal sized one and made the balls with a teaspoon measure)
  • 2 tbsp. crumbled goat cheese (garlic/herb flavor works well here)
  • 2 tbsp. pepitas (roasted and shelled pumpkin seeds – I used unsalted)
For the dressing (makes enough to toss into about 4 servings of salad so don’t freak out!)
  • 3 tbsp. Champagne vinegar (it’s available in most grocery stores)
  • 2 tbsp. extra-virgin olive oil
  • 1 heaping tsp. honey Dijon mustard (or the same amount of regular Dijon mustard with ¼ packet no-calorie sweetener, if you want to skip the honey)
  • 2-3 tbsp. juice from the watermelon (of which there should be plenty)
  • ½ tsp. minced garlic
  • ¼ tsp. black pepper
Directions:

Spray a small skillet generously with non-stick cooking spray and set it over medium heat, allowing it to get hot.

If your shrimp are frozen, run them under some cold water in a colander. If not, then season them with garlic powder, salt and pepper.

Place them in the hot pan and cook about 2-3 minutes, turning once. Set aside and allow them to cool.

Place salad greens in a mixing bowl with watermelon, goat cheese and pepitas. Add half of your dressing and toss salad with tongs.

Distribute evenly between two plates. Top with shrimp and serve.

To Make the Dressing: In a bowl, whisk together vinegar, oil, watermelon juice, garlic and pepper. Refrigerate at least one hour before straining through a sieve into a bowl or dressing bottle.

Outtake Photos
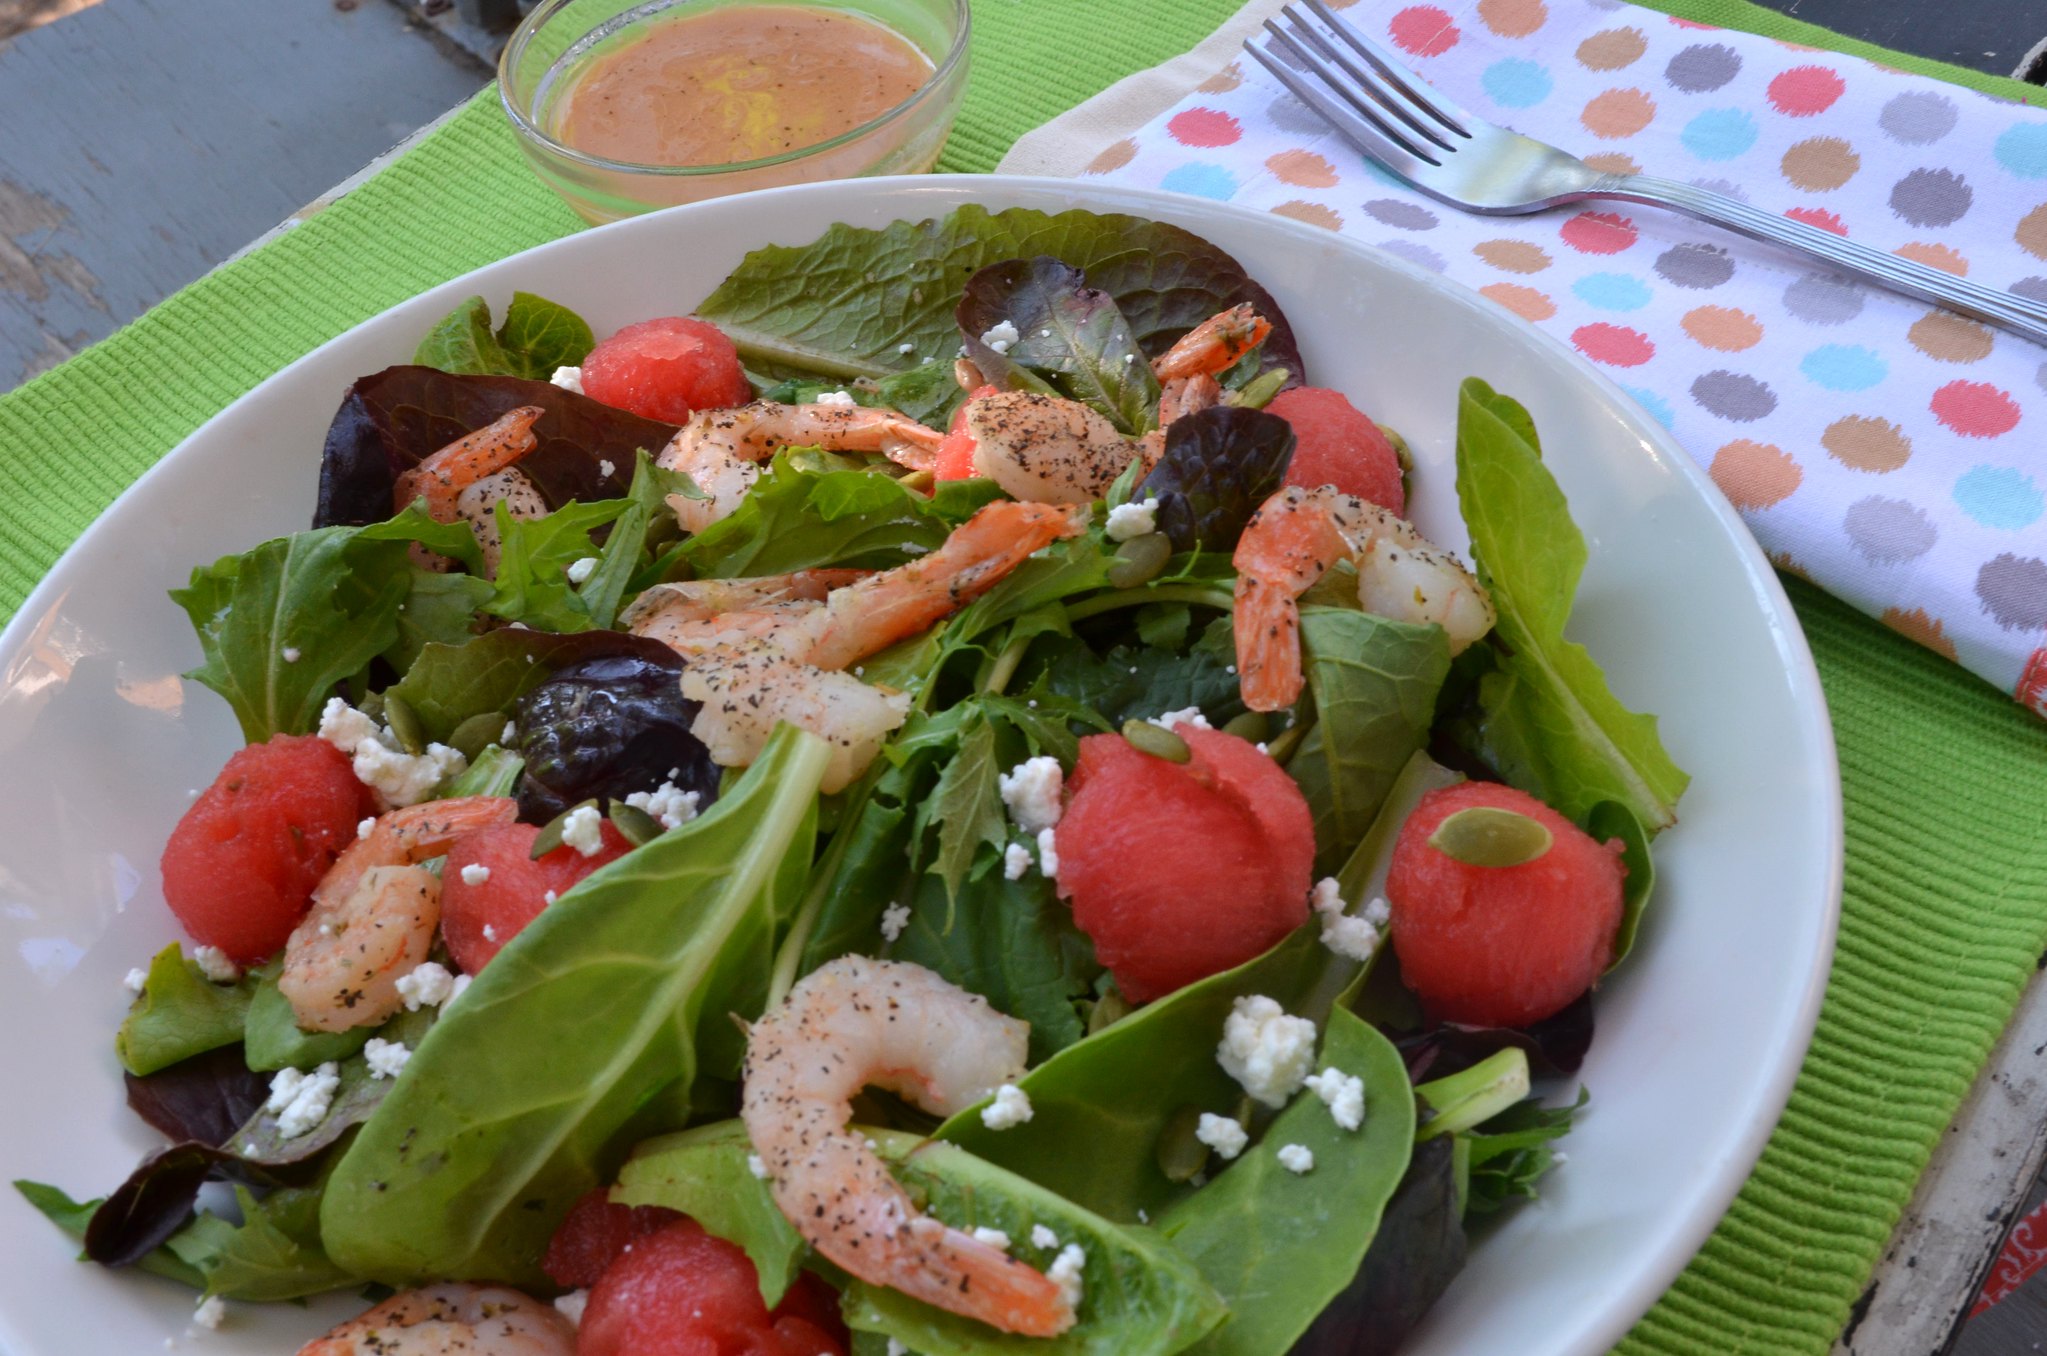

Summer Shrimp Salad w/ Watermelon Champagne Vinaigrette
Not sure you've ever wondered, but I generally photograph on my front porch (I live in a row house which means my house is attached to other houses on either side). My neighbors think I am very strange!
Summer Shrimp Salad w/ Watermelon Champagne Vinaigrette
I was trying to play with the mood on this one, but I think I just ended up making it look like it's about to rain on my salad. Hmph. The struggle continues...
Summer Shrimp Salad w/ Watermelon Champagne Vinaigrette
This was almost the cover photo for this recipe but I wanted you guys to see the whole salad. Oh, fun fact: that super cute "napkin" is actually an apron I got as a souvernir from Haiti. I liked the pattern and I don't have many cloth napkins so I figured I'd just MacGuyver it!

Nik's Roasted Pear Butter

See the "HOW TO USE" section for details on what this is!

Ok, so I’m really, really, really REALLY behind on stuff lately. For those who have followed this blog more than a year, this is a familiar song and dance.

But I’m trying to get caught up because next week will be all about the release of The Bariatric Foodie Breakfast Book! I’m so excited about that (and nervous).

But first we have some unfinished business to attend to. I owe you TWO recipes that I demonstrated on social media. I’ll post one today, the other tomorrow. First up, let’s talk pears!

Have you ever had fruit in your refrigerator too long? It goes through some stuff! It deepens in color, softens in texture and, in some cases, begins to bruise to the touch. And there’s a point where you look at it, remembering that you really did buy it for a purpose (you really did!) but the fruit has gone past its ability to fulfill that purpose and it is all. Your. Fault.

Ok, so maybe that’s a bit dramatic, but my main point here is that over-ripe fruit can still have a place in your food plan! But first a few words:
  • Over-ripe and rotten are NOT the same thing. You should be able to tell the difference just by looking at the fruit but if there is any doubt, cut a piece of fruit in half. If it is mostly still healthy inside with only a few soft/bruised spots, cut those out and keep it moving.
  • However, note that over-ripe fruit is fruit whose sugars have developed and intensified. That means it’s naturally sweeter than the day it was picked and therefore when you prepare stuff with it, you’ll need to adjust additions accordingly.
  • My ultimate rule for over-ripe fruit goes like a page from the Johnnie Cochran playbook: “If in doubt, throw it out!”
So anyway. One day I was in the grocery store and noticed in the produce section that they had the “last chance” bin out. That’s where the produce folks package up fruits/veggies that are older and sell them for deep, deep discounts. It is a well-known fact in my household that I have the physical inability to resist this cart. I can. Not. Do it!

On the cart this day was a pack of 6 pears. Very, very ripe pears. I bought them, endeavored to do something yummy with them, then put them in the fridge.

And then…four days later…they were very, very VERY ripe pears. When I have very, very, very ripe pears, I start thinking pear butter!

This probably isn’t true pear butter to pear butter officianados (I wonder what they are called) but it was easy and can be used a bunch of different ways.

Nik’s Roasted Pear Butter

Ingredients:
  • 4-6 whole pears (Nearly any kind works, but the ones in the picture are Bosk. Also note they don’t have to be over-ripe. They can be freshly bought.)
  • 2 tsp. lemon juice
  • Optional: ½ c. no-calorie sweetener (I used Splenda) or to taste, 1 tsp. cinnamon or 1 tsp. apple pie spice and I’ll say below how you can add protein, if you wish.

Directions:

Preheat your oven to 350 degrees.

Cut pears in half. (If they are over-ripe, this will be a “juicy” process. You don’t have to peel or seed them at this point.)

Spray a cookie sheet down with nonstick cooking spray. Place pears, cut side down, on the cookie sheet. 

Roast your pears for 15-25 minutes (the more ripe they are, the less time they’ll take to roast). When they come out of the oven they should be easily pierced with a fork, the skin should have darkened considerably (mine already had dark skins because they were over-ripe, but look for an olive color).


Allow the pears to cool thoroughly before easily removing the skin with a spoon or paring knife. Flip them over and then use a teaspoon to easily remove the seeds.

Place your roasted pears in a bowl (or the bowl of a food processor if that’s what you’ll use to pulverize them) and add lemon juice, sweetener (if using) and spice. If you are using protein powder, you’d add that at this stage as well. I recommend using ¼ c. (or four tablespoons) of protein powder for every four pears you use, but play around with it. You can use vanilla, unflavored or any other kind you like!

If using a food processor, pulverize your pears until they reach your desired consistency (they can be chunky, they can be smooth…go with what you like best!). I don’t have a food processor so I used an immersion blender and did the same.

Chill until ready to use.

HOW TO USE

Well for me I like this straight out of the bowl but I did add some to some protein oatmeal and the kids have been noshing on it as well. I also put some aside and added some black chia seeds, stuck it in fridge (so that the seeds could fill up with water. Post-ops should NOT consume un-hydrated chia seeds as they take in fluid and expand in the gut in their un-hydrated form). What I ended up with is this:


It’s interesting. It tastes good, has a little bit of a crunch, it thickened the whole deal and it gave it an almost…dare I say…carbonated mouthfeel. So…if you’re interested give that a try. 

I also used it to make the dessert at the top of the post which I called "deconstructed pear crumble." It's basically 1/3 c. of the pear butter, about 1/4 c. of Bear Naked protein granola (I also used Fiber One another time but did not photo that) and a little poof of whipped cream. Yummy!

BF Hydration: The Green Apple


But first...have you checked the Bariatric Foodie Pledge Halftime Report? If you THINK you are in the running for the grand prize, you want to check it to make sure you're on MY list. Go do it!

This drink does not have protein. But then, all our drinks don't have to! In the cold weather especially, a good low-cal drink that helps you get that water in is worth it's weight in GOLD!

So here's a warm, comforting drink I came up with because I got bored with what I was drinking before. Give it a try, if you've got the ingredients.

Nik's Green Apple Hot Drink

Ingredients:
  • 10-12 oz boiling water (depending on your cup size)
  • 1 packet of green tea of your choice
  • 1 packet sugar-free apple cider mix
  • Optional: no-calorie sweetener (I didn't use any)
Directions:

Steep tea bag in boiling water for a minute or two, then remove.

Add cider mix then stir thoroughly and enjoy!

I find the tea calms down the tartness and sweetness of the cider mix. It's a nice little drink to have in your back pocket when you need it, y'know?

What do you drink when the weather turns cold?

Kelly's Sugar-free Blueberry and Apple Compotes


I ask and ask and ask for your recipes. And I get SO excited when you guys send them! I actually have a few reader submissions laying in waiting now. I'll post one a week. Yay!

This one is from Kelly S. who was inspired to play with her food and came up with recipes for TWO delicious compotes that she uses to top things like Greek yogurt and oatmeal!

If you have any questions for Kelly about her recipe, leave them in the comments below. If YOU have a recipe you'd like to share with the Foodie Nation, hit me up at bariatricfoodie@yahoo.com. (Recipes with pictures, please!)

Kelly's Sugar-free Blueberry Compote


Ingredients:
  • 2 pkgs of fresh blueberries (rinsed and picked of stems, Kelly says, "lots of times I forget to do this!")
  • 1/3-1/2 cup of sugarfree blueberry or grape jam (Smuckers make this, I find it at Walmart, but whichever flavor you can find)
  • 1/2 lemon (Kelly uses both the zest and the juice)
  • 1-2 tbsp no-calorie sweetener (Kelly uses Splenda), to taste
Kelly's Directions:
Firstly, taste your blueberries. Are they sweet enough? If not, you might consider adding a wee bit of sweetener to them while cooking.

In a shallow saucepan over medium-low heat, dump in the sugarfree jam (start with the smaller amount first).


Add the zest of the half lemon as well as all the juice from it. I use a juicer that I put the lemon half in and squeeze like crazy (working on my muscles, too!). So, I get quite a bit of juice. You may need to use both halves if you don't have this fancy tool. Please note that I have also used (horrors), the fake lemon juice. In fact, when I made this last month, I didn't have anything BUT the fake lime juice and I used it, tasted just the same.

Stir this and let it simmer and bubble away just until the berries start bursting and giving forth their juices. Turn off the heat and let cool; store in a container (I use glass so that it doesn't stain). If you like your compote thicker, use more jam and/or pull the berries as soon as they start bubbling.

Kelly's Sugar-free Apple Compote


Ingredients
  • 3 c. of diced apples
  • 2 tbsp no-calorie sweetener (Kelly used Splenda)
  • 2 tsp cornstarch
  • 1 tsp cinnamon
  • 1/4 tsp of vanilla (or more to taste)
  • 1/8 tsp salt
  • 1/2 c. cold water
Kelly's Directions:

In a medium, nonstick pan, combine all the ingredients (except the apples) and stir until all the ingredients are dissolved. [Note: I usually dump everything in at the same time, including apples, stir and then proceed; works fine.]


Bring to medium-high heat, stirring often, for 7-10 minutes or until apples are soft (or to your desired doneness).

Then reduce heat to low, stirring frequently, until the mixture becomes thick and gooey. Transfer to a container, let cool, refrigerate and use as topping to anything your heat desires (cottage cheese, greek yogurt, oatmeal, etc.).

And here are Kelly's finished masterpieces:


I could TRULY swim in that...it'd probably be good or my skin too, ya think??? But lookit, it gets even BETTER:


In the immortal words of Randy Jackson from American Idol..."you know what's wrong with that [recipe]? ABSOLUTELY NOTHING!!!"

Thanks, Kelly, for taking the time to share your recipes and for playing with your food!


Nik's Asian Chicken Salad

Yet another instance where I wish my photography skills did my dishes justice! 

I...am a salad person. I have been since relatively early post-op. I was cleared for raw veggies pretty early out but didn't really attempt salad until, I'd say, about 5 or 6 months post-op. But when I did, I made a discovery. I could eat a decent amount of salad! (Mostly because the veggies are predominantly water) That was a comfort to me because eating in front of others was about to have me diagnosed with paranoid schizophrenia ("Is that really ALL you can eat???)

This salad is what I call "Sunday food." Sundays in my house are a laid back day. We go to church and then we chillax. Lunch is often the biggest and most elaborate meal of the day. I don't typically do a gigantic Sunday dinner. This started off as Chinese Chop Salad but as I surveyed my pantry (and my accompanying unwillingness to go to the store) it became more of an overall Asian salad.

Nik's Asian Chicken Salad

Ingredients:

1 bag of your favorite salad mix (it's helpful if there are carrots already in there, otherwise put some in)
1/2 cup edamame (extracted from the pods)
2 large white mushrooms, sliced (if you want to get fancy you can get shitakes. I am cheap...so I don't)
1/4 c. almond slivers
1 small can mandarin oranges
Optional: tomatoes (to me a salad isn't a salad without tomatoes, cucumbers)

For the chicken:

3 large chicken breasts
1 c. unflavored Greek yogurt
1 tbsp lite soy sauce
1 tsp ground ginger
1/4 tsp red pepper flakes
1 tsp minced garlic

Directions:

Place the Greek yogurt, soy sauce, ginger, red pepper flakes and minced garlic in a zip-top bag and marinate on the counter for an hour (or in the fridge for a few hours). The longer you marinate, the more tender the chicken will be.

When ready, grill your chicken with whatever grilling mechanism you see fit (I used my George Foreman grill) until done. Remove from heat and set aside.

Set a DRY skillet over a medium flame and allow the pan to get hot. Empty your almond slivers into it. The key to toasting nuts (especially almonds) is to not overtoast them. You can tell when they are ready in two ways. #1 - they change color. Here's my almonds just in the pan:


And here they are all toasty:


See the difference? Also when you begin to smell the nuts, they are ready to come off the heat. Much longer than that and you've got burnt nuts. Burnt nuts are not pleasant (pun VERY much intended).

In a bowl, empty your salad mix and throw your edamame and half your almonds in there. Drain your mandarin oranges (BONUS TIP: if you're ever in a place that doesn't sell no sugar added canned fruit, get the kind in light syrup. Bring it home, drain into a collander and rinse the fruit. Then place it in a container and put a little of your favorite sugar substitute in it). Add those to the bowl. Now comes the fun part. SHAKE YOUR SALAD!

Here is La Petite Diva (with new hairdo) shaking our salad:


Once the salad is good and mixed, plate up your salad mix. Dice your chicken on a cutting board and divide equally. Sprinkle each salad with a few of the remaining toasted almonds and top with your favorite dressing! As you can see, we're partial to Asian Sesame.

YUMMY!

BF Basics: Sugar Free Fruit Pie Filling

Fresh From The Orchard!
~~posted by Jen

Sorry this is kind of late, I'm fighting the cold from hell and have been knocked out on the couch (Thanks, Nyquil!) for the past few hours. We went apple picking at a nearby orchard this morning. That was SO much fun, and just what I needed.

The sun was shining, the air was cool and crisp, a beautifully perfect Fall day. 2 hours and 2 mixed bushels of apples later, we were headed home. We picked a nice mixture of Granny Smith, Fuji, Golden Delicious, Cameo, Gala, and Johna-Gold. The Honeycrisp were all gone, and the Pink Lady apples weren't quite ready yet.

Since I'm home from work for at least a few more weeks, I'll be making lots of homemade apple pie filling and applesauce and canning it. Nothing is more satisfying than biting into something you picked, canned, and cooked yourself. (Yes, I am a throwback, thanks for noticing.)

I think it's because it reminds me so much of growing up in South Georgia, both sets of my grandparents farmed, and we always had a huge garden every year. I can't help it, all those farmer genes floating around, of course I get giddy over picking apples!

So before I drugged up and passed out, I peeled 6 apples and made some Sugar Free pie filling to bake the boys an apple pie. That's a household favorite and I can't tell you how much money I'll save on canned pie filling by making my own.

One of my favorite go-to breakfasts is still Greek Yogurt mixed with SF pie filling and some Kashi Go Lean for crunch. By making your own, not only do you save money, but since it's so much fresher you'll also get more nutritional benefits from the fruit. (This method doesn't cook the fruit to death like some commercial brands do.)

Jen's Sugar Free Apple Pie Filling
Ingredients:
6 large firm apples, peeled, cored, & sliced (I used 3 Granny Smith and 3 Cameo)
juice of 1 lemon
4 tbsp butter
3 tbsp cinnamon
3/4 cup Splenda
1/4 cup water
1 tbsp cornstarch
2 tbsp Splenda Brown Sugar blend (**this does have some real sugar in it, so I only used a small amount. Nik uses Brown Sugar Twin that is completely sugar free.** OR substitute 3 pumps of Davinci Sugar Free Caramel Syrup)


Directions:
Juice 1 lemon (this works great for juicing citrus). Peel, core, & slice your apples into relatively thin slices, then squeeze the lemon juice over them (this prevents them from oxidizing and turning brown). Heat a non-stick skillet and place the apple slices in it. Add the Splenda, Cinnamon, Brown Sugar Splenda(or whichever substitution you used), water, and butter to the apples. Let the water, seasonings, and butter get warm and start melting together.


In a small separate bowl, spoon about 3 tbsp of the water mixture from the skillet into the bowl, then add the cornstarch to it. Whisk it in quickly so it doesn't lump, then add it back to the skillet.


Simmer the apple mixture for about 5 minutes or so, until the apples just start to get tender and the liquid thickens up a bit. Let it cool, then store it in a covered plastic container in the fridge. 


You can also make larger batches and process it in canning jars for 10 minutes in boiling water, these keep for a year.

Any fruit will work for this, adjust your amount of Splenda based on the natural sweetness of the fruit. Peaches, blueberries, cherries, and strawberries all work well for this. Obviously, for those you would omit the Cinnamon and Brown Sugar Splenda. Great combinations to try are peaches and blueberries, or triple berry with strawberries, raspberries, and blackberries. I also like cranberries added to the apple for a little extra zip.

Play with your food! Make up own tasty combinations, then tell us what you came up with! Mix some into your Greek yogurt, or even ricotta cheese or cottage cheese, and dig in! Better yet, make some of my High Protein French Toast and top it with the heated apple mixture. YUM!

Just in the "Nik" of time!

~by Nikki

Boy, you guys are good for my memory. Cuz I'd almost forgotten about the banana bon-bon contest (not really...but it was sort of in the back of my mind that yesterday was the deadline. That is, until I received two late entries from two friends, both named Susan!

Here's what the first Susan had to say:


Here is my submission for the chocolate banana bonbons, I tweaked the recipie a little cuz i didnt have any greek yogart. I substituted activia light vanilla, and as you can see in the pic I sprinkled half of them with toasted coconut--YUUUUUMMMM they turned out awesome! even my hubby agreed! Thanx for this recipie, i will be making these often!

Here's what the second Susan had to add:


Here you go! I dusted mine with PB2. They are currently in the freezer. Had to use two plates, so that is just a picture of one. Omitted the dusting of flour, it made the coating peel right off the banana when I did it.

So now comes the fun part. The winner! I plugged the names of all entrants into a random generator and the winner is...
 
Susan Hickman!!!!!!!!!
 
Congrats Susan. I'll be in touch to give you the details about your FABULOUS PRIZE!


And thanks to everyone who participated! This is the first of many "play with your food" contests to come, so watch out for them!

...And then there were three (bon-bons that is)

~by Nikki

Bon-bon madness is catching on. Have you made yours yet? No? Well maybe a nice testimonial from our friend Lucia in Rhode Island might convince you. She says:

I love this recipe! To shake the pieces of banana in, I didn't have any of the things you listed. So I took some Fiber One twigs and a little cocoa powder and (somewhat) pulverized them in the food processor. This mix worked fine. Also the only syrup I had on hand was SF chocolate. So mine are nice and chocolaty!


And they look like it too. Thanks Lucia!

In other news, I think Jen just coined the latest in a LONG list of Pouch Party sayings. We have quite a few because, as a company, we have to be able to describe what we do in a few words. Here's a few that we already have going:

  • "Cooking Big, On a Small Scale"
  • "Your surgeon tells you how to eat, we show you what to eat."
  • "There's no excuse for making a nasty protein shake!"
  • "There's NO food that can't be made weight loss surgery friendly!"
Those are all nice, but Jen said something yesterday that so perfectly described our goal at Bariatric Foodie that I nearly fell out of my chair when I read it. Wait for it...wait for it...

"Play with your food people! And then let us see what you did."

Sounds simple but THAT is what we hope you'll do with our recipes. Play with them. Take out things you don't like and replace them with what you do like. Add some more stuff to them if you want to. We're always here to answer your questions and we love, love, love when you send us pictures of your BF-inspired creations. Truth be told, we love to see what you're cooking in general. So if you came up with something really great that you want to share, hit us up!

More Bon-Bon Madness!

~by Nikki

We have another contender in the bon-bon challenge!

This time it's my good friend Pam. Instead of sending me a picture, however, she blogged about her bon-bon making.

Click here to go to her blog, but be warned: there is some SERIOUS food porn going on over there.

So what are YOU waiting for? Bon-bon with us!

The first bon-bon contender!

~by Nikki

From my lovely friend Dee. Remember I told you she had a bit of trouble due to my...erm...technical difficulties? Well her bon-bons still turned out pretty decent. She does, however, have some advice to future bon-bon chefs.

She said you might think about cutting them smaller so as not to be so hard on the teeth when eaten. Good advice! Everytime I've made them the bananas were wayyyy overripe so they never really achieved total frozen status and weren't hard to bite into. But I think smaller pieces might be easier to handle.

All in all, she said they tasted delicious and her husband (whom she has affectionately nicknamed "Beast" enjoyed them very much). I'm so glad!

I'll post pics as I get them and advice that comes in on preparation. Thanks Dee for taking the challenge and sharing your bon-bons!

Banana Bonus: Protein Banana Bon-Bons

~~by Nikki

Ok, so here's the deal. Life has been sort of crazy lately. And I've been promising these bon-bon's FOREVER. You've lost faith in the fact that I'll ever post them. I understand. If I were you, I would have too.

So first off let me apologize for that! The hold up is that I don't have a pic. I don't have a pic because life has been crazy! It's an endless cycle!

BUT we have an opportunity here to do something fun. For those of you willing to try your hand at this recipe, I am willing to reward you for doing so!

Yes, people, I am *paying* you to do my job for me.

So here's how it's going to work. The recipe is below. Try it out. E-mail me if you run into any difficulties. Jazz it up! Make it your own! Then snap a pic and send to me.

What's in it for you? Welllll...since my life has been rough, many of my generous hearted friends have sent along goodies ranging from protein powders I could never afford to buy myself to syrups to snacks. I have waaaaaay too much stuff. I try stuff before I recommend it to you all though. But having a gamillion protein bars might not be the best thing for my continued sucess.

SOOOOO...those who make the bon-bons and submit a picture will get the opportunity to hand pick a care package (which I WILL pack with mine own hands instead of violating child labor laws like I usually do) of things from my arsenal...erm, stockpile of protein goodies.

Ok, so deadlines. One week from today...which would be August 31. So, just to re-iterate, three easy steps.

  1. Make the bon-bons
  2. Snap a pic of the bon-bons
  3. E-mail the bon-bon pic to me (along with your OH name or FB name)
By sending me your pic you are also giving me permission to post here on the blog and on our Facebook page. All entrants will be plugged into a random name selector and I will post the name of one winner on Sept. 1st.

You game? Here's the recipe:

Edited to add: My wonderful friend Dee made them this evening and had some trouble. I quickly learned why. I ommitted a whole chunk of the recipe (damn delete button). I've added it back in italics along with some tips from Dee.

Nik's Protein Banana Bon-Bon's

Ingredients

3 large, ripe bananas, chopped into one inch long “nuggets” (Dee suggests smaller since you are eating them frozen)

1 cup unflavored 0% Greek yogurt

½ package sugar-free chocolate fudge pudding mix

2 scoops chocolate protein powder

1 tablespoon Splenda

3 pumps sugar-free Butter Rum syrup (if you don't have any, whatever you like will do)

2 tablespoons of either soy flour, Carbquick or whole wheat pancake mix

A box of tooth picks

Directions

In a bowl, mix together yogurt and protein powder. Mixture will be thick.

Add pudding mix and mix again. Mixture will be even thicker. Add syrup and Splenda and mix some more!

Place flour or pancake batter in a baggie and shake the banana pieces in them and shake them until well coated. Trust me, in the end you won't taste this but you'll thank yourself for doing it.

Place banana slices on toothpicks and submerge in mixture (this may be easier done using tongs) then transfer onto a cookie sheet lined with parchment paper (or wax paper, which is what I used - Dee didn't use anything and said she wishes she did!)

Once done you can either leave the toothpicks in (in which case you’d have a mini-frozen banana pop) or take them out (for a bon-bon).

Freeze for two hours or until coating is set. When going to eat it might be good to let them sit at room temperature for a few minutes to soften up a bit. My girls personally liked them just from the freezer. If your banana is super ripe it should be soft to bite into. Use your best judgement!

I tried and tried to tweak this so you only have enough coating for the bananas and somehow I ALWAYS have more than that. With my diva chocolate lovers, though, this is not a big problem because...the coating...when you put it in the fridge...makes the most awesomest chocolate mousse EVER!!! Thick, rich, creamy and delicious. Just watch your portion sizes! A half a cup of this stuff is more than enough with all the protein it has. With a dollop of whippage...OF COURSE.

And of course...for you stats people, here is the LiveStrong diary entry! (even if you don't use LiveStrong this will show you the stats for this). For our purposes a serving is 2 bon-bons.

Let's get fruity!

by Nikki

For years, I went to Baltimore's Cross Street market just for fruit salad from a particular stall that has been there...oh...I dunno...since God said "let there be light" and there was light...and that guy with a bowl of fruit salad.

Nowadays I am on a budget. I am also living a bit differently. So it was a happy occassion that I found that I had enough fresh fruit in my refrigerator to make my own fruit salad!

Now for all the carbophobes out there...fruit salad is NOT evil! No, really! Fruit contains water, fiber, vitamins and when it's hot outside and the fruit is cold in the summer time...YOWSA!

So here is an awesomely awesome fruit salad I made the other day. It made a ton of salad which I have now taken to using as layers between protein infused Greek yogurt in a parfait (more on that later). It sort of puts me in the mind of Sangria...except I remember what happens after I eat it.

Boozy Fruit Salad

2 large apples (I like Pink Lady) cored and diced, skin on
2 cups strawberries, hulls removed and sliced
2 cups green grapes, halved
1 large pinapple, cubed
1 honeydew melon, cubed
1 cantaloupe, cubed
Yield of one small watermelon, cubed
2 tbsp Splenda
1 tbsp lemon juice
A few tablespoons (start with 2 and go from there to taste) sugar-free DaVinci Butter Rum syrup

Mix all fruit together well in a large bowl. Toss in Splenda and lemon juice and mix again. Finally, add the syrup and stir again. Cover bowl well and refrigerate for a few hours (let's say three...although I do this the day before). Whenever you go into the fridge during those hours, just give it a shake.

Serve cold!
Related Posts Plugin for WordPress, Blogger...