Your Quest Bar orders help create more giveaways. Order today!

NEW! Working Search Button! USE IT!!!

Love BF as a blog? You'll love it even more as an e-mail newsletter. Get recipes, tips and more!

Bariatric Foodie has a NEW WEBSITE!


This blog platform has served me well for 6 years but alas, we've outgrown these digs, Foodies. It's sort of like living in a one-bedroom apartment after you've had two kids. It just doesn't work!

But the good news is that the new, improved Bariatric Foodie is just a click away! 


Here are just a few of the things that await you:
  • Downloadable/printable/customizable recipe posts! That's right. You can download recipes, easily print them and...say my recipe made four servings and you only want two. You can change the servings to get the recipes YOU want!
  • Easier-to-find resources: Everything is so much easier to find on the new site. It's great!
  • Easier-to-share blog posts: You can share via Facebook, Twitter, Pinterest, all easily with one click!
  • The Foodie Store: Check out the Foodie store and make sure you're all stocked up on all the BF products you love.
What are you waiting for? It's all there for you!


Please note I will leave this site up for a few more weeks so that everyone can get the news, but this site will go poof soon! So make sure you head over the www.bariatricfoodie.com and bookmark the new site (and sign up for email updates while you're at it) so you don't miss a beat. 


BF Top 5: Summer Recipes

We're now in what I like to call "the thick of summer." The first day of summer has passed. The 4th of July has passed. Now it's time to settle into summer until Labor Day gets here. I actually like the thick of summer. Holidays sometimes stress me out. You either have to host something or contribute a dish to something. I'd much rather have a lazy day with good food.

Here's a few recipes perfect for the thick of summer.


Thai Shrimp Skillet. This one was a contribution from one of our long-time Foodies, Julia! It's a skillet meal that combines all the luxurious flavors of Thai food into an easy, low-carb, high-protein meal!

Here's your Thai Shrimp Skillet recipe!

DSC_0099 

S'mores Protein Pudding. I mean c'mon...what says summer like S'mores??? When Torani released this sugar-free flavor I was so excited. So. Excited! You can make this as a pudding or dump it into popsicle molds for a delicious, chocolatey, marshmallow-y frozen treat!

Here's your S'mores Protein Pudding recipe!


Buffalo-Style Chicken Meatballs. So to be fair, I do this one in the oven, which is a bit counter-intuitive during the summer. These meatballs can also be cooked in a slow cooker (use whatever method works best for you). I LOVE me some buffalo wings. They actually remind me of both summer and football season, so expect to see this suggestion again come fall!

Here's your Buffalo-Style Chicken Meatball recipe!

Protein Orange Creamsicles (featuring Premier Protein)

Protein Orange Creamsicles. This is a more recent post but I swear...I'm on my third batch of these things! (To be fair the kids lapped up some before leaving for the summer and my boyfriend seems to like them as well.) It's cool and cream and, best of all, three ingredients!

Here's your Protein Orange Creamsicle recipe!

Sugar-free Tropical Lemonade

No-Sugar Added Tropical Lemonade. When I posted this recipe I got a lot of "Why not just make Crystal Light?" Ohhhhh, Foodies. Have you tasted real lemonade? Made from real lemons? It's out of this world! This recipe is really intended to be an occasion drink more than a "this is what I drink every day" because it does take some effort. But for the experience of having cool, tart, refreshing, real lemonade...I think you're worth it. But I may be biased.

Here's your No-Sugar Added Lemonade recipe!


Summer Shrimp Salad with Watermelon Champagne Vinaigrette


Summer Shrimp Salad w/ Watermelon Champagne Vinaigrette 

Ok so let me set the scene of this meal for you.

It’s Wednesday – Hump Day – mid-summer. It’s warm, but not offensively so. There’s a slight breeze that feels really nice against your skin and it’s evening so there’s just enough shade for you to think to yourself, “It would be nice to have dinner outside tonight.”

And maybe you have a spouse or significant other arriving home soon. Or, if not, maybe you have a good friend who doesn’t live that far away and you invite them over. Because this evening feels like the kind of evening for good conversations and relaxation. After all, you’ve only got half the work week to go and you feel kinda good.

Thinking about what you want to prepare, you don’t want anything fussy. It should take maybe 30 minutes to prep. You don’t want anything too heavy – it’s just a tad too warm for that. You want something fresh, light and good. But since this evening feels so breezy you also want something that feels a little fancy. Because…well…you deserve it!

This is the meal you make for that occasion. Ladies. This is a meal to put on a maxi dress to eat!

A word about the dressing. It totally makes the salad. So I tried to limit the amount of fat in other places in the recipe so you could spend it on the dressing. I can't even describe how good it is. And with the watermelon...swoon! It feels fancy because it is fancy - but not fussy!

Nik’s Summer Shrimp Salad with Watermelon Champagne Vinaigrette
(The above picture is either one non-op portion, two post-op portions, or a combination thereof)

Ingredients:

For the salad
  • 10-12 cooked/shelled shrimp in the size of your choosing (I used medium, 24-30 ct.)
  • Garlic powder
  • Salt and Pepper
  • 4 c. salad mix (I used spring mix…just make sure to use something hearty)
  • About 10 chunks/balls of seedless watermelon (I bought a small personal sized one and made the balls with a teaspoon measure)
  • 2 tbsp. crumbled goat cheese (garlic/herb flavor works well here)
  • 2 tbsp. pepitas (roasted and shelled pumpkin seeds – I used unsalted)
For the dressing (makes enough to toss into about 4 servings of salad so don’t freak out!)
  • 3 tbsp. Champagne vinegar (it’s available in most grocery stores)
  • 2 tbsp. extra-virgin olive oil
  • 1 heaping tsp. honey Dijon mustard (or the same amount of regular Dijon mustard with ¼ packet no-calorie sweetener, if you want to skip the honey)
  • 2-3 tbsp. juice from the watermelon (of which there should be plenty)
  • ½ tsp. minced garlic
  • ¼ tsp. black pepper
Directions:

Spray a small skillet generously with non-stick cooking spray and set it over medium heat, allowing it to get hot.

If your shrimp are frozen, run them under some cold water in a colander. If not, then season them with garlic powder, salt and pepper.

Place them in the hot pan and cook about 2-3 minutes, turning once. Set aside and allow them to cool.

Place salad greens in a mixing bowl with watermelon, goat cheese and pepitas. Add half of your dressing and toss salad with tongs.

Distribute evenly between two plates. Top with shrimp and serve.

To Make the Dressing: In a bowl, whisk together vinegar, oil, watermelon juice, garlic and pepper. Refrigerate at least one hour before straining through a sieve into a bowl or dressing bottle.

Outtake Photos


Summer Shrimp Salad w/ Watermelon Champagne Vinaigrette
Not sure you've ever wondered, but I generally photograph on my front porch (I live in a row house which means my house is attached to other houses on either side). My neighbors think I am very strange!
Summer Shrimp Salad w/ Watermelon Champagne Vinaigrette
I was trying to play with the mood on this one, but I think I just ended up making it look like it's about to rain on my salad. Hmph. The struggle continues...
Summer Shrimp Salad w/ Watermelon Champagne Vinaigrette
This was almost the cover photo for this recipe but I wanted you guys to see the whole salad. Oh, fun fact: that super cute "napkin" is actually an apron I got as a souvernir from Haiti. I liked the pattern and I don't have many cloth napkins so I figured I'd just MacGuyver it!

No-Sugar Added Chocolate Hazelnut Spread


Spoiler Alert: Nutella is never going to be health food. This is not health food. It will always be a treat.

I felt like I should lead with that because there are always new folks coming to this blog and I want you to know that we do, in fact, know the difference between a healthy food and indulgences. We talk about that quite a bit.

But my personal philosophy (your mileage may vary) is that my food life should be about 85-90ish% above board choices, 10-15-ish% indulgences. This is how I do moderation. Again, your mileage may vary. 

So. Back to the good stuff. Nutella!

I had surgery in 2008. This was before Nutella was a common item on US grocery store shelves. It’s been around in Europe, apparently since Europe was invented or something. But here in the US it’s become a popular shelf staple only over the last five years or so.

My youngest daughter lives for Nutella. Like seriously…she will even do her chores if she thinks there’s Nutella involved. Unfortunately for her I don’t do food rewards, but who am I to get in the way of her motivation if she chooses to think Nutella will be her reward? (Did that make me sound like a bad parent?)

Now I’m all for moderation. And having a little of what you like and a lot of what you need. But Nutella has one big problem I can’t get around.

The sugar content. It would kill me.

So that’s why I was so happy when Buzzfeed produced a videoon how to make your own Nutella at home (btw…the Nutella people are probably preparing a lawsuit against me for the sheer number of times I’ve used the term Nutella in this post! Keeping that in mind…Nutella!).

Anyhoo…I basically followed their directions I just modified the recipe a little bit.

No-Sugar Added Chocolate Hazelnut Spread

Ingredients:
  • 1 c. chopped hazelnuts (look in the baking aisle at the grocery store)
  • 4 oz. baking chocolate (unsweetened), chopped
  • 1 tbsp. extra-virgin olive oil (or you can use canola, I just had olive)
  • ½ c. milk (whatever kind you use)
  • No calorie sweetener (use your preferred kind in amount equivalent to ¾ - 1 c. sugar, depending on your desired level of sweetness. To get the correct amount, consult the conversion chart on your packaging.)
  • 1 tsp. vanilla
  • Dash of salt
Directions:

Place your chocolate in a microwave-safe bowl and microwave in 10 second increments until it’s all melted. (I did a double-boil but that’s because I have this weird Martha Stewart fetish.)

Heat a dry skillet over your stovetop (don’t spray it with nonstick, just leave it dry). Add the hazelnuts and toss them around a minute or two, until you can begin to smell the nuts. Remove from heat immediately.

Combine nuts, melted chocolate, oil, milk, vanilla, sweetener and salt in a food processor or blender (I used my Nutri-Ninja) until smooth. If it’s not smoothing out/blending, add milk by the tablespoon until it gets going.

Transfer to a clean container (I used a glass jar). This is NOT a recipe developed for canning. Refrigerate and use this within a month. I personally like it right off the spoon (and a spoonful is enough for me). I also tried it on a Pink Lady apple and that was divine as well.

To answer your inevitable question, no it doesn’t worry me having this around. Sweet stuff is not my trigger – salty food is! (Which is why you will never see a WLS-friendly Dorito recipe coming from me.) If sweet stuff is your trigger I would not be hurt if you decided to pass on this one. Seriously...it's ok!

Outtake Photos:

I like mine a bit nutty still, not completely smooth. The longer you blend, the smoother your final product should get. 

Because...melted chocolate. That is all!


Red, White and Blue Protein Popsicles (Featuring Premier Protein)

This post is sponsored by Premier Protein
It is my theory that the 4th of July is a blueberry's favorite holiday. Why? Because on that day the red/white/blue color combo is just everything -- and, really, what other food can you use to play that up?

I personally love blueberries, not only for their antioxidant qualities, but because they are a nice, mild berry. I like popping a few straight out of the fridge, adding to my cottage cheese and a multitude of other options.

That's why when the good folks at Premier Protein sent me the recipe for this Patriotic Protein Pop (see what I did there?) I couldn't wait to share it with you. It's so easy! Especially if you've invested in popsicle molds to make my Orange Creamsicle Protein Pops. Now you have not one, but TWO, three ingredient recipes to make in them!

Red, White and Blue Protein Popsicles

Ingredients:
  • Sliced Strawberries
  • Blueberries
  • 1-2 Premier Protein® Vanilla Shake
Directions:

Line popsicle molds with sliced strawberries and blueberries.

Fill popsicle molds with Premier Protein® Vanilla Shake.

Freeze overnight.

Enjoy!

3 Things I Learned in Haiti That Changed Me

Untitled

I struggled with how to do this blog post. This trip was so educational for me. I learned a lot about Haiti, about the world, but especially about myself. It would be impossible to summarize in one blog post. So I thought I’d concentrate it to the thee big things I learned that truly did change me.

But first…

Why exactly were you in Haiti, Nik?

Quiet as it’s kept, Bariatric Foodie is not my only “job.” My “day job” is as the staff writer for an organization that helps people around the world fight poverty and build strong livelihoods (and proud as I am of that work I will decline to name said organization because I like to keep my BF life and my day job life somewhat separate – thank you for understanding!). I traveled to Haiti to see our work there with coffee farmers and to document that work in video. I traveled to the city of Cap Haitien, which is about 6 hours north of Port-au-Prince, not that far from the border to the Dominican Republic. We also visited coffee farmers at two cooperatives, both high up in the mountains about 3 hours further north.

Without further adieu, here are my three things.

With a little support, you can overcome even the most difficult obstacles.

Untitled

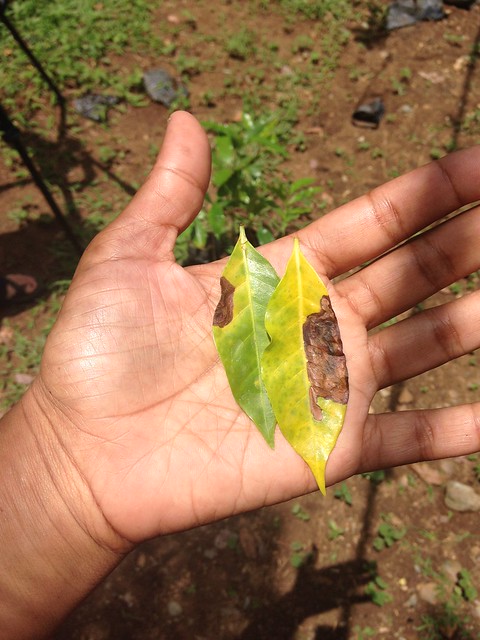
This is a photo of two leaves from a coffee tree that was struck by leaf rust, a disease that can kill coffee trees. Coffee farms all over the Caribbean and Central America have been affected by it. While I was in Haiti I got to see and hear a lot about leaf rust. It’s a truly devastating disease. It kills the branches of a coffee tree so it can’t produce “cherries” (little berry-like fruits that contain coffee beans).

To understand the full impact of that you have to know how coffee farmers use coffee to support themselves. Think of it almost like the reliability of your direct deposit in your bank account. Most farmers grow food they can eat. Coffee provides cash for all those other little things you must pay for like school fees for children, medical care and food to supplement what you grow. Many coffee farmers lost 60% or more of their coffee crop to leaf rust. That meant they saw a dramatic reduction in their income. Some dealt with it by switching their kids to less expensive schools. They knocked back on their amount of meals per day. It’s hard but folks are surviving.

They are coping by putting more effort into growing food for their families to eat but also testing out coffee plants that seem to resist leaf rust. They aren’t panicking. They are being organized, addressing their immediate needs and trying to recover for the future. 

My Big Lesson: We face those situations sometimes too. Things that want to derail us. Knock us off of our big plan. I know in the past I’ve freaked about it. These farmers taught me that the most effective way to deal with those situations is to determine what you need most right now and work on that then, little by little, work on getting back to where you used to be.

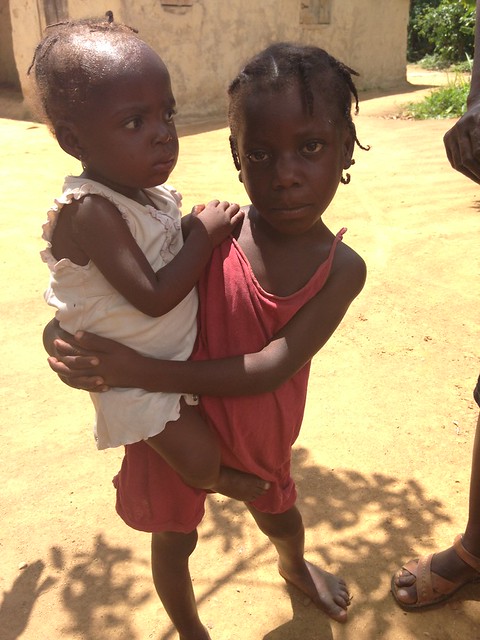
Accept your shortcomings, get out of your own way, and great things can happen!

Little Mama

I wish I could tell you the names of these little girls. They are absolutely adorable (although this photo makes them look sort of serious). On our second day of shooting, high in the mountains, I was taking a quick break while our videographer got some footage of a coffee farmer’s house. The village we were in had quite a few houses relatively near one another and all had little kids laughing, playing, eating mangoes (from the trees in their yards!).

This little girl is six. Her sister is about two. And that was about the only thing I understood that she said. In this region, Haitian Creole is the first language. Kids learn French in school but she was a bit young to know much French.

When she approached me she started asking questions (universally I think our intonation is about the same when asking a question). I think she was asking me what we were doing and about the cameras. I had our local staff close by BUT they speak Creole and French but no English. I speak English but no Creole and French. And I was stressed out about that for a minute.

But then that sweet little girl smiled and started chatting on, not really caring that our words didn’t match up. It was a magical moment for me.

My Big Lesson: Accepting your shortcomings is not the end of the world. I didn’t speak Creole and I wasn’t going to try to butcher the language at that point. I also decided I wasn’t going to feel bad about not speaking Creole. The little girl certainly didn’t feel bad about not speaking English. And she also didn’t see it as a barrier to making a new friend. I think I need to be like that more in life. Shortcomings are a challenge, yes, but they don’t make or break my ability to survive a situation.

You only get one life and if it’s a damn shame if you waste it feeling bad about yourself.

Untitled

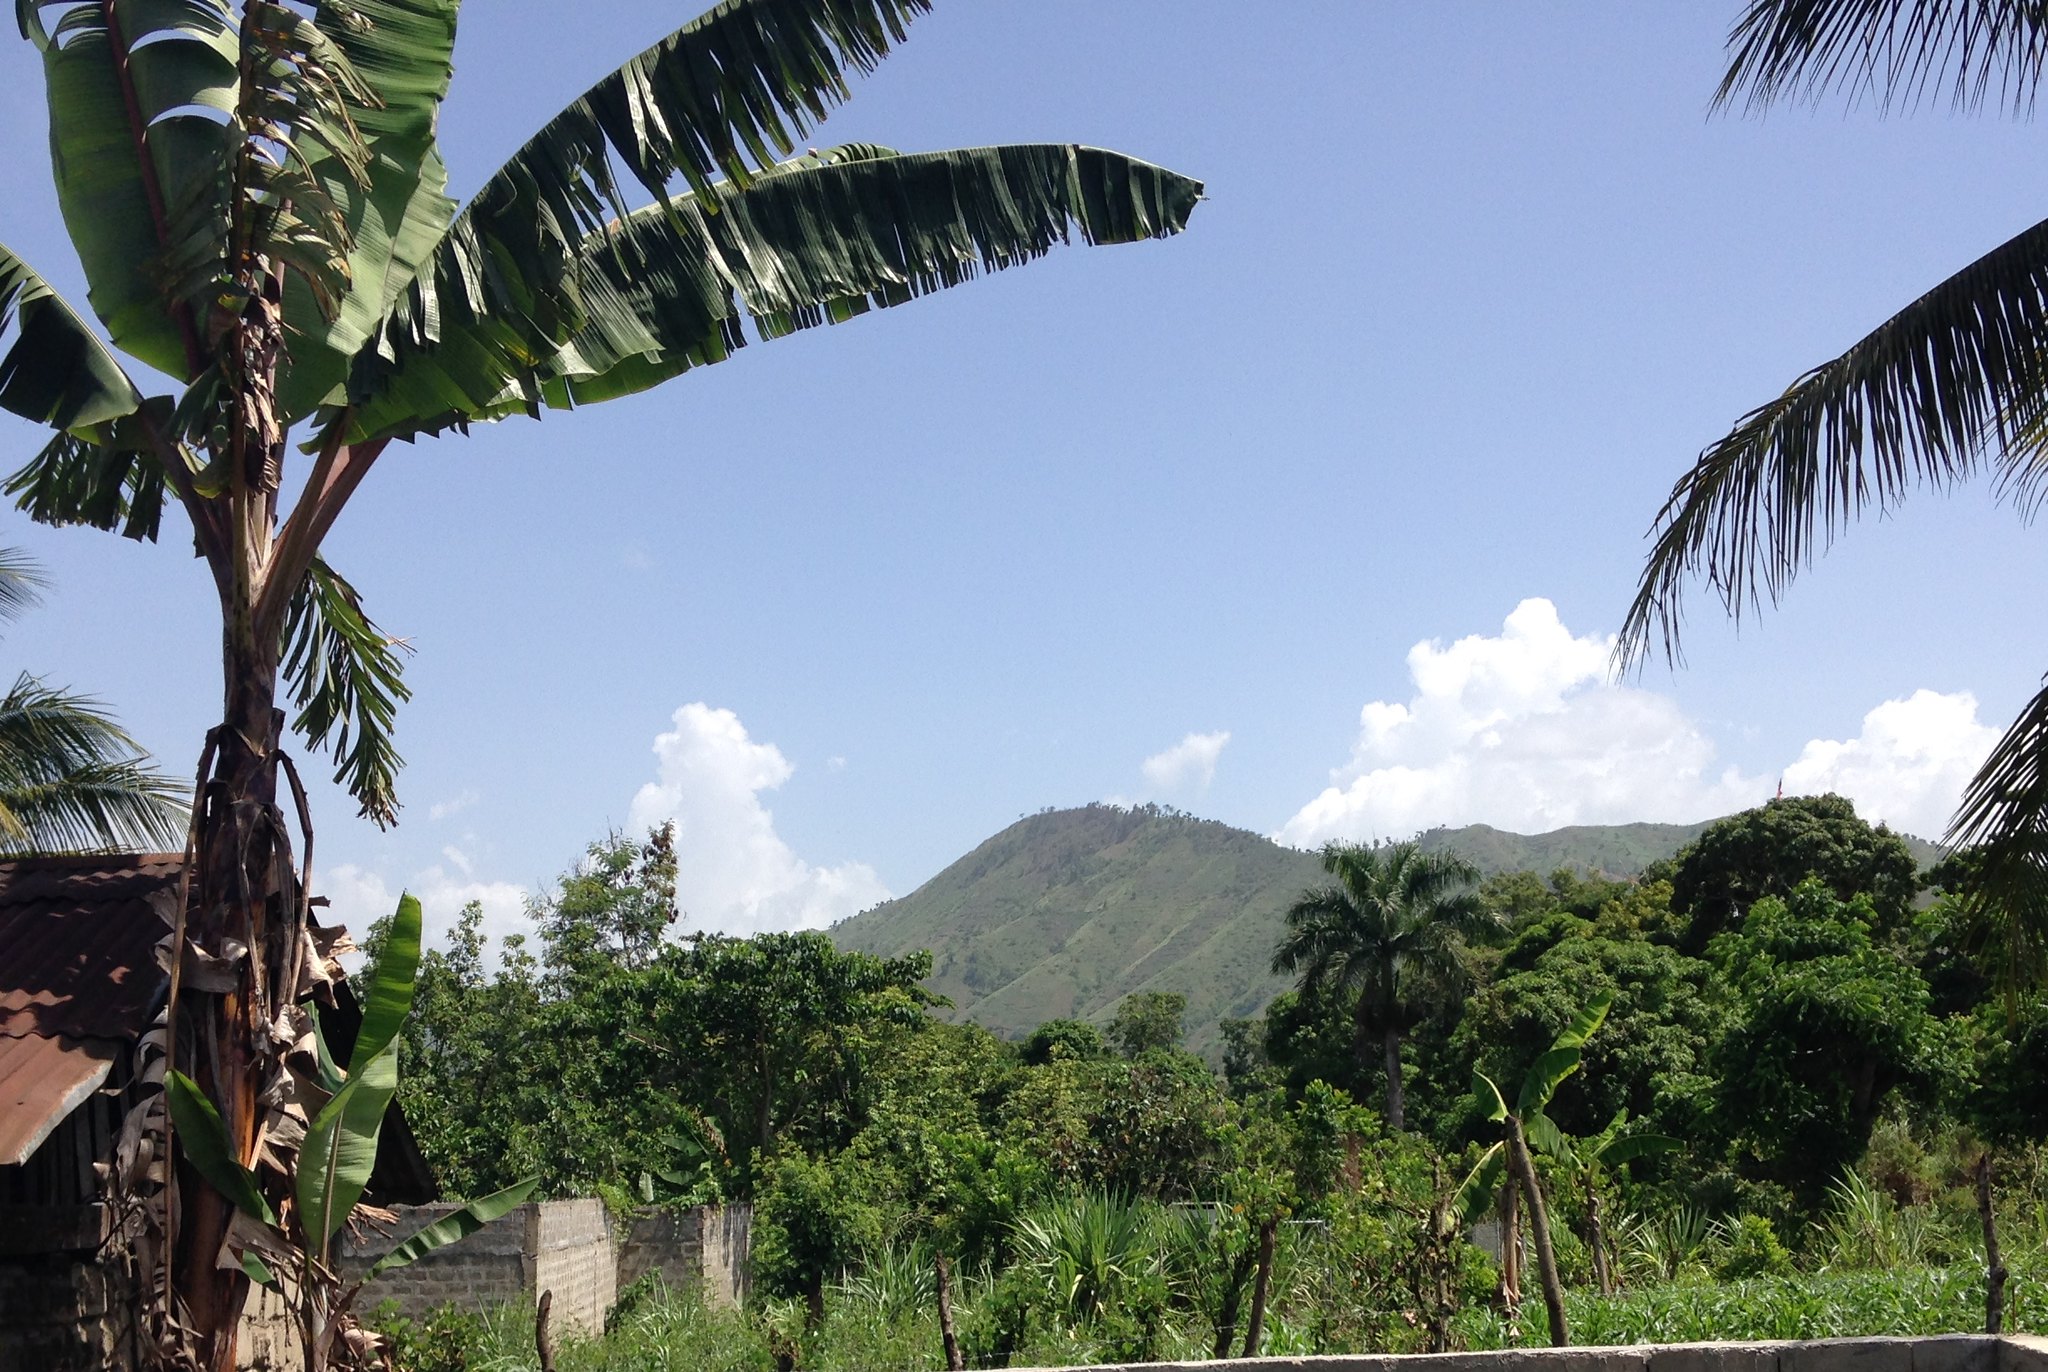
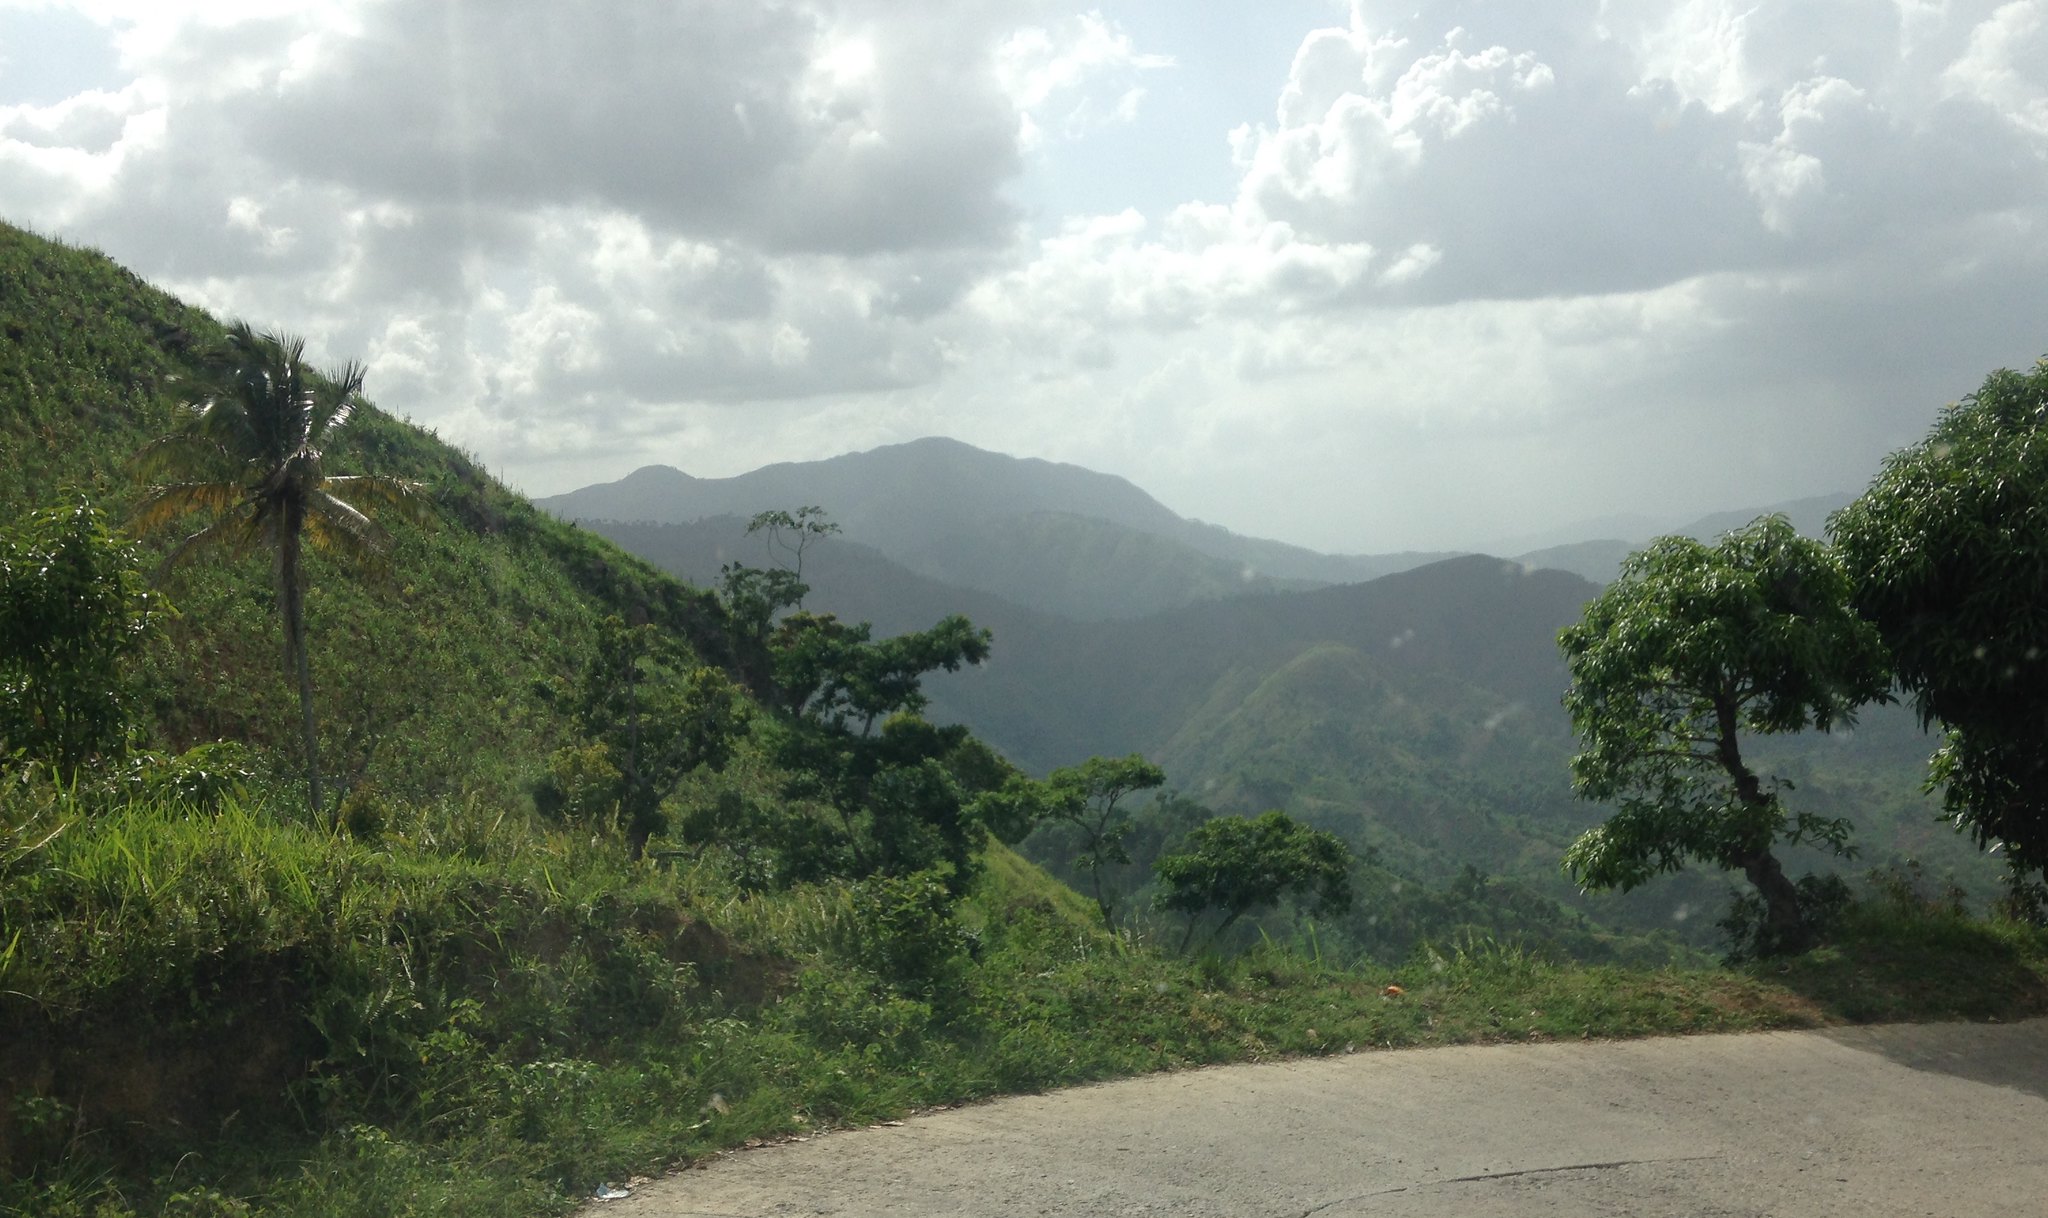
I got this picture going up the mountain. Oh my goodness there was so much to see! There were people working in the fields. There were cows. There were pigs and chickens and baby goats that seemed to be playing tag with one another. There were streams and flowers. And bugs, yes, bugs!

But then there were also the mountains. I was awe-struck by them. My photos don’t accurately capture the scale of these mountains. They were majestic and beautiful. I have always loved mountains because they make you realize how small you are relative to the universe. Our individual worlds are so small that our problems sometimes seem to fill them up. The mountains expand that world (at least for me) and put things into perspective.

I could have focused on the bumpy ride it took to get up that mountain (I banged my head on the top of our truck about 57 times and I’m lucky I didn’t get a concussion!) but I was too busy being in awe of what was going on around me. There were many moments like that on this trip, where folks were having serious discussions and I just wanted to look out the window, drink it all in.

My Big Lesson: Life really is amazing, Foodies. And if you’re not careful, in the immortal words of Ferris Bueller, “if you don’t stop and look around every once in a while, you might miss it.”

So there you have it. Three big things I learned while in Haiti. I didn’t take a whole, whole bunch of pictures but I did get a few shots. Here are my best ones. If you’d like to know anything more about the trip, drop a comment. I’m happy to answer!

Untitled
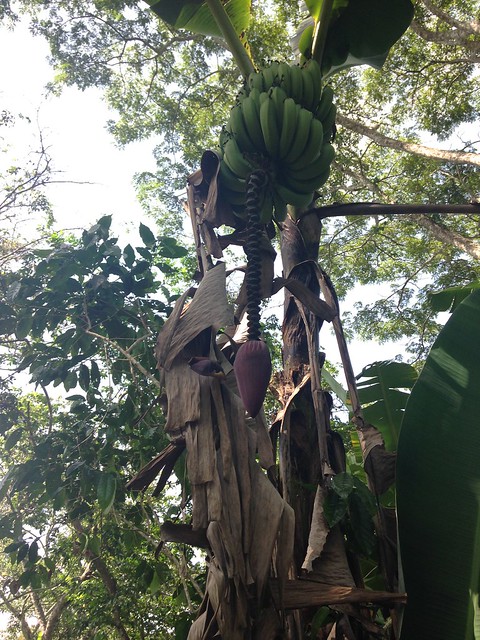
These are bananas on a tree. I had never seen a real banana tree before so I didnt' know what to make of that large...vine? With the flower on the end. I won't lie, my inner 12 year-old had a field day.

The massive lobster tail
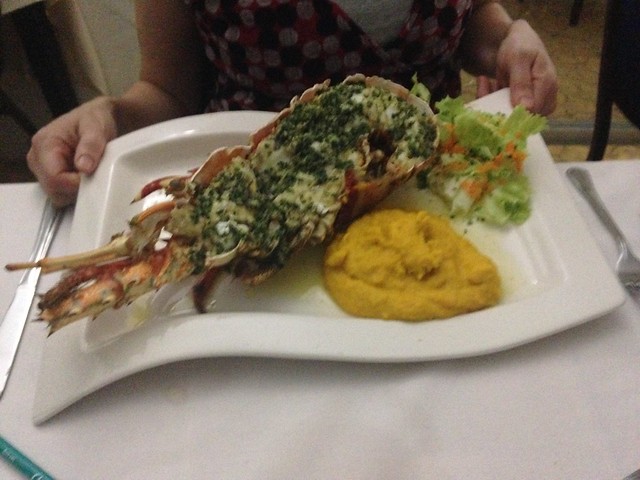
It's a bit fuzzy, but this is one thing Cap Haitien is known for. Lobster! My co-worker ordered this dinner (which, by the way, was a paltry $18!) and we were all really surprised byt he size of it (it's wider than she is). That's all lobster meat by the way, with seasonings on top.

Untitled
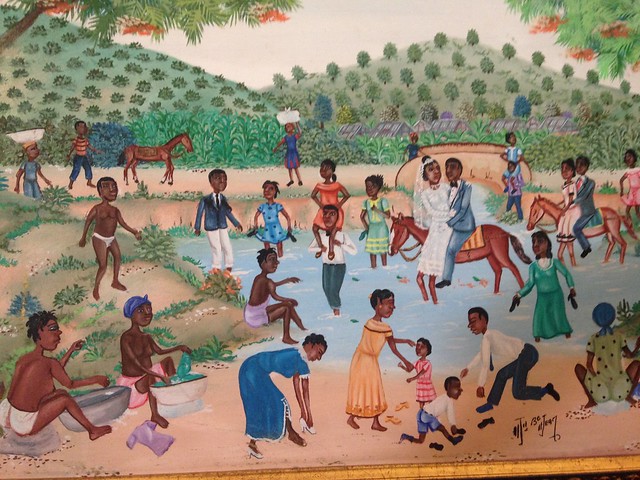
This painting hung outside my hotel room door and I think it captures the spirit of Haiti very well. There's always stuff going on! Life doesn't stop. People are moving about, to and fro. It's a very industrious place but you can tell the people take care of one another and themselves!

Cap Haitien is a jogging city
Speaking of taking care of yourself...this is one lone jogger early in the morning. But by about 7 a.m. there are THRONGS of people - locals - jogging. Old people, young people, plump people, skinny people. Literally...there were dozens. It was inspiring!

There are even more pictures on my Flickr account. Feel free to check them out if you like! 

Meatless Mexican Frittata (Featuring McCormick Perfect Pinch Mexican Spice)

Mexican Veggie Frittata (featuring McCormick Perfect Pinch Mexican Spice)

Saturdays are cooking days in my house. That's when most of the week's blog posts (if I have any) get cooked. I also like to make a nice breakfast or brunch.

Today I was in a bit of a bind though. The girls leave for Texas for the summer next week (they live with their dad during the summer) and I fly out to Haiti to do some videography work for my job. So I'm not stocking the kitchen until I get back. So that is to say, there isn't much in there!

I knew this morning I wanted a Mexican-themed frittata but I knew I didn't have all the ingredients called for in the Bariatric Foodie Breakfast Book recipe. So I played with my food!

Nik's Meatless Mexican Frittata
(Makes a family sized, which is about 8 servings, which all freeze great when cut and wrapped tightly.)

Ingredients:
  • 1 small green pepper, diced
  • 1 small yellow pepper, diced
  • 1 medium tomato, diced (I used a hot-house)
  • 1 small yellow onion, diced
  • 1 c. cooked black beans (I had some left over from lunches the previous week)
  • 1 tsp. McCormick Perfect Pinch Mexican spice
  • 1/2 tsp. baking powder
  • 6 eggs, beaten (or equivalent of egg substitute)
  • 1 c. shredded Mexican blend cheese
  • Optional: Unflavored Greek yogurt and salsa for topping
Directions:

Preheat oven to 350 degrees.

Spray an oven-safe skillet with non-stick cooking spray, set it over medium heat and allow it to get hot.

Add peppers, tomatoes, and onions and sautee 1-2 minutes, or until softened.Add black beans and spice.

Place baking powder in a bowl and pour a little of the egg into it. Beat that with a fork until it's incorporated, then add the rest of the egg (if you just add the baking powder to the egg it will clump).

Pour eggs onto cooking vegetable/bean mixture and spread it around until it resembles a big, flat egg pancake. 

Gently stir inside the circle of eggs with a wooden spoon, but do not disturb the edges, you want them to set. 

Once edges set, top with cheese and place the entire skillet in the oven for about 10 minutes or until the top of the frittata is done and cheese is browned to your liking. 

Cut and serve while hot!

NOTE: In the Bariatric Foodie Breakfast Book all frittata recipes come in single-serve varieties (like this one!) requiring just one egg and a tiny oven-safe skillet! Perfect for cooking for one. 

This was a good breakfast because everyone but one member of my family (my oldest daughter who hates eggs) will eat it. My boyfriend will eat it, I will eat it, my pescetarian younger daughter will eat it. It's in that wonderful Venn diagram of meals most of us will enjoy. #Winning.

Here are some outtake pics:


Mexican Veggie Frittata (featuring McCormick Perfect Pinch Mexican Spice)
While this post was not a review for the McCormick Perfect Pinch, it really did make this frittata. It's full of flavor and took it from plain to Mexican in just a few shakes!
Mexican Veggie Frittata (featuring McCormick Perfect Pinch Mexican Spice)
I like this shot but the kid in me always sees Pac-Man when I do this kind of shot of a cut frittata!
Mexican Veggie Frittata (featuring McCormick Perfect Pinch Mexican Spice)
Sometimes I wish I could invite you guys over for a Saturday breakfast. I love weekend breakfast. I think it's because I get to actually wait to be hungry instead of having to eat when time allows.

Foodies, breakfast does not need to be a challenge after WLS! 

In the Bariatric Foodie Breakfast Book I've done the hard work for you. The book features single-serving recipes for things like eggs, frittatas, and protein pancakes, as well as make-ahead/grab-n-go breakfasts like protein baked oatmeal and protein muffins.

I'll also teach you how to amp up the protein in your favorite breakfast dishes, 11 creative ideas for cottage cheese, new ways to enjoy Greek yogurt (like cheesecake!) and lastly, I show you how to make an awesome "Un-Breakfast" (a dish that uses breakfast foods but doesn't feel like breakfast). 

Check out the crave-worthy recipe pics on the Bariatric Foodie Breakfast Book board on Pinterest, then you can browse and buy the book on hard-copy or Kindle on Amazon - you won't be sorry you did!

Protein Orange Creamsicles (featuring Premier Protein)

Protein Orange Creamsicles (featuring Premier Protein)

They call this weekend the "unofficial" start of summer.

Damn that. I'm calling it. It's summer!

I mean after the winter we had? We deserve it. (Unless of course you don't like summer in which case...sorry...I love it so forgive my obnoxiousness over the next few months.)

Raise your hand if the highlight of your summer day as a kid was hearing the jingle of the ice cream truck? (Raises hand) Oh what a joyous sound that was! The first faint sounds were my signal to beg my mother (in the most annoying voice possible) for a few coins so that I could partake in my all-time favorite summer treat: Orange Creamsicles.

Today, I still eat Orange Creamsicles but - sorry, ice cream man! - I make them myself. Using the basic frozen treat instructions from my book, The Bariatric Foodie Guide to Perfect Protein Shakes, here's how I make this delicious summer treat!

Nik's Orange Creamsicle Protein Pops

Ingredients:
Directions:

Protein Orange Creamsicles (featuring Premier Protein)
So let's not talk about how I got this Nutri-Ninja like a year ago and I am just starting to use it regularly. 
Combine everything in a blender for two minutes, then pour into popsicle molds.

Protein Orange Creamsicles (featuring Premier Protein)


Protein Orange Creamsicles (featuring Premier Protein)

NOTE: The ones I used, I got at Family Dollar...for a dollar! For these I had to add about three additional tablespoons of milk (I use almond) to fill all 8 slots.

Protein Orange Creamsicles (featuring Premier Protein)

Freeze well. To remove, run frozen pop mold under cool (not cold, not hot, not warm but cool) water for a few seconds and try to coax it out. Repeat until pops dislodge from the mold.

TIP: For an extra protein boost you can add more protein powder before blending the first time (I'd recommend no more than one additional serving of protein powder that has at least 25g protein in it). Stick with vanilla. And DO use the lemon juice. Lemon juice brings out the fruitiness of fruit flavors. The pop will taste a bit flat without it. 

Outtake pics!

Protein Orange Creamsicles (featuring Premier Protein)
My attempt at creating a summer scene. I will concede there may have been a bit too much going on here.
Protein Orange Creamsicles (featuring Premier Protein)
I handle my popsicles with the utmost care.
Untitled
Yeah...being a food blogger is a tough job some days. But somebody's gotta do it!


And remember this recipe is just one of dozens included in The Bariatric Foodie Guide to Perfect Protein Shakes. The book not only gives you great shake ideas, but instructions on how to make your shakes into crave-worthy treats like this. Check it out on Amazon

No Sugar-Added Tropical Lemonade

Sugar-free Tropical Lemonade

So I know we live in this super high-tech, fast-moving world where everything is designed to be faster, easier, more convenient.

But every once in a while I like something that takes time, requires a little skill, and is a bit more involved. Good, homemade handmade lemonade is one of those things.

When I was an itty-bitty thing and my grandma was still alive (she passed away when I was five) she used to make lemonade. Helping her is one of my earliest memories. Now lemonade wasn't a quick-rush thing to her. No, no! You took your time with it. Because if you did, you got something really wonderful.

In my estimation, homemade lemonade is a great way to practice the old will-power muscle. It's not instant gratification. You get the very best results if you wait it out. But the moment you put that sweet nectar to your lips...ahhhhh. You realize it was worth it. Even if the waiting nearly drove you insane. :)

Nik's No-Sugar Added Tropical Lemonade
(The below recipe is what I used for this batch. Each batch can be different, the method of making it remains the same! This makes about 3 quarts of lemonade.)

Ingredients:
  • About 10 pineapple cores (see below)
  • 2 mango seeds after I cut the flesh off
  • 6 c. water
  • 2 limes, juiced
  • About 8 lemons, juiced
  • No-calorie sweetener equivalent to 3 c. sugar (use whatever kind you like but check the conversion chart on the packaging to make sure it matches up against sugar!)
  • Another 8 c. (64 oz.) of cold water
Directions:

Pre-Step: Fruit Cores

So I had these two pineapples, right? And I needed to cut them up because they were sitting in my fridge doing absolutely nothing. I know from experience nobody in my family will cut them. They will go bad first. (Yes, that is sad!) So I decided to cut them up along with a mango I had. I wanted to show you a super simple hack for removing the cores of pineapples. I'm sure there are other ways. Please share in the comments!

Untitled

Step One: Making a flavored simple syrup


Untitled

This is usually how I get the non-lemon flavor into lemonade. You don't have to do it this way. You can also:
  • Infuse lemonade with flavor by adding fruits or herbs (like mint) to your final product and letting them sit for a long while
  • Pureeing fruit and straining out the flesh and adding it during step 4. (This method works especially well with strawberries).
But since I was using the cores of fruit, I incorporated it into my simple syrup by adding 6 cups of water to a sauce pan, dropping the fruit cores in there, turning the heat to high and letting it come to a boil. Then I dropped the heat to medium-low and let it simmer about 10-ish minutes before turning off the burner and letting it sit.

Step Two: Juice the lemons


Untitled

I personally do it the way my grandma did it, which is by hand. But there are lemon juicers out there that do the job very quickly with no mess. I will say, though, that nothing beats how your hands smell after hand-juicing lemons. Since I had lemons and limes on hand, I used both. In general, you need about 8-10 lemons to make a decent sized, share-able pitcher of lemonade. As you can see I squeezed mine into a separate bowl.

Step Three: Complete your simple syrup

Untitled

Remove the fruit cores from the sauce pan and turn it back on low heat so it stays warm. One at a time, add a cup of sweetener and whisk it in until it completely dissolves. NOTE: If you like less sweet lemonade feel free to use less sweetener than this recipe calls for!

Step Four: Putting it all together

Combine the lemon (and in this case lime) juice with the simple syrup then stir well. Then add that to a large pitcher. Then add the 8 cups of cold water and stir again. Give it a taste. Is it too sweet? Add more water. Is it not sweet enough? Add more sweetener. The tartness should be fine but if it isn't, you can always squeeze another lemon or two and throw the juice in there. I keep it a bit on the sweet side because I know I'll add ice when I serve it and lemonade is a social drink. You sip, you talk, you sip, you talk...I still want my lemonade to be sweet after the ice melts! But that's just me.

Refrigerate about two hours or until cold. Serve over ice. I serve it with bits of the fruit that's in the lemonade (shown are pineapple and mango bits).

Some other ideas:
  • If you want/need protein in this, once it's cold add some unflavored protein to your glass. I would say 1/2 serving for every 8 ounces.
  • My kids like to add soda water to this (actually the put it through their Soda Stream machine)
  • This makes a really great Arnold Palmer with the addition of some home-brewed iced tea (don't mess up the handmade momentum with the instant stuff - it's WORTH the effort!)
Outtake Photos

Untitled
Here's the thing that irks me. I spent good money on a good camera...and sometimes my iPhone simply takes the better photo! 
Sugar-free Tropical Lemonade
Obligatory direct overhead shot. Note to self: not appealing with drinks!
Sugar-free Tropical Lemonade
Doesn't that look downright SLURPABLE??? Yum.

Strawberry Cheesecake Pudding Parfait (featuring Premier Protein)

Strawberry Cheesecake Parfait

Long-time readers...I know what you're going to say, ok? I KNOW. Yes this is the gamillionty-seventh cheesecake-inspired recipe on this blog.

But Google Analytics says 90+% of you reading this have never been to this blog before so...hi. I'm Nikki. And I like cheesecake!

But as we all know cheesecake can be fatty and sugary and all sorts of things that can cause certain gut-death. I won't lie. At 7 years post-op I do enjoy a bite or two of the real thing every now and again. 

And on regular days I have this.

Nik's Strawberry Cheesecake Pudding Parfait
(Makes 5-ish servings)

Ingredients:
  • 1 box sugar-free instant cheesecake flavored pudding mix
  • 1 container (11 oz.) Premier Protein shake (Strawberry or Vanilla works best, in my opinion)
  • 6 oz. container plain Greek yogurt (Note: Do use plain, it cuts the sweetness of the pudding mix and the protein shake combined!)
  • 1 oz. reduced fat cream cheese, softened (it amps up the cheesecake factor…)
  • ¼ tsp. lemon juice
  • About 10 strawberries (or 2 per parfait), hulled and sliced
  • Whipped cream
  • Optional (pictured): sliced almonds
Directions:
  1. Place the instant pudding mix and protein shake in a mixing bowl and mix on medium speed about 2 minutes. (You want to work out any powder lumps.)
  2. Add the Greek yogurt, cream cheese and lemon juice and mix again, until combined. Refrigerate at least two hours.
  3. To assemble: place a few sliced strawberries at the bottom of a cup or bowl. Top with ¼ c. pudding mixture, then a dab of whipped cream. Repeat.
If you like a little crunch, you can use high-protein granola in there too. These days I like to crush a bit of Fiber One and add it as a layer.

I originally published this recipe on ObesityHelp.com and I did something unprecedented. I posted nutrition facts! (Dear folks new to Bariatric Foodie. I do not generally post nutrition facts for my recipes. Here's why.) But I'm going to make you head over there to get that information. It's a great site if you've not been there before...plus I can't be starting habits over here at Bariatric Foodie.

One habit I will keep, though, is posting outtake pics! Here you go:


Strawberry Cheesecake Parfait
There isn't a particular reason I didn't use this one at the top. I just didn't.


Strawberry Cheesecake Parfait
I usually use a slatted bench on my front porch to take photos (my porch is the only place in the ENTIRE house that gets good light!). But every once in a while I mix it up. This is actually my porch floor. I didn't like the pic because the right glass seemed skewed. #PerfectionistProblems

Strawberry Cheesecake Parfait
As I've said many times...direct overhead shots are my "comfort zone." I'm trying to get out of my comfort zone. Plus...it's a parfait. You gotta see the layers!

Premier Protein: Simple Protein for a Complicated Life. (Product Review)


DSC_0397
This review was sponsored by Premier Protein, and I was provided with free product for the purposes of this review. All opinions are my own.


I sorta feel like I'm preaching to the choir about Premier Protein. So many of you already use it! In fact, the sheer number of you who use it prompted me to want to give it another try. I tried the shakes at the very beginning of my post-op life and I liked them well enough, but then I started playing with protein powder and making recipes and...we all know where that went

So here I am again trying Premier Protein. If you all follow me on Facebook or Twitter, you know they sent me a lot of product. Like...a lot. I think it's because they want me to share it with you. I intend to! After the grad school semester from hell ends. Until then all you'll get is procrastination and empty promises and, really, who needs that? 

Anyway, let's get on with the review!


Premier Protein
This review will cover the shakes. They sent me lots of bars as well and I think that may need to be its own blog review! Look for it coming soon. 

So the shakes come in three flavors: Strawberry, Chocolate and Vanilla. The stats on them are pretty much all the same:


Here's some other important information:
  • Premier uses a blend of whey isolate and whey concentrate
  • It also contains sucralose (an artificial sweetener used to in Splenda)
Packaging

Yes, I start from the beginning, Foodies! But I think Premier's packaging is worth talking about. It's very convenient for a few reasons. Firstly, the shakes are shelf-stable so you don't have to keep them in the fridge. For those of you who work in places where you don't have a fridge, that might be very convenient. It also has a sturdy, "twist on/twist off" cap. As I was reviewing these shakes I can't tell you how many times this saved my shirts! 

Taste/Texture/Yadda

Like I said in the title, it's simple protein for a complicated life. One thing I like about Premier Protein is that they keep their flavors clean. Each flavor tasted like what it was supposed to taste like. I was a bit put off by the fact that the strawberry was an off-white but then as I thought about it, that means there's no red dye in it, which is a good thing! But just to give you my initial impression (I actually wrote these phrases down as I tasted these):
  • Chocolate: "Tastes like a Yoohoo." (Do they still make those, by the way?)
  • Strawberry: "Takes me back to elementary school and those little cartons of strawberry milk." (Do they still make those, by the way?)
  • Vanilla: "Must Triple X this...would make an awesome thick vanilla shake!"
Which brings me to my next point. The shakes aren't super thick. (Newbies may disagree.) They pour easily. There are a few bubbles when you pour but nothing too serious. For the pics above I fanned the cups with a piece of paper and the bubbles dispersed. In all reality, most of you will drink this from the carton anyway. I will admit I didn't shake them first. They seemed fine even still.

So...was there an aftertaste? For this one I had to go outside myself. I've been on artificial sweeeteners and protein supplements for so long I don't think I could tell you even if the aftertaste tapped me on the shoulder and introducted itself. I had my oldest daughter (the "Picky One") taste it (I had to pay her to do it - the little extortionist!). She said there is no aftertaste. Then she asked if she could have the rest of it. Ba-da-bing.

Final Verdict

Well you all know me. I like to play with my food.


Here's one way I played with my Premier Protein Shake. Click here to get the recipe. There will be other ways!

Of all the flavors, I'd likely do the chocolate and vanilla most often. I'm not a big fan of strawberry anything, although I didn't mind testing out this flavor at all. I see that they are available all over. Check out this page to locate them near you. So they are convenient, affordable and not a special purchase.

So I think my final verdict would be to give them a try. It's good protein, for a good price, and easily accessible (check out the "Where to Buy" page on their website to find it near you). Especially if you are a person who doesn't need a fancy shake, you just need a good shake, with good flavor, and a good protein count, Premier has got you covered.

#PWYF
Related Posts Plugin for WordPress, Blogger...