Your Quest Bar orders help create more giveaways. Order today!

NEW! Working Search Button! USE IT!!!

Love BF as a blog? You'll love it even more as an e-mail newsletter. Get recipes, tips and more!

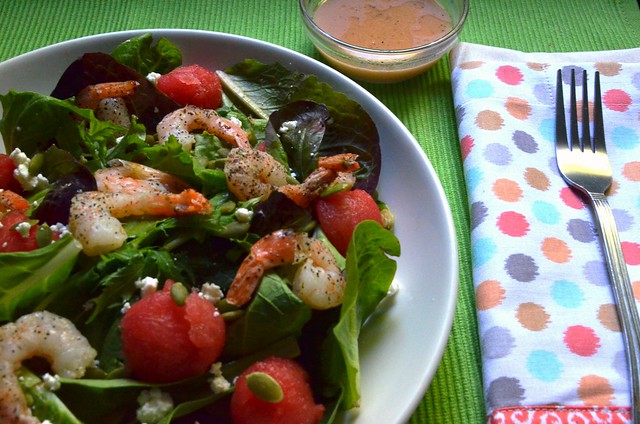
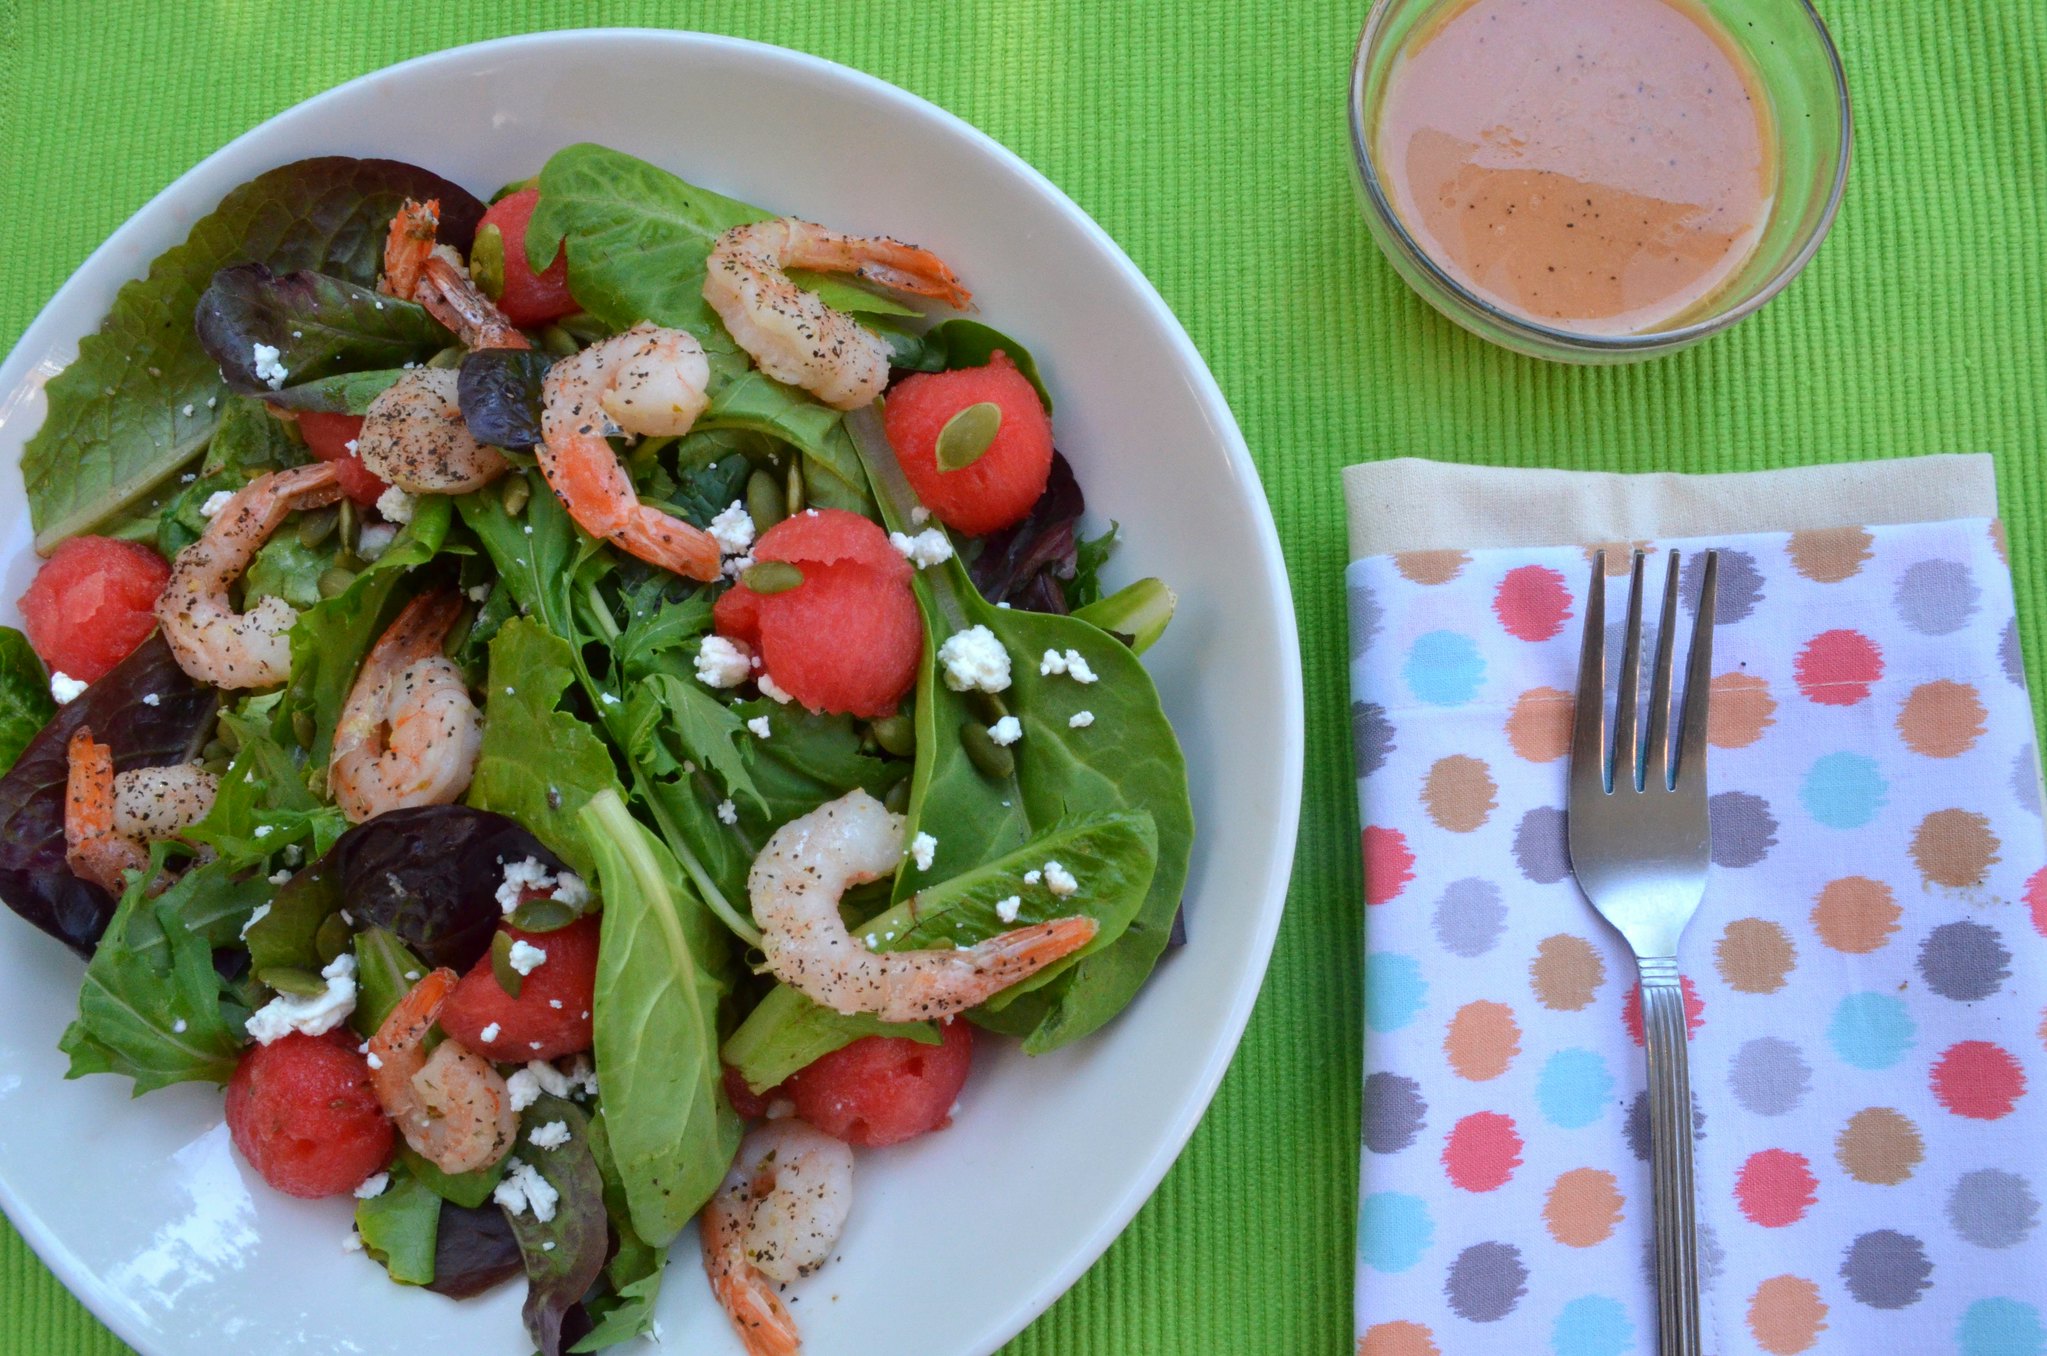
Summer Shrimp Salad with Watermelon Champagne Vinaigrette


Summer Shrimp Salad w/ Watermelon Champagne Vinaigrette 

Ok so let me set the scene of this meal for you.

It’s Wednesday – Hump Day – mid-summer. It’s warm, but not offensively so. There’s a slight breeze that feels really nice against your skin and it’s evening so there’s just enough shade for you to think to yourself, “It would be nice to have dinner outside tonight.”

And maybe you have a spouse or significant other arriving home soon. Or, if not, maybe you have a good friend who doesn’t live that far away and you invite them over. Because this evening feels like the kind of evening for good conversations and relaxation. After all, you’ve only got half the work week to go and you feel kinda good.

Thinking about what you want to prepare, you don’t want anything fussy. It should take maybe 30 minutes to prep. You don’t want anything too heavy – it’s just a tad too warm for that. You want something fresh, light and good. But since this evening feels so breezy you also want something that feels a little fancy. Because…well…you deserve it!

This is the meal you make for that occasion. Ladies. This is a meal to put on a maxi dress to eat!

A word about the dressing. It totally makes the salad. So I tried to limit the amount of fat in other places in the recipe so you could spend it on the dressing. I can't even describe how good it is. And with the watermelon...swoon! It feels fancy because it is fancy - but not fussy!

Nik’s Summer Shrimp Salad with Watermelon Champagne Vinaigrette
(The above picture is either one non-op portion, two post-op portions, or a combination thereof)

Ingredients:

For the salad
  • 10-12 cooked/shelled shrimp in the size of your choosing (I used medium, 24-30 ct.)
  • Garlic powder
  • Salt and Pepper
  • 4 c. salad mix (I used spring mix…just make sure to use something hearty)
  • About 10 chunks/balls of seedless watermelon (I bought a small personal sized one and made the balls with a teaspoon measure)
  • 2 tbsp. crumbled goat cheese (garlic/herb flavor works well here)
  • 2 tbsp. pepitas (roasted and shelled pumpkin seeds – I used unsalted)
For the dressing (makes enough to toss into about 4 servings of salad so don’t freak out!)
  • 3 tbsp. Champagne vinegar (it’s available in most grocery stores)
  • 2 tbsp. extra-virgin olive oil
  • 1 heaping tsp. honey Dijon mustard (or the same amount of regular Dijon mustard with ¼ packet no-calorie sweetener, if you want to skip the honey)
  • 2-3 tbsp. juice from the watermelon (of which there should be plenty)
  • ½ tsp. minced garlic
  • ¼ tsp. black pepper
Directions:

Spray a small skillet generously with non-stick cooking spray and set it over medium heat, allowing it to get hot.

If your shrimp are frozen, run them under some cold water in a colander. If not, then season them with garlic powder, salt and pepper.

Place them in the hot pan and cook about 2-3 minutes, turning once. Set aside and allow them to cool.

Place salad greens in a mixing bowl with watermelon, goat cheese and pepitas. Add half of your dressing and toss salad with tongs.

Distribute evenly between two plates. Top with shrimp and serve.

To Make the Dressing: In a bowl, whisk together vinegar, oil, watermelon juice, garlic and pepper. Refrigerate at least one hour before straining through a sieve into a bowl or dressing bottle.

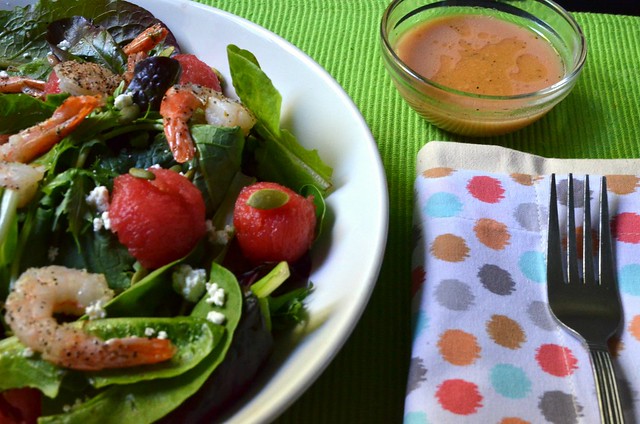
Outtake Photos
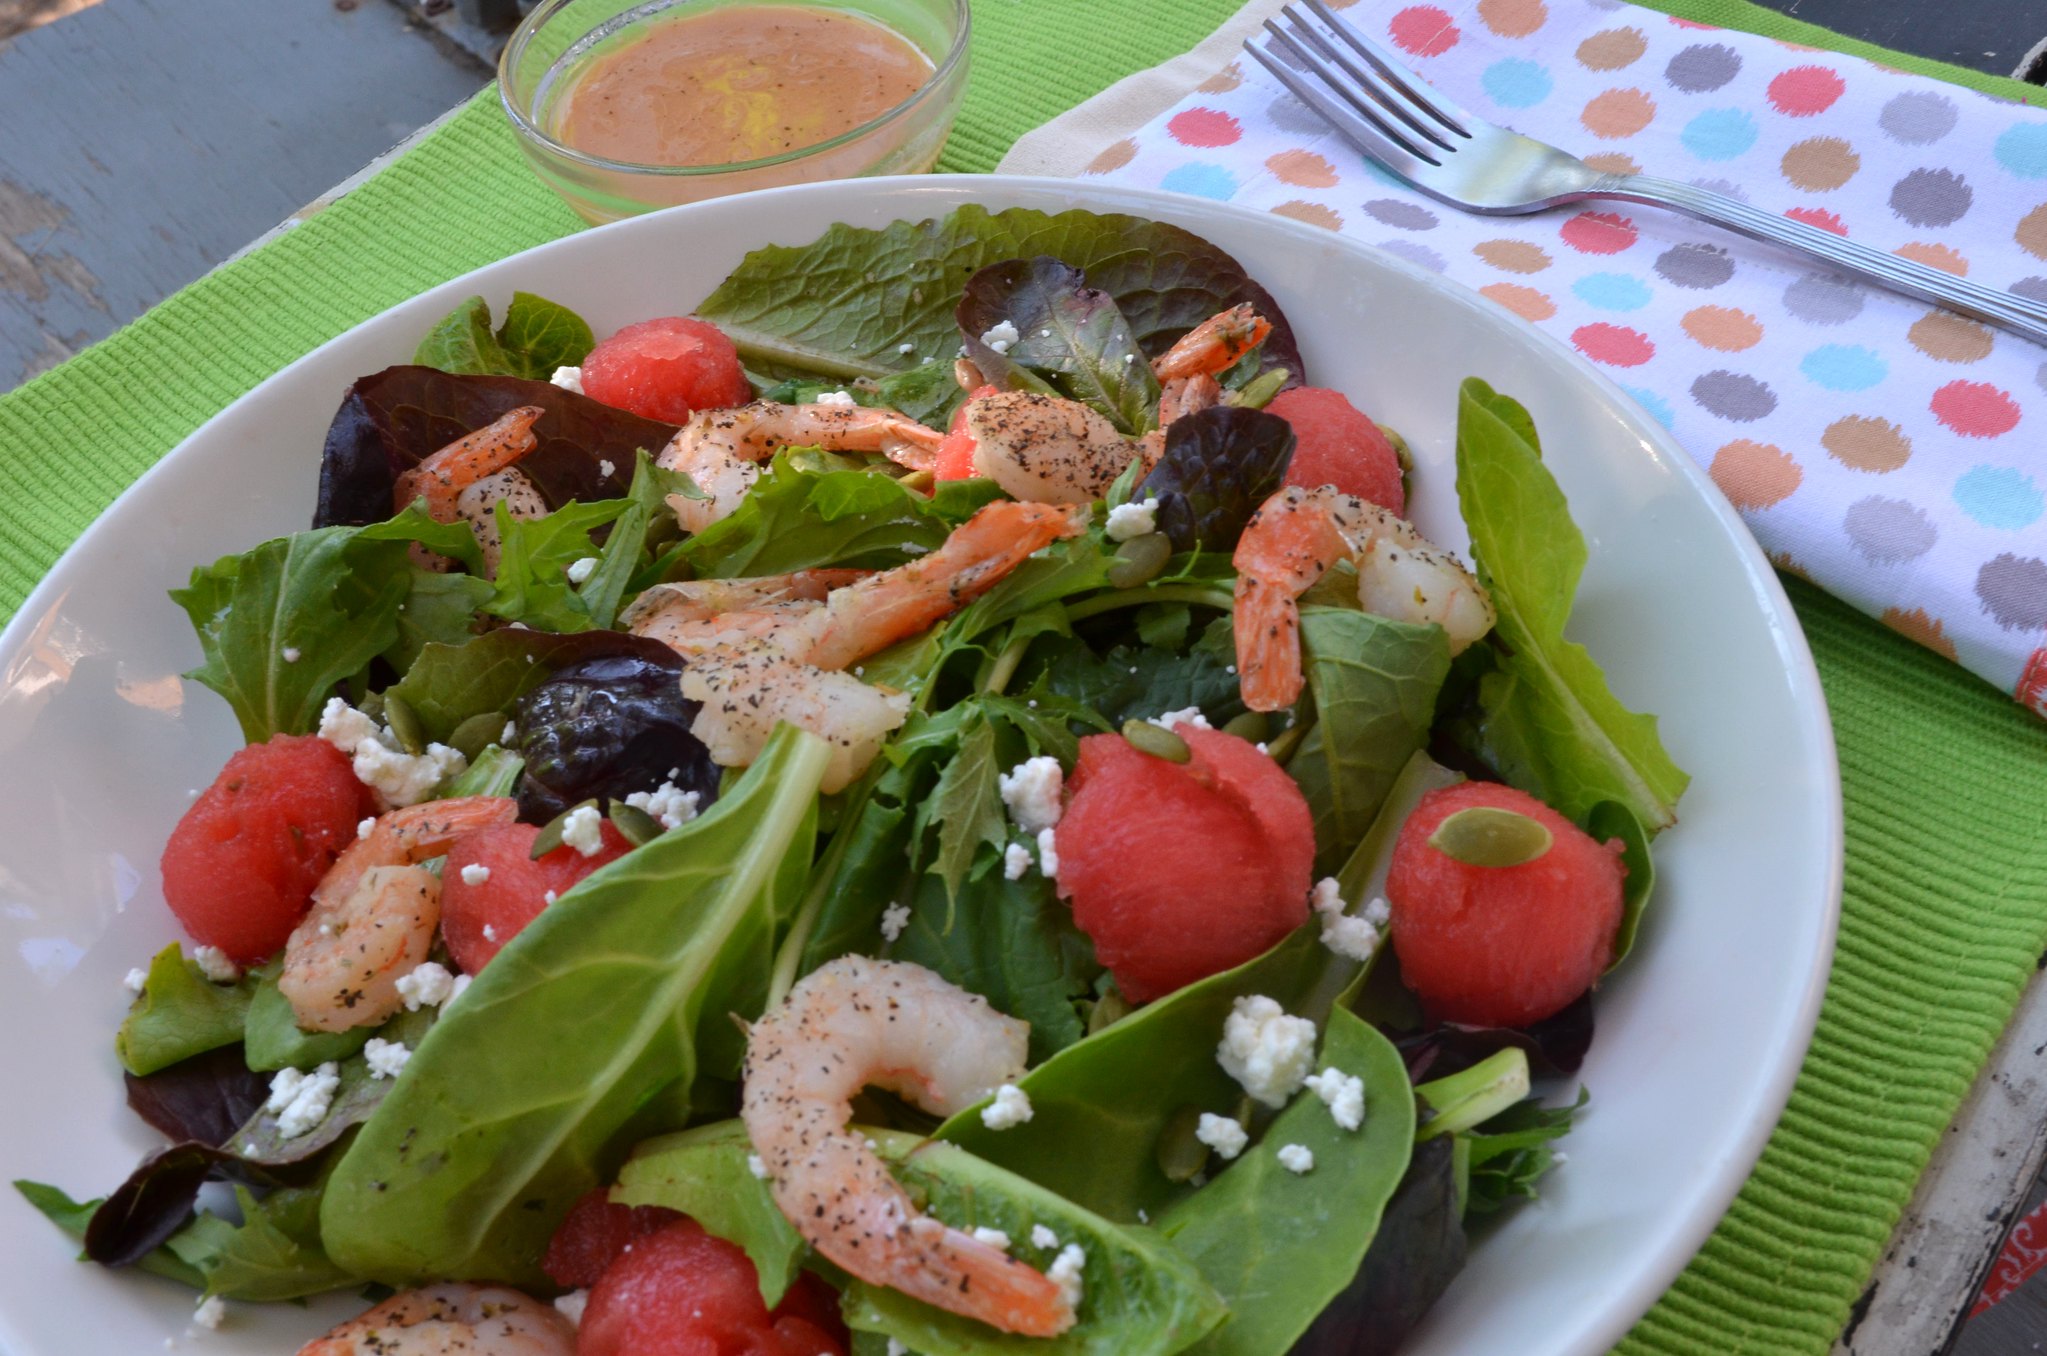

Summer Shrimp Salad w/ Watermelon Champagne Vinaigrette
Not sure you've ever wondered, but I generally photograph on my front porch (I live in a row house which means my house is attached to other houses on either side). My neighbors think I am very strange!
Summer Shrimp Salad w/ Watermelon Champagne Vinaigrette
I was trying to play with the mood on this one, but I think I just ended up making it look like it's about to rain on my salad. Hmph. The struggle continues...
Summer Shrimp Salad w/ Watermelon Champagne Vinaigrette
This was almost the cover photo for this recipe but I wanted you guys to see the whole salad. Oh, fun fact: that super cute "napkin" is actually an apron I got as a souvernir from Haiti. I liked the pattern and I don't have many cloth napkins so I figured I'd just MacGuyver it!

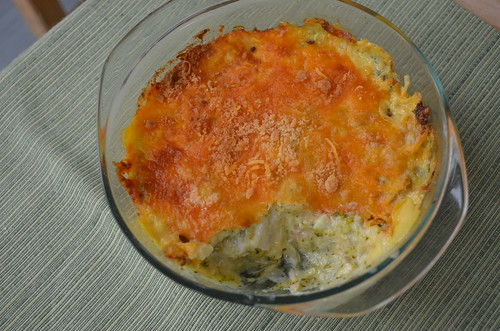
Cheesy Chicken & Brocolli Bake

Cheesy Chicken & Brocolli Bake - The final shot
For reasons unknown (probably climate change or something), Baltimore has been decidedly fall-like this week.

Unlike many of you, however, I consider it blasphemous to consume anything with pumpkin in it outside the months of September through December. So no pumpkin lattes or protein shakes or the like - yet. But I have been using my oven more, which is nice. Comfort food almost always comes from the oven.

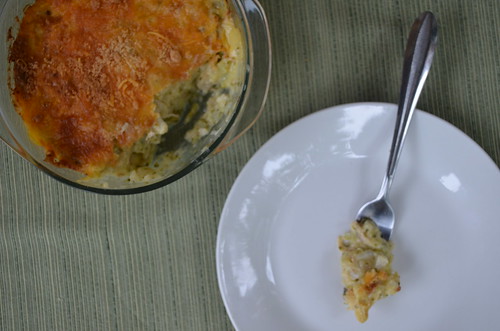
And this easy bake is comfort food at its best. Now I made it from raw veggies (cauliflower, broccoli) but you can easily use frozen for a quick weeknight prep. The amounts listed yield this lovely little casserole dish (notice it isn't much bigger than the salad plate it's sitting next to) full of  yumminess.

Nik's Cheesy Chicken & Brocolli Bake

Ingredients:
  • 8 oz. chicken (I used thighs, use breasts if you like those better)
  • 1/2  a large head cauliflower, cut into florets OR 2 cups frozen cauliflower florets
  • 1 small head of broccoli OR 1 cup frozen broccoli florets
  • 8 oz. can reduced-fat cream of chicken soup
  • 1 cup whatever shredded cheese you like (I used Mexican blend)
  • 1/2 cup grated Parmesan cheese
  • Salt, pepper, onion powder, garlic powder, to taste
  • Optional: 1/2 an onion diced and/or more veggies (I didn't javascript:;use onions because it would have required another pan and I didn't want to dirty one!)
Directions:

Pre-heat your oven to 350 degrees. Season chicken thighs and place them on a baking sheet. Bake until done. Once done, remove the skins and transfer to a rack to drain of excess oil. If you are using chicken breasts, I'd advise the morning before you make this you use my meat marinating method (which makes it so tender that most newbies can even tolerate it) and then proceed to grill the chicken in whatever manner is easiest for you (I use my Foreman Grill).

While the chicken is baking set a small pot of water on to boil. When it is boiling, add both the cauliflower and broccoli florets and cook until fork tender, about 5-7 minutes. Drain.

Now here's where your personal style comes into it. I personally pick the broccoli out and mash the cauliflower in a large bowl then add the broccoli florets back in. If you're looking at this post going "Ain't nobody got time for that!" then it's perfectly fine to mash it all together. The broccoli will not yield willingly though!

Cut your chicken into the appropriate sized pieces and add it to the bowl and mix. Then add your soup and mix again. Transfer all this to your small casserole dish and top with grated cheese, then with Parmesan.

Bake for about 30 minutes or until cheese is as melty and brown as you like it.

This is a really easy, really comforting meal, especially if you're one of those people, like me, whose pursuit of protein almost always leaves you missing out on your veggies! Here's a few more shots I took of this dish. Enjoy!

Cheesy Chicken & Brocolli Bake


Cheesy Chicken & Brocolli Bake

Breakfast Week: Nik's Warm Asparagus Salad


This blog post title is something of a misnomer. I started wanting to remake a warm asparagus salad I had at Cheesecake Factory. Oh it was lovely! It was on their Skinnylicious Menu and had fresh asparagus, pine nuts, basil, Parmesan Cheese and a fried egg on top.  It was a bit heavy on the oil though so I knew I could do better.

But as I was writing this post I thought to myself, "Self? Since you're doing this recipe to highlight the Unbreakfast chapter of The Bariatric Foodie Breakfast Book...technically you've thrown eggs on top of a lot of stuff...so really you should also highlight that!

And so I will.

But first the salad recipe!

Nik's Warm Asparagus Salad (Cheesecake Factory Knock-Off)

Ingredients:
  • 5 or 6 stalks of asparagus of medium thickness (not super thick, not pencil thin)
  • 1 small tomato, cored and sliced into wedges
  • 1/2 tbsp. extra-virgin olive oil
  • 1/4 tsp. Italian seasoning (fresh basil and oregano, finely chopped would be better but I had neither on hand!)
  • 1-2 tbsp. (depending on your caloric limits) shelled sunflower seeds (I'll explain why the switch in a moment)
  • 1 large egg
Directions

Spray a skillet with non-stick cooking spray, set it over medium heat and let it get HOT.

Cut off the woody stems of the asparagus (HINT: Usually grocery stores rubber band them at the cut mark but if not, usually where they are definite green and not any white). Then chop asparagus into bite-sized pieces (whatever that means for you).

Add asparagus to the skillet and stir to cook for about 2 minutes. Add tomato. WARNING: The tomatoes are going to release a good deal of water when they hit the heat. It will evaporate quickly.

Add olive oil and spices and toss it all to coat.  Transfer to a plate and set to the side.

Re-spray your pan and fry an egg the way you like it (as you can see, my preferred way is sunny side up!). As your egg is cooking, sprinkle asparagus and tomato with sunflower seeds. I used sunflower seeds because...um...HELLO? Have you checked out the price of pine nuts lately?!?! I mean I love you guys but $13 for a small bag was a bit steep and these work just fine!

Slide your egg on top of the mixture once it's done and go. To. TOWN!!!

Adding an egg to something is an easy way to make an Unbreakfast, which I define one of two ways in the book. An Unbreakfast is either:
  1. A food that uses traditional breakfast food but could easily work as lunch or dinner. OR...
  2. A food that doesn't use traditional breakfast food but has great nutrition to start your day.
So with that, here are a few other things I've plopped an egg on in the spirit of good eating!

Nik's Turkey TVP Chili...with a fried egg
Veggie hash...with a fried egg
Spinach, red peppers and mushrooms...with a fried egg
Matchstick peppers...with a fried egg
So those are just a few ideas to get you started. I love putting a fried egg on things mostly because the luscious yolk adds a richness to things that I love. Yes, it's added fat but it's added fat with NUTRIENTS which, much as I love it, butter just can't claim!

Nik's Mini Farm-Stand Frittata

This is a close-up but this frittata fits on a SALAD sized plate!

So in case you haven't heard, my third book, The Bariatric Foodie Breakfast Book, was released today in hard copy on Amazon! (My e-book loving Foodies, hold tight! I just got what I hope is the final draft of the Kindle, Nook and iPad versions so I hope to have them for sale this week also.)

To celebrate, we're doing "Breakfast Week" here on the blog where I'm going to share four BONUS recipes corresponding to the four major sections of the book.

First up, eggs!

In the book, I go over some of the challenges post-ops have with eggs. I know some folks have problems with eggs, especially after they've been reheated. For me, they've always been a safe food so I do a lot with them.

But one thing I heard from you guys in the past about my books was that the recipes seemed a little daunting for folks with smaller appetites (I'm not one of you but I do LOVE you!). So in this book I made a real effort to give folks options. For instance, all the scrambles in the book have mini-sized and SUPER mini-sized versions so that you can pick which version works best for you!

TIP: Read the intro pages to each of the recipe sections. There's valuable tips. For instance, in the intro to the section on Egg Casseroles there is guidance on how to make them into mini-quiches using a mini-muffin tin. In the intro to the Egg Scrambles, I show you how to make those individually-portioned meals into a breakfast your entire family can enjoy!

To make this recipe you'll need a 7-ish inch oven-safe skillet. You can click this link to see one but I got mine from K-Mart. :)

Nik's Mini Farm-Stand Frittata

Ingredients:
  • 1/4 of a small yellow onion, cut into slivers
  • 1/2 a small tomato, diced (seeded if the seeds bother you)
  • A handful (or about 1/3 c.) baby spinach
  • 1 clove garlic,  minced
  • 1 large egg, beaten
  • 1/4 tsp. baking powder
  • 1/4 c. shredded cheese of your choice (I used Kraft 2% Mexican-blend cheese)
Directions:

Preheat your oven to 350 degrees.

Spray your skillet down with non-stick cooking spray, set it over medium heat and allow it to get hot.

Add onions and cook about a minute, or until softened. Add tomato, spinach and garlic. Toss and cook about another 2 minutes or until spinach just starts to wilt (NOTE: It should still be a nice, verdant green!). Drop your heat to medium-low.

In a separate bowl, whisk together egg and baking powder (this is one of the rare instances where you can actually use baking soda instead - and usually I do - but sources tell me it can sometimes produce a slightly metallic taste in the finished product. I've never noticed one but just to disclose!).

Pour egg into skillet and swirl skillet so that the egg gets into the nooks and crannies of the veggies and forms a circular shape.  Cook (stirring insides gently with a wooden spoon) until edges begin to set.

Top with cheese and pop the entire thing in the oven. Cook for about 10 minutes or until the center is done (it will puff up slightly) and cheese is browned to your liking.

Remove from oven and place skillet on a cooling rack. If this is too big a portion for you, from here you can cut it. If not, slide that sucker onto a plate and be happy!

If you have leftovers, wrap them well in plastic wrap and stash in the fridge. They do fine on the reheat IF you generally do well with reheated eggs. (If not, tread carefully!)

Here's another variation I did with peppers and onions. Frittatas are so versatile you can make them a million different ways!


Tilapia Verde


I'm literally eating this as I type. I don't routinely upload recipes this quickly after sharing them (read: don't go getting spoiled) but I figured since it's a quiet day and I have the time, why not?

This dish started with me having a random assortment of vegetable-type stuff to use up. A few days ago I sacrificed two zucchinis and an eggplant to my co-worker's compost pile. While I'm glad they will still get good use, that hurt my heart!

Now I feel especially passionate about using up my veggies since I read this statistic in Women's Health Magazine. 

I also needed something quick to prepare. On Tuesdays and Thursdays I go to a 5:45 a.m. weight lifting class which lasts an hour. In order to get the divas to school on time I must leave by 7:20 a.m. So, this morning (having not prepped anything for today) I had to get back from the gym from a class that ends at 6:45, get un-grossified, dressed, make sure they are un-grossified and dressed, and get us all out the door in 35 minutes. Oh...and make lunch. 

So this is to say if I could pull off that feat with a great lunch, I have confidence in the rest of you!

Nik's Tilapia Verde
(Makes numerous servings. For me, two, for you, who knows?)
  • 1/4 c. water
  • 1/2 a small onion, cut into slivers
  • 2 c. spinach
  • 2 tsp. garlic, minced (luckily I don't kiss anyone during my workday!)
  • 1/2 a yellow squash, cut into rounds, then halved
  • 2 - 4 oz. tilapia filets
  • 1 c. salsa verde (mine was homemade...I'd imagine pesto would work well too in this situation to keep the whole "verde" theme although pesto something of a caloric bomb with all the oil...tasty but very caloric!)
  • Salt, pepper to taste
Directions:

Set a nonstick skillet over medium heat and add water. On top of it add all the veggies and garlic. Top with fish and sauce. Cover.

Go get un-grossified and dressed. Return to kitchen and check on it. At this point it should be REALLY watery. Remove the cover and go back upstairs. Do your hair, make-up, yell at your pre-teenager to hurry up, relent to fixing the hair of your teenager ("Because it never comes out right unless you do it, Mom!). Get dog and cat situated then return to the kitchen. (Yes, this is ALL a part of the recipe! Men, you do this too!)

Remove from heat while you get your purse/briefcase/smart technology together. Empty contents of skillet into a plastic container, snap the lid on and get to gittin'! 

SIDE NOTE:

Did I mention La Grande Diva turned 15 on Tuesday? I baked her the cutest cake. I hope you don't find me mean cruel or some other horrible adjective for sharing it with you. It's called an Ombre Coconut Cake (Ombre being a style of dyeing things where you use one color and go from darkest to lightest hues). I got the recipe/method from Food Network Magazine. I posted the pic on their Facebook Page and it's getting lotsa love. It's a HUGE cake. I could only eat a few bites. I'm not a big sweets person. I've not touched it since then. 


So...in summary...I had time to make that fabulously healthy lunch up above AND this beautimous cake (which I made from scratch, by the way). I am Nik, hear me ROAR!

Nik's Stuffed Zucchini

Quinoa & Tilapia Stuffed Zucchini

So I think I should stop calling Meatless Friday, Meatless Friday. It’s sort of misleading. More than once I’ve been told if I eat fish it’s not a true Meatless Friday and, thinking about it, that’s kind of right. I think it’s much more a function of my Catholic grandpa’s conception of “meatless” that I ever came to think of fish as part of Meatless Friday.

All that is to say I’m going to try going forward to only use the term “meatless” for true vegetarian meals and mark my Lent meals as such. Cool? Groovy!

That being said, about 10 p.m. last night I remembered today was a “Lenten Friday” and, as such, I was abstaining from chicken, beef, pork, etc. I eat fish, seafood, veggies, whole grains and dairy on those days.

Now I could have gone out to lunch today. Lord knows there are TONS of meatless (and Lent) options. BUT. I am trying to stick to my budget better so I decided to whip something up. (Yes, at 10 p.m. last night!)

My mind immediately went to this dish I had at a Greek restaurant called Ikaros in North East Baltimore. Baltimore is known for having very rich, cultural neighborhood traditions. This part of Baltimore is informally known as “Greek Town” and there are some great restaurants with excellent food!

The original dish I had was called named (wait for it…) Stuffed Zucchini Squash! (There was a name in Greek which I could probably attempt since Greek is similar to Russian and, fun fact, Nik can READ – not always understand – perfect Russian and the alphabets are similar BUT…I respect my Greek brothers and sisters way too much to try. K? Moving on.) It had ground beef, Greek spices and rice and the zucchini was HUGE. It was a few meals for even me!

In this instance I decided to replicate the spirit of the dish so much as imitate it. Mine isn’t Greek. It doesn’t subscribe to any particular tradition, although if I were pinned down I would probably (and inaccurately) say it’s more French provincial. But enough of my imagination. Let’s get to the dish!

Nik’s Stuffed Zucchini

Ingredients:
  • 1 zucchini (mine was about 7 inches)
  • 1 tsp. extra-virgin olive oil
  • 2 tbsp. chopped red bell pepper
  • 2 tbsp. chopped green pepper
  • 2 tbsp. diced onion
  • 1 tsp. minced garlic
  • Salt, pepper, your favorite spices (I used Herbs de Provence, but you can also use Greek seasoning or any other seasoning you like)
  • 2 tbsp. quinoa (I used red quinoa – tastes the same to me)
  • 2/3 c. water
  • 4 oz. tilapia filet (or other white fish filet of your choice)
Sauce ingredients:
  • 1 tbsp. butter
  • 1 tbsp. soy flour
  • ¾ c. milk (I used skim)
  • 1 tsp. garlic
  • 2 tsp. lemon juice
  • 3 tbsp. goat cheese (or other sharp cheese of your liking)
  • Salt and pepper, to taste 
Directions:

Preheat your oven to 350 degrees.

Cut off stem and base of zucchini, then cut in half length-wise. Use a knife to score a ¼ inch channel down the middle of the zucchini then scoop out the flesh with a spoon. Set on a baking sheet and sprinkle with salt.

Put a dry skillet over medium heat and let it get hot. Add oil.

Add all vegetables and saute for two minutes or until softened. Add garlic and spices, stir and cook an additional minute.

Add quinoa and stir through the vegetable mixture before adding water. Top with fish and cover the skillet.

Cook about 12-15 minutes or until fish is done and white rings have popped out of the quinoa, signaling it is done. You want to cook your quinoa extra tender since it’s going to go in the oven.

Making sure your fish, veggies and quinoa are all mixed together, spoon the filling into the channel of the zucchini, then bake at 350 for about 15 minutes or until zucchini has softened.

Meanwhile, in that same skillet that you made the filling, melt the butter. Add the flour and mix until a dough-like paste forms.

Add the milk and garlic and whisk it into the butter/flour mixture. Bring the mixture to a boil. It will froth and begin to thicken.


Add the lemon juice and goat cheese and any spices and stir until it bubbles, then reduce heat to low, cover and allow to simmer until the zucchini is done.

VERDICT: I loved it! Somehow the dish tasted like there was bacon in it but there was not! It was savory and fragrant and...not a bowl of tuna! (Which is what I was going for. I wanted a lunch that felt like lunch.) I love the stuffed zucchini concept so I'm going to play around with it some more.

If you've made one, share how you stuffed yours!

Nik's Vegetarian "Meat" Sauce


Sorry about the stove...if I'd know you were coming over... ;)

So I thought it’d be nice, after all the flurry of the Pledge, to post about…food. Remember when we used to talk about food? Me too! Let’s start doing that again!

This is a quick one but, as always, there’s a story.

My youngest child has decided to become vegetarian. This is not the first time she’s done this. She’s never much cared for meat, especially meat that looks like meat. It bothers her deeply to think that she’s consuming an animal.

While I’m not vegetarian I respect the fact that she (at 12 years old) came to that decision for herself. But life is not easy for a vegetarian kid living in a meat consuming household. Very often it was hard to find that wonderful place in the middle of the Venn diagram that is my oldest child, a self-proclaimed “meatitarian” and my youngest.

But recently – EUREKA! – I found a ray of hope. Quite to my surprise my oldest likes Boca Burgers. That brings us to last night, when I wanted to make ONE dinner that feels like dinner. The eldest had been wanting spaghetti. While I could have made a veggie spaghetti (and grumbled while the oldest picked out most of the veggies and fed them to our beloved Basset Hound when she thought I wasn’t looking), I decided to try to build upon her like of Boca meat by using Boca crumbles instead of meat.

(NOTE: This isn’t a review for Boca products, but you can look them up for yourself here.)

Here’s the recipe. After I’ll tell you how it was received.

Nik’s Vegetarian Spaghetti & “Meat” Sauce

Ingredients:
  • 1 small onion, diced
  • 1 green pepper, diced
  • 1 clove garlic minced (or one heaping tsp of jarred minced garlic)
  • 12 oz. Boca crumbles (they come in a 12 oz. bag)
  • 1 jar low-sugar spaghetti sauce (I usually get the most basic kind and doctor it up myself, as you’ll see below)
  • 1 tsp. Italian seasoning (or, if you don’t have that but have dried basil, the same amount)
  • ½ tsp. red pepper flakes (less or none if you don’t like spicy stuff)


Optional (and had it just been me and The Younger, I would have used), a variety of colorful diced veggies like zucchini, yellow squash, red peppers, eggplant, really anything!

Directions:

Spray a pan with nonstick cooking spray, set it over medium heat and allow it to get hot.

Add onions and peppers (and any other veggies you’re using) and saute about 2-3 minutes, until they begin to soften.

Add the Boca crumbles and stir into the veggie mixture. Allow it to cook about 3-4 minutes.

Add spaghetti sauce and seasonings and stir. Bring it to a boil, then drop the heat down to medium-low, allowing it to simmer about 10-15 minutes more. The sauce should be a deeper shade of red when finished.

NOTE: This can be made with whatever ground meat substitute you like. I am trying to watch my younger daughter’s soy intake to make sure she doesn’t just eat soy as a meat replacement. I know that’s a concern for some of you as well.

NOW…I served this to them atop whole-wheat thin spaghetti. I always eat just the sauce, chili-style, with tons of grated Parmesan on top.

The Elder? She loved it! Interestingly, I didn’t tell her it was vegetarian. The fact that her sister was eating it should have clued her in but…14 year-olds are sometimes self-absorbed, so what can we do? I’m just glad I have a good fall-back dinner everyone can eat!

Julia's Thai Shrimp Skillet


Before we get to this yumminess, THANK YOU to everyone who pledged a goal for week one of the Bariatric Foodie Pledge! You can find the official week one pledge list (in alphabetical order) here. Remember that you must check-in on your goal at the end of the week to be eligible for this week’s prize, sponsored by Chike Nutrition. Week one check-ins open at 12 p.m. EST Saturday, February 8 and end 12 p.m. EST, Sunday February 9 (which is also when week two pledging begins).

If you’re going, “What the heck is a Bariatric Foodie Pledge?” click here.

Now…onto the yumminess. Chike Nutrition is, first and foremost, a maker of yummy protein powders. I’ve tried many and liked them (look out tomorrow for a comprehensive list of my favorites).


Recently, they came out with a new product: Chike PB. It’s peanut flour. What’s that? Well when a peanut is pressed for oil it leaves behind a powder, which contains most of the protein of the peanut and just a little bit of the fat. That’s peanut powder (also called peanut flour). It has about 85% less calories than peanut butter. Amazingly, Chike’s offering preserves 85% of the protein of a serving of peanut butter. Here’s how that shakes out.

Regular peanut butter (2 tbsp): 200 calories, 17g fat, 7g protein
Chike PB (2 tbsp): 45 calories, 1.5g fat, 6g protein

And when you mix it into things like protein shakes, protein oatmeal and desserts, it tastes like peanut butter! Sweet, right?

Anyhoo, I gave a Chike PB sample to a few fellow Foodies and asked them to think of interesting and new ways to use it. This comes by way of Julia, one of the finalists for the grand prize from last year’s Pledge, might I add!   

Julia’s Thai Shrimp Skillet

Ingredients:

Shrimp (or protein of choice)
  • 1 lb. shrimp, cooked (25 ct. size or so) OR a pound of your favorite protein, cut into pieces and cooked
  • Juice from one lime
  • Zest from one lime
  • 2 tbsp. fish sauce (if there’s an Asian section in your grocery store, check there. If not, you can omit)
  • 2 tbsp. peanut oil
  • 2 tsp. grated fresh ginger
  • 2-3 cloves of garlic, crushed 

Peanut Sauce
  • 6 oz. coconut milk
  • 5 tbsp. Chike PB powder
  • 1 tbsp lime Ponzu (again, check the international food aisle OR you can use soy sauce mixed with a squirt of lime juice)
  • 1 tbsp. fish sauce
  • 2 tbsp. Thai garlic chili sauce (this also tends to be in the international food aisle although it may be with other marinades – if you like spicy food, use the same amount of sriracha)
  • 2 tsp. grated fresh ginger
  • 2-3 cloves garlic, crushed 

The Veggies
  • ½ a sweet red pepper, cut in strips
  • ½ an orange sweet pepper, cut in strips
  • 1 medium onion, cut in strips
  • ½ a sweet potato, diced
  • 1/3 of an eggplant, diced
  • ½ - ¾ c. grape tomatoes, halved

Topping: fresh cilantro & roasted peanuts.

Directions:

Combine the marinade ingredients in a zip-top storage bag and add your protein. Marinate at least 30 minutes.

Place a skillet over medium-high heat and allow it to get hot, add peanut oil and sweet potato (add potato immediately as peanut oil begins to smoke very quickly). Stir about 3-4 minutes or until it starts to become tender then add the remaining vegetables and stir, sauteeing until the vegetables are as soft as you want them to be.

While your veggies are cooking, combine peanut sauce ingredients in a bowl and whisk (Julia used her Magic Bullet Blender). Make sure all peanut powder is incorporated and you don’t see any dry powder!

Drain your protein from the marinade liquid and add to the pan, along with the peanut sauce and stir until warmed through.

Serve warm with cilantro and peanut garnish!

"Why are you telling me all this, Nik? You're giving away the protein, not the PB!"

Good question! All will be revealed...TOMORROW! Bwahahahaha! (I've been dying to do an evil laugh. Indulge me, ok?)

Seriously. Check back to the blog tomorrow and you'll find out WHY I'm telling you about Chike PB. Because there's always a method to my madness.


Thanksgiving Covert Cooking: Nik's Sweet Veggie Pie


Forgive the crust. It was a quick job!

When you all get your copies of the “Bariatric Foodie Holiday Survival Guide” you’ll read all about a concept I call “covert cooking. (Side note: For folks who snagged one of the now sold-out Survival Kits, your copy of the book is coming with your kit! Otherwise, I know the rest of you are planning on ordering it from Amazon, right???)

Long story short, covert cooking is taking a dish your family loves and making it healthier but doing so in a way where it looks, smells, tastes and feels like the original. And then not telling your family (at least not when they are eating it) that it’s healthier. I go into the topic in more length in the book (as well as why you have to be REALLY careful how you change holiday recipes!) But the bottom line is this: to successfully covert cooke, you have to make smart (and believable) swaps.

This pie is an example of covert cooking, although an accidental one. What I mean by accidental is that I didn’t go into this with the intention of withholding any information from my children. They know me. They know a pie is never just a pie.

The accidental part came in because they got to the pie before we had any conversation about it. They tasted it and decided maybe, for once, I just let a pie be a pie and made pumpkin pie (my kids have such discerning pallets that they can quickly and easily tell a pumpkin pie from a sweet potato pie from sight alone).

Little did they know, the pie was not made out of pumpkins but out of these:

Check out my Basset Hound, Benji, trying to photo bomb!!!

“What the HELL is that, Nik?”

I’m glad you asked. I have a friend. Her name is Margaret and she runs a blog called "Feed My Sleeve." Margaret is everything I want to be someday because she produces a lot of the food she and her hubby eat on her very own property! This year she had a bumper crop of round zucchini and earlier this summer she gave me some. One cool day I decided to roast them and noticed the insides of the larger ones were similar to butternut squash in color, texture and flavor. So when she gave me another boatload of them recently I decided to see if I could pass the flesh from the zucchini off as pie.

The above picture is the result.

For those of you who don’t happen to have access to a round zucchini, the same could be done with the yield of butternut or acorn squash. Just make sure it’s orange! Here’s the rest of the recipe, including an option to make a protein pie (although this one is not).

Nik’s Sweet Veggie Pie

Ingredients:
  • 15 oz. of some sort of orange veggie (Veggies in the gourd family work best: butternut squash, acorn squash, etc.), cooked soft and pureed
  • 1 c. no-calorie sweetener of your choice (I used Splenda)
  • 1 tsp. vanilla extract
  • A “splick” (about 1/16 tsp.) salt
  • 1 heaping tsp. pumpkin pie spice
  • 1 egg
  • OPTIONAL: 2 scoops (doesn’t matter the size) vanilla or unflavored protein powder
  • 12 oz. fat-free evaporated milk
  • 9-inch pie crust of your choice (Or you can go crustless. Since I made this mostly for the kids, I just got a storebought crust. If you choose a no-crust option be sure to spray your pie plate down well with nonstick cooking spray!) 

Directions:

Pre-heat your oven to 350. Make sure to pre-heat it for a while so that it is HOT when you are ready to put your pie in.

If you’re using a prepared pie crust, place it in your pie plate and pre-bake the pie crust for about 7 minutes. Remove to cool and set aside.

In a mixing bowl, combine pureed veggie, vanilla, salt and pie spice (and if you are using protein, add it at this stage) and mix well. (Tip: I usually use a hand mixer on low speed.)

Add egg and mix again until fully incorporated. Finally, add condensed milk and mix thoroughly. Mixture will look soupy.

Pour mixture into pie shell and place pie plate on a baking sheet and into the center rack of your oven.

Bake for 55-60 minutes or until fully set. Transfer to a cooling rack and allow it to cool one hour before cutting.

The verdict? The kids liked it!  I still haven’t told them it's squash. My youngest would not mind. My oldest would feel a DEEP sense of betrayal (she’s the proverbial “picky one”). I think I’ll keep it to myself. But this recipe is definitely a keeper for Thanksgiving. I’m going to make one (and probably use acorn squash unless Margaret’s zucchini plant yields anything else), put it on the table and walk away very fast!


BF Brunch for Two: Nik's Farmers Market Scramble


I say brunch for two because this will feed a non-op and a post-op. So if your spouse (or bf/gf/bff or whatever other relational acronym you'd like to eat with) loves veggies and you can tolerate veggies and eggs, this is a winner for a lazy Sunday morning.

You can, of course, sub in any veggies you like or find you tolerate well. Here's what's in mine!

Nik's Farmer's Market Scramble
  • 1/2 of a large onion (of your choice) either diced or in thin slivers
  • 1/2 a green pepper, diced
  • 1/2 a red pepper, diced
  • 1/4 of a small zucchini, diced small
  • 1/4 of a small yellow squash, diced small
  • 1 clove garlic, minced
  • 1/4 tsp. Italian seasoning
  • 2 large eggs + 2 large egg whites, beaten (or 1/2 c. Egg Beaters)
  • 2 oz. your favorite cheese
  • 1 large tomato (of your choice), cut into wedges, then halved
  • Salt and pepper, to taste

Directions:

Set a pan sprayed with non-stick cooking spray over medium heat. Add all veggies, Italian spice and garlic and sautee until lightly browned and soft.

Add eggs into the crevices of the veggies and then gently turn them so that the veggies get mixed in.

Once eggs are done, turn off heat and sprinkle cheese over the top, mix in if you'd like.

Add fresh tomatoes last (they taste great fresh so don't cook them!). Also if one of you likes tomatoes and one does not, this is an easy way to have them without forcing them on someone else!

Season to taste.

This was a perfect breakfast for me this morning. For your #2, you might serve some whole wheat toast or if the person has a hearty appetite, some French toast even. YUM! Easy, quick, delicious brunch for you and #2.

What's that you ask? Who is MY #2? Oh I'll never tell...


Spicy Mustard Greens and Sausage


Have you liked Bariatric Foodie on Facebook yet? If you had, you would have seen that I posted about trying this new recipe yesterday!

This adventure all started at the farmer's market. It's a place of inspiration! Do you go? 

Anyway, I try to commit to trying new things when I see them and this day I saw a bag of spicy mustard greens. I like spicy stuff so I decided to give it a whirl. Now...I have experience with collard greens and kale but not mustard greens. So my first step was to taste one: raw and straight up.

It lives up to its name. It is spicy and tastes like mustard. And that's all I have to say about that.

From there, I went about finding a recipe I could use to cook it. This recipe seemed to fit the bill and it is what I used! 

Verdict: YUMMY! The Cajun flavor came through and man! My body must have been missing green, leafy veggies because my pouch actually sighed in happiness. Word to the wise: if you try any variation of this recipe, add the tomatoes dead last. The freshness and firmness of the tomato will play nicely against the salty/spice of the sausage. The recipe called for cherry tomatoes but I had romas so that's what I used. When they are in season, though, I'd even advocate for heirlooms for a bit of sweetness.

Some ideas on making this dish a bit more WLS-friendly:
  • While the Andouille sausage was wonderful, I could totally see this going with some low-fat turkey smoked sausage and being fine, especially since you have to add Cajun spices
  • If you've never worked with kale or mustard greens before, remove the big stem. It is not pouch-friendly.
  • If you aren't yet cleared for such a hearty green, I think baby spinach would work well, it's just tricky to make it "al dente" if you will. Spinach gets mushy fast. But luckily it also absorbs flavor really fast so I don't think the preparation would change so much as you just would not simmer quite as long. 
  • Not related to health but a random thought: I should have known this but leafy greens of any kind produce a LOT of liquid, especially when you add salt (which draws the liquid out of foods). Although the instructions don't say to do this, unless you want soup, take the lid off the pot the last 10 minutes or so.
I did not feed this to the divas. They were in the mood for Zatarain's jambalaya (if you ever are...here is a much more "us-friendly" recipe) and as I have said many times, rice and I don't get down like that. But it was a quick and easy dinner for them and this was a quick and easy dinner for me and we all managed to have Cajun food together. Winning, right?

Cheesy Chicken, Broccoli & "Rice" Casserole


Ok, so let’s talk about condolence food.
You know what I’m talking about. Someone passes away and family, friends, people you hardly even know start bringing you food. Yummy food. Comforting food. Carby food.

For my part, I have sort of been picking at the condolence food, much to the chagrin of La Petite Diva who has appointed herself my grief counselor. It is her mission to ensure I get three squares a day and I was NOT doing that for a minute. (After employing some good old fashioned Chinese water torture she has reformed me.)

But all that is to say this dish is what I call a “recovery” dish. I needed some vegetables in my life. BAD! The children did too. Although La Grande Diva nearly fainted away of sheer joy upon receipt of a gamillion piece box of fried chicken from Super Wal-Mart (who even knew they SOLD fried chicken???)

To get us all headed back down the right eating path, I fixed this casserole. Interestingly it passes both girls veggie radars. Ordinarily the older girl loves broccoli and the younger hates it BUT I recently learned that there is an exception to that clause. We’ll call it the “cheese clause” and we’ll say it states “With liberal exceptions a small fraction of ordinarily unacceptable vegetables will be considered and perhaps even ingested with the addition of cheese.”

Broccoli falls under this clause. Hallelujah!

Nik’s Cheesy Chicken, Broccoli & “Rice” Casserole

Ingredients:
2 large chicken breasts, grilled and chopped into small pieces
1 small onion, finely diced
3 cups of cauliflower rice
1 package of frozen broccoli pieces (not florets…pieces…there is a difference)
1 can (10 oz.) of lowfat cheddar cheese soup
½ c. milk
1 c. each shredded sharp and mild cheddar cheeses
Salt, pepper, onion powder, garlic powder and any other spices you like

Directions:
  1. Fistly, if you don’t already, check out my no fail tender chicken marinating technique (included in this post) before preparing your chicken breasts.
  2. Preheat your oven to 350 degrees.
  3. Boil your broccoli until it is the desired consistency then drain.
  4. Sautee your onion in a pan with nonstick and add any desired spices
  5. In a large bowl, combine chicken, onion, cauliflower rice and cooked broccoli pieces. Add soup, milk and half of each kind of cheese and mix well.
  6. Transfer to a casserole dish and top with remaining cheese.
  7. Bake for 30 minutes or until cheese is melty.

If you are not cleared for cruciferous veggies like broccoli and cauliflower yet (or worried that these might upset your system...or just don't like broccoli and cauliflower) zucchini works great in place of broccoli and spaghetti squash in place of the cauliflower. It is still yummy and so comforting you won’t miss the carbs!

Nik's Mango Salsa


Last Sunday morning I awakened with the desire to make mango salsa. Don't ask me why. I don't know. Perhaps it was the four ever ripening mangoes I had sitting in my fruit basket that needed using NOW.

Anyway, this is a ridiculously simple yet yummy salsa recipe that can be used alongside a good tortilla chip for the kids (or you if that's your thing), on top of chicken or, as I like to do, just on a spoon. And the beauty of it is the longer it sits in the fridge, the better it gets!

Nik's Mango Salsa

Ingredients

3-4 mangos, cut into small chunks
About 4 cups of diced tomatoes (I used tomatoes on the vine)
1 small vidalia onion, roughly diced
2-3 jalapeno peppers, chopped (seeds removed if you don't like the heat)
About 1/4 c. chopped cilandro
1 tbsp lime juice
2 tsp minced garlic
1/2 tsp salt
Juice of half an orange
Optional: 3 packets no-calorie sweetener

Directions:


Combine your tomatoes, mango, jalapeno and onion and mix well. For those of you who've never worked with a mango before, I just want to give you a quick tutorial. You basically peel it like you would an apple. Directly underneath the skin there is a green part. You want to cut through that until you get to the orangey-pink flesh. Like so:


Mangoes have pits in the middle, so you have to cut around the pit to get the flesh off, but they are notoriously slippery. I usually cut them lying on their side with a very small knife. BONUS TIP: for mangoes and any other friuts and veggies, the sticker can tell you quite a bit. Look here:


You'll see the first number on the sticker is a "4." That means this mango is organically grown (no chemical pesticides, etc. Numbers starting in a 5 are the same. A number starting with a 3 is not organic.). Just thought I'd share that! Ok...moving on to the rest of the directions...

Add garlic, chopped cilantro, lime and orange juices and mix again.

Add the salt and taste. If it's sweet enough for you, stop there. I personally like the sweetness to match the saltiness, so I use some sweetener. If you feel the same way, add it at this point.

Stir it all up and put it in a bowl with a cover and refrigerate one hour before serving.

YUM!

Nik's Snappy Spinach & Bacon Dip

~by Nikki


This year I actually made time to attend my support group's annual Christmas party (not to be confused with the Bariatric Reunion that just occurred a few weeks ago). We'd all been invited to bring a WLS-friendly goodie to share. I offered to bring two. Damn over-achiever in me! (I'll post the other side dish another day)

Spinach dip isn't new (although I did take some inspiration from Jen's Spinach & Bacon Pie for my flavoring). But I always saw room for improvement in this thing. And not just adding Greek yogurt instead of sour cream. There's room to really amp this thing up! So I played with it and played with it and here's what I came up with!

Nik's Snappy Spinach & Bacon Dip

Ingredients:

Large acorn squash or pumpkin, hollowed (for serving...hey...it's better than a bread bowl)
8 oz. 1/3 less fat cream cheese (Neufchatel cheese)
1 c. unflavored Greek yogurt
1 pkg. dry ranch dip
2 scoops Any Whey unflavored protein powder
6 slices pre-cooked bacon
1 can of spinach (or package frozen spinach, thawed)
Salt and Pepper to taste
Optional: I add a few extra shakes of garlic powder...just cuz I like garlic. Your choice though)

Directions:

In a bowl, cream together cream cheese, Greek yogurt, dry ranch mix and protein powder.

Check out my Old Skool Sunbeam mixer...I heart this thing and am keeping it forever!!!
Strain thawed spinach using a colander and heavy duty paper towels. Add to the cheese mixture, along with bacon pieces. Mix very well. In the interest of the new post-ops I'd probably be interacting with, I sorta obliterated mine.


Hollow out your gourd (this is a good thing to do the day before). Scoop out the innards and then sprinkle the insides with salt. Place on a rack and let it drain into a bowl overnight. The next day you'll have an ocean of water and a relatively dry gourd. Remember to wipe out the excess salt!

Once you've done all that and your dip is ready, spoon  the mixture into your pumpkin or gourd and refrigerate for an hour or so before serving.


Now here is the one and ONLY Martha Stewart-esque tip I know. See how the outer skin of the squash (in this case an acorn squash) is sort of matte looking? Well glossing it up is easy! Just give your squash a mayo bath!


Just take a paper towel and put some mayo on it and rub down the outside of your gourd...


And then it comes out all shiny and purdy like so:


For the 99.9% of you that have more common sense than me...yes you can do this before putting the dip into the gourd!

Now folks always ask me what I use as dippers for these things. Well, I am a carrot fanatic, so that's my usual choice. I also put out whole-wheat crackers for my support group peeps (cuz we ain't afraid of no [complex] carbs!). But you can also set out other veggie crudites (some favorites: red bell pepper strips, celery, cauliflower, raw broccoli).

This dip was a hit at the party! I only have a little bit of it left. It was a great time with some really good food. If I can convince my support group peeps to do it, I'd like to share the recipe to some of their party favorites that they brought. Stay tuned.


This is my GORGEOUS friend Quiana (who...I believe...is 6 years post-op RNY) partaking of the spinach dip. 

BF Reader Request: Protein Latkes

~~posted by Jen


Nik and I always like to say "ask us anything!" and we'll figure out a way to make a food you love more WLS-friendly. This is no exception! Our friend Amy S asked me a couple weeks back for a healthier version of potato latkes she could make for her family on Hannukah. Even though this is technically Leftovers Week, today is the first day of Hannukah, so I wanted to publish this today in time for the holiday meals.

I've been working them out for a few weeks now, and finally have it figured out! These will never be a "figure-friendly" dish, but as part of tradition, should absolutely be enjoyed in moderation. My ex-husband and his family are of Irish-German descent, so I know a bit about working with potatoes.

I'm currently dating a Russian who also happens to be Jewish, so now I am getting up close and personal with the latke of it all! (Just a little backstory for those of you who were wondering what the hell a southern girl from Georgia knows about a latke.) S'anyway! Since today is the first day of Hannukah, this is our little "gift" to you, Amy!

I didn't have to venture too far outside my usual method for making these, but I did make a couple of tweaks. Now for the purists in the crowd, I am WAY too lazy to peel and shred all those potatoes by hand. If that offends you, I am sorry. But as long as the good folks at "Simply Potatoes" keep making them already shredded and drained in that purdy little green package, then that is how I'll be doing it.

If you wanna be old school and peel and shred, then by all means do so! Bear in mind, my flavors may not be what your family likes, these are how MY family enjoys them. (They prefer less salt, so I use lots of herbs to give the latkes more flavor.)

So play with your food, make it your own! Here's how I made them:

Jen's Protein Potato Latkes

Ingredients:
3 (1 lb 4 oz) packages Simply Potatoes shredded hashbrowns (in the refrigerated section)
4 scoops Any Whey Unflavored Protein Powder
5 jumbo eggs
6 tbsp parsley flakes
2 tbsp dill
3 tbsp onion powder
2 tbsp garlic powder
1 tbsp salt
1 teaspoon pepper
1 cup Wondra Flour for gravy (comes in a blue can, right by the regular flour) (you could use whole wheat flour, but I like this best)
Vegetable or Canola oil for frying

Directions:
In a small bowl, beat together the eggs and seasonings. Meanwhile, in a large mixing bowl add the protein powder to the potatoes and mix until completely incorporated. (Ignore the vanilla cupcake aroma of the protein, it does not have a smell or taste when you cook it, I SWEAR!!)

You might notice that the protein draws some more liquid out of the potatoes, but this is ok. Once you add the flour and eggs it will be the perfect consistency. Pour the egg mixture into the potato mixture and stir well until thoroughly combined. Sprinkle in the flour and mix it in. (I usually use my hands for this part, you don't want to overwork the flour and develop the gluten.)

Spray your hands with cooking spray to prevent the latkes from sticking to your hands as you pat them out. I usually make them up and put them on wax paper, since this recipe makes so many at the time. They're better cooked fresh, so I just cook what will be eaten for each meal then stash the rest in the fridge or freezer. They keep in the fridge for up to 4 days in an air tight bag, layered in wax paper.

Preheat the oil in a non-stick skillet, once it starts to ripple, add your latkes in batches of 4 or 5 at the time. Fry for about 2 or 3 minutes per side, until golden brown and crispy. Remove to a platter layered with paper towels to drain. Serve immediately.
The protein powder doesn't affect the taste or texture AT ALL 
Related Posts Plugin for WordPress, Blogger...