Your Quest Bar orders help create more giveaways. Order today!

NEW! Working Search Button! USE IT!!!

Love BF as a blog? You'll love it even more as an e-mail newsletter. Get recipes, tips and more!

Panera Knock-Off: Nik's "Something Chicken Stew"


"This looks fancy..."

That was my youngest daughter's reaction when she looked at the contents of the slightly modified bowl I presented her this past weekend. (I'll tell you why the modification in a sec.)

Now to her, "fancy" is a good adjective. With the elder girl, not so much. I was quite pleased how this recipe turned out, mostly because it was just so darn easy!

Backstory (because you know there always is one!). A few months back I went to Panera Bread and had their Spanish Chicken Stew. Oh. My. WORD! (As Pam would say.) That stuff is delicious! It's a combination of chicken, herbs, spices, vegetable, broth and there is some brown rice on the bottom. What made it unique and delightful for me was the sprinkling of sliced almonds on top. It did feel fancy!

Fast forward to this past weekend, when I wasn't feeling that great and didn't feel like standing over a stove to cook. I hadn't tried out my new Ninja Kitchen cooking system (it's like a crockpot plus four other things I've not figured out yet), and I had some almonds left over from another recipe I'd captured earlier in the week, so I decided to experiment. 

Now if you've been following the blog for a while you know I am not a big fan of looking at other people's recipes before creating my own. I mean...where's the fun in that? Rather I like throwing stuff together and seeing how it comes out. Risky? Yes. But good!

I call this "Something Chicken Stew" because I'm not sure it's particularly Spanish, per se. It's something. And that something would be good. And easy. And good!

Nik's "Something Chicken Stew" (Panera Knock-Off)

Ingredients:

  • 2 large pre-marinated chicken breasts (I get them in my local meat or frozen section. These are breasts that have already been marinated for you - big time saver! I got Garlic & Herb.)
  • 6 c. of any assortment of veggies you like, chopped. I used:
    • Tomatoes
    • Asparagus
    • Red Peppers
    • Zucchini
    • Onions
  • 1 tsp. additional chopped garlic
  • 1 tsp. Mediterranean seasoning (I used Lawry's Mediterranean seasoning salt)
  • 1 tsp lemon juice
  • 4 c. water
  • 1-2 tbsp. tomato paste (depending on how thick you want your broth)
  • 2 c. cooked quinoa or 1 box of couscous (I used the latter in Parmesan flavor. If you've never cooked quinoa before, here's my super-easy tutorial!)
  • Sliced almonds, to finish
Directions:

Put everything exept tomato paste in the crockpot and set it on low for about 4 hours. Then go do something fun (yes, this is a legit part of the recipe).

By the time you come back your chicken should be cooked through. With a pair of tongs, move it to a cutting board and dice it into pieces of your desired size. Put the chicken back into the crockpot. 

Taste the broth and adjust the seasonings as you see fit (I added a dash of oregano at this point but otherwise the seasoning was spot on). Stir the tomato paste into the hot liquid until incorporated. Let that go about another 30-40 minutes.

Meanwhile, cook your quinoa or couscous. Now at this point I'll say a word on this. It's up to you what grain you use in this recipe, if at all. Here are a few options, if couscous is not your thing.
My point here is you have choices. Play with your food!

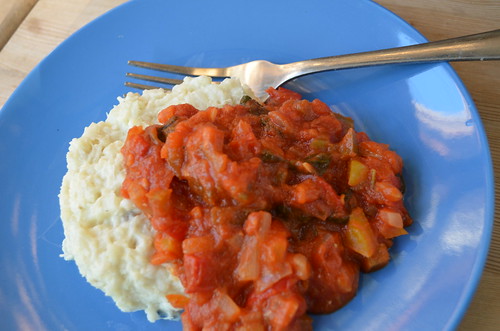
To serve: place a small amount of couscous/quinoa/rice/whatever in a bowl. Ladle some stew on top of it (for your portion, you get to choose how much broth, as I know some folks worry about taking in liquids and solids together). Top with sliced almonds and enjoy!

After these pictures were taken I got the inspiration to add sliced olives, which just made this all the more delicious. Now I modified this for my younger daughter because she eats a pescetarian diet (she eats seafood but no other type of animal protein), so I made another little pot of this stew with just the veggies and broth. Still wonderful and yummy!

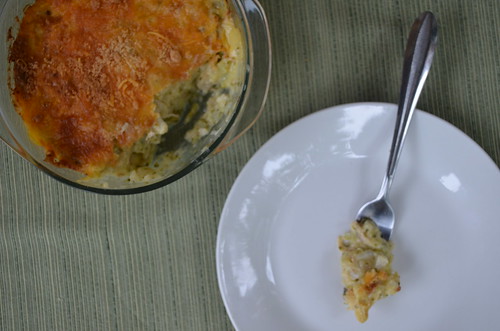
Here are the outtake pictures of this dish. 


Don't ask me why, when given a choice, I always go with the direct overhead shot. I just always seem to like it better. But this is a good one too!
I just didn't feel like this captured the full essence of this dish. Not a bad picture though. Please note I have two places I can take pictures with sufficient light: on top of my microwave oven (which is where the photo directly above this one was taken) and on a bench on my front porch (and yes, my neighbors do think I'm crazy, thanks for asking). 

Let's have dinner together for Cinco de Mayo!


I've been wanting to do this for a long time. Let's see if we can manage it.

Tomorrow is Cinco de Mayo. It's also my late grandfather's birthday. So I'm feeling festive! I already posted a delicious protein drink you can enjoy in the spirit of the day, but I thought it might be fun to have dinner together too! How? Easy.

Step One: If you haven't already check out my Taco Casserole recipe. It's the most popular recipe on Bariatric Foodie. Here's the recipe.  

Step Two: Make Taco Casserole! This recipe uses ingredients you can find in any grocery store. The best part? It's easy to modify it and make it your own!

Step Three: Post about making Taco Casserole! Here's three ways:
As I see photos tomorrow night, I'll share them! I'm also going to pin them to this Pinterest board. Remember, if you make changes to the recipe, let us know what you did so we can get new ideas too!

UPDATED: Since I nearly had a brain explosion over some tech difficulties related to this post and you all hung in there anyway (like the champs that you are!) I am now offering a PRIZE for anyone who participates. If you make the casserole and share a pic (using one of the methods above), you'll be entered to win a prize pack of Premier Protein stuff PLUS a copy of The Bariatric Foodie Breakfast Book.

All you have to do is share your picture using one of the three methods above. You don't need to register or do anything else. I'll note who submitted something and enter you. I'll announce who won on May 6. Easy, right?

That's my small way of saying I'm sorry for melting down. I'm human. It happens!

Single Serve Cheesy Mashed Cauliflower


Yesterday I posted the above picture on Facebook of my beautiful little lunch: about 2.5 oz. grilled salmon, along with a spear of brocolli (both leftover from a trip to TGI Friday's) along with a side of cheesy mashed cauliflower I made that morning.

Since I only wanted it that day, I made a single serving. I know some of you either live alone or have family who won't touch veggies with a ten-foot pole, so I though this recipe might be useful to you as well.

Nik's Single Serve Cheesy Mashed Cauliflower
Makes about 1/2 c. (ish) of mashed cauliflower. Divide that into as many portions as you see fit!

Ingredients:
  • 4-6 frozen cauliflower florets 
  • 1/4 c. (ish) of water
  • 1 wedge of Laughing Cow Light spreadable cheese (any flavor you like - I use Garlic & Herb)
  • 1 tbsp. shredded cheese of your choice
  • 1 heaping tsp. grated Parmesan cheese
  • Salt and pepper to taste
Directions:

Place florets and water in a bowl. Microwave on high for about 2 minutes. This should leave your florets pretty soft. If not, keep microwaving in 15 second increments until they are!

Drain the water and mash the florets (this can be done with a sturdy fork although for me any excuse to use my potato masher is a good one!).

While the florets are still hot, mix in your cheeses (Laughing Cow, shredded and parmesan), along with your salt and pepper. Mix in well.

I personally like to add parsely to the top (I'm a visual eater) but that's not necessary. If it's not hot enough for you, pop it back in the microwave about 30 seconds to reheat it through. 

Enjoy!

Low-Carb Ramekin Shepherd's Pie

DSC_0031

So...St. Patrick's Day is tomorrow. And some of you already have your corned beef and cabbage cooking. Yum!

Here's another idea to throw onto the heap. I love cooking with ramekins. It's so fun! You can make a perfect portion (by purchasing the ramekin size that suits you), it's easy to ditch starches (like pie crust in this instance) and they are just darn cute, don't you agree? (TIP: For another St. Patrick's Day ramekin idea, check out my Reuben Ramekins!

I love Shepherd's Pie. And I even love it without any modifications! In moderation I have absolutely no problem eating the full fledged version. But since I also want to enjoy a piece of Soda Bread with this meal, I gotta make a swap somewhere. (Why? Because Nik's blood sugar will sink like an anvil if I have more than one source of starch at a sitting!) This swap I can live with as a weeknight meal. I'm more inclined to use a more traditional recipe for weekends.

Here's how it goes.

Nik's (Version of) Lil Baby Shepherd's Pies
(Makes about 4 six ounce ramekins)
***For Shepherd's Pie purists, please read the recipe notes!

Ingredients:
  • 1/2 of a yellow onion, finely diced
  • 1/2 lb. lean ground meat (I used turkey)
  • 8 oz. can peas and carrots, drained
  • 1/2 bag frozen cauliflower florets (or about 2 c. fresh ones)
  • 4 oz. (or approximately half a can) low-fat, low-sodium Cream of Mushroom soup
  • 2-3 Laughing Cow style cheese wedges (any flavor)
  • 1/3 c. shredded cheese for topping
  • Salt and pepper, to taste
Directions:

Preheat your oven to 350 degrees.  Put a small pot of water on to boil.

Set a skillet over medium heat and let it get hot. Spray it with nonstick cooking spray and add onions. Sautee about 2 minutes.

Add ground meat, browning and mixing in the onions until meat is fully cooked. Drain if necessary. Your pot of water should be boiling so drop cauliflower florets into it.

Add peas and carrots and stir. Then add soup and stir. If soup doesn't sufficiently coat the meat mixture, add about 1/4 c. milk. Allow the mixture to warm through then set aside.

When cauliflower florets are tender (about 4-5 minutes after returning them to a boil), drain and mash them (I use a basic potato masher). Add the Laughing Cow wedges while the florets are still hot. Mix with spoon until mixture becomes a mash (won't look exactly like mashed potatoes but will bond together and won't look like grated cauliflower anymore either).

Place your ramekins on a baking sheet. Ladle in about 1/4 c. meat/veggie mixture. Top with about 1/4 c. of the cauliflower mixture and top with a sprinkle of shredded cheese.

Bake ramekins for about 10-15 minutes or until cheese is melted and, if you like, browned.

A few notes:
  • If you are a Shepherd's Pie purist perhaps the soup shortcut just won't do. That's fine! Use whatever you like to make the gravy for the pie. Play with your food! (And if you come up with something good, let us know!)
  • If you are a Shepherd's Pie purist you might also prefer a potato topping. Don't let me stand in your way!
  • Every time I use canned soup in a recipe I seem to get scoffs from folks. I will say this. I have low blood pressure and therefore have been advised against a low-sodium diet. I know that's not the case for many of you. Use your best discretion with regards to canned soups. There are great low-sodium varieties out there!
  • Finally, if a 6 oz. ramekin is too much for you, feel free to make them smaller! They freeze beautifully when you wrap them properly and are a great, comforting meal to reheat!
Here are a few other photos of this delicious dish!


DSC_0032
The addition of parsely in food pictures can make a real difference to the visual appeal in my honest opinion. Check out this dish before I added parsely. Doesn't it look more appealing with it? 

DSC_0022

The Art of the Low-Carb Quesadilla

Yes, yes I know we should be beyond crappy cell phone pics. Bare with me! I'll get a better one. :)

(But first...are you planning on taking part in the Bariatric Foodie Pledge? If so, you need to read up on the Pledge and make sure your device will work to participate. If you haven't done that yet, go do it!)

So let's talk about take-out food for a moment.

Before surgery I loved fast food. Cheesesteaks (steaks...not cakes!), pizza, oh my!

Immediately after surgery I couldn't eat those things (everything made me sick and I do mean everything). Nowadays, it's just not conducive to my lifestyle anymore. That's not to say I don't do it occasionally, but it usually makes me feel sluggish and overfull and sometimes queasy.

But over past few years I've found a good way to substitute many of my favorite take-out offerings. The low-carb quesadilla! It has several benefits:

  • Low-carb quesadillas are made of high fiber tortillas (like these), which give you fiber and sometimes additional protein
  • They can be made with any size tortilla, so if you can't eat much, use a taco sized one OR you can even use a cookie cutter to cut a "you-sized" tortilla
  • You can put nearly anything you love in these suckers and make them good. Read on for some tips.
How to Make (Almost) Any Take-Out Into a Quesadilla

Do do this you'll, of course, need a low-carb tortilla. But in addition you may need:
Here's how to actually cook a quesadilla

Step One: Spray down your pan or griddle well and allow it to get HOT (1-2 minutes over a medium flame out to do it).

Step Two: Lay out your tortilla on a plate or clean surface. Spread half your cheese across half the tortilla (measure it out so you don't go bonkers), then top with any meat/veggies, then do another layer of cheese. Fold the empty half of the tortilla over your "stuff" so that it makes a half moon shape.

Step Three: Lift the uncooked quesadilla by the open sides and lay it in a pan. Fry for about 1-2 minutes on each side or until tortilla is crisp.

Step Four: Transfer to a plate and cut into the appropriate amount of wedges. 

And here are some ideas of things you can make into quesadillas (all tested by me!)
  • Taco-dilla: (pictured) Fill your tortilla with leftover taco meat, some shredded cheese (or, as I like to do, a wedge of jalapeno Laughing Cow cheese) along with a bit of salsa.
  • Cheesesteak Quesadilla: Spray a pan down with non-stick and cook up some shredded low-sodium and/or low-fat deli beef (or leftover beef, your choice) along with slivers of onions and green pepper.
  • French Dip Quesadilla: Sort of like the cheesesteak, but be sure to use Swiss cheese (or Laughing Cow Swiss) along with grilled onions. I usually do this as a family thing and serve some nice soup instead of au jus. (WARNING: It's debatable if this violates the no eating/drinking rule. Use your best judgment!)
  • Mushroom Chicken Quesadilla: I tend to use deli chicken meat and sautee it but you can also use leftover chicken breast. Combine with sauteed mushrooms (and onions if that's your thing). I love this with Laughing Cow White Cheddar cheese wedges (I swear I am NOT getting kickback from Laughing Cow for this...but...Laughing Cow if you see this...feel free to send CHEESE!)
  • Breakfast Quesadilla: Load up scrambled eggs, cheese, diced sausage and/or bacon (turkey or pork, your choice!) into your tortilla. 
  • Dessert Quesadilla: Combine about 1/2 c. Greek yogurt with 1/4 c. lowfat cream cheese until combined (you might have to nuke the cream cheese to soften). Sweeten it however you do. If you want to boost it a bit more, add in some unflavored protein to the mixture. Place between the tortilla and add sugar-free or no-sugar added jam of your choice and cook. NOM! Trust me, this is good.
So there you have it. How to satisfy your take-out cravings with a quesadilla. Remember, Foodies, there is NO food you can't make WLS-friendly. Play with your food!

Nik's Peanut Stew


Don't ask me why, but I'm always hesitant to share recipes that use specialty ingredients. I guess I want you guys all to have fair access to the food I make, but I think my egalitarian attitude has prevented far too many recipes from going on this blog.

Well, the buck stops here!

I was poking around on Pinterest and found this recipe for West African peanut stew. I was searching on behalf of La Petite Diva (my youngest daughter) because she has been vegetarian for about a year now and so I figure she's committed enough for me to start thinking outside the box (she's my culinarily adventurous child).

So when I went to make it I thought I had all the ingredients but I didn't. And then in thinking about modifications, the inevitable happened. I started thinking "I wonder if this would be good if I added..." Yeah...I started playing with my food!

The result is REALLY yummy. The kid liked it. I liked it. Even though it's got peanut butter, that's not the dominant flavor here. It is noteworthy that this dish can be easily made with chicken (and if you've ever had Thai-style chicken skewers you can relate to the flavor of peanuts and chicken together) to bump up the protein. Just use my meat marinating technique to ensure tender chicken, grill it up and then add it into the recipe where I indicate below!

Nik's Peanut Stew
(Makes about 1 post-op + 3-5 "non-op" servings)

Ingredients:
  • 1 tbsp olive oil 
  • 1 onion diced (I used a regular yellow onion)
  • 3 tomatoes diced
  • 2 cloves of garlic, minced
  • 1 can of diced carrots, drained
  • 1 tsp. of ground ginger
  • 1 tsp. garam masala
  • 1/2 tsp. cumin
  • 1/2 tsp. tumeric
  • 1/2 tsp. ground coriander
  • 2 c. water.
  • 1 c. creamy peanut butter (you can use chunky if you like the texture)
  • 4 oz. tomato paste
  • 1/4 c. hot sauce (I agree with the source recipe...Sriracha is best!)
  • 2 cans of garbanzo beans (chickpeas)
  • 1 bag (about 3 c.) baby spinach
Directions:

Set a soup pot over medium heat and allow it to get hot. Add olive oil, onions tomatoes and garlic. Sautee 2-3 minutes.

Add peas and carrots along, spices and water, stir, and drop your heat down to low. Cover the pot and allow the mixture to come to a boil.

In a mixing bowl, combine peanut butter with tomato paste (I do this with a whisk but a regular mixing spoon works too) until thoroughly combined. Ladle some of the veggie mixture into the bowl and use it to thin out the mixture before adding it all back into the pot.

Stir well then add the hot sauce. (My advice is to add it 2 tablespoons at a time until you reach a flavor you like. I like spicy food so I just went for it!)

Finally add the garbanzo beans and baby spinach and stir. (NOTE: If you are using cooked chicken meat, add it at this point!) Cover the pot and allow it to simmer on medium-low for 25-30 minutes (just to let the flavors love on one another).

I served La Petite Diva hers over brown rice and mine over cauliflower rice. I like this! It's tart, creamy and savory all at the same time. I love "eating outside the box!"

Here are some outtake pictures:


#PWMF Recipe Contest Dinner Winner: Erin's Creamy Chicken Fajita Soup


(Heh...Dinner Winner...ok...moving along...)
 
Dinner! I don’t know about you but it’s always been a challenging meal for me.

I think it’s the finality of it all. Like dinner. It means you’re, like, done. With food. For the rest of the day. (In my head.)

My issues aside, a good, WLS-friendly dinner the entire family can eat is worth its weight in gold. It means you don’t have to play short-order cook to your family and you can all sit down and eat the same thing at the same time (theoretically). That’s important.

Hillery, our dinner judge, is a working girl. She manages to pack a lot into her day and now she’s having a baby! So she was looking for a good dinner that doesn’t take long to make, that both she and her hubby can enjoy.

Here’s her pick.

Erin’s Creamy ​Chicken Fajita Soup

Ingredients:
  • 4 C. boneless, skinless chicken breasts , shredded
  • 1 whole onion, diced
  • 1 (28 Oz. Size) Can Stewed Tomatoes
  • 2 (14.5 Oz. Size) Cans Great Northern Beans
  • 2 (14.5 Oz. Size) Cans of Sweet Corn
  • 2 (14.5 Oz. Size) Diced Carrots
  • 8 C. Low-Sodium, Fat-Free Chicken Broth
  • 8 Oz. Plain Greek Yogurt
  • 1 Package of Fajita Seasoning
  • Garlic Powder. Salt, Pepper to taste
Add chicken breasts to slow cooker. Add enough water to cover meat and cook on low for 6 hours. Take cooked chicken out, once cool enough shred meat. Set chicken aside.

Remaining liquid can be added with chicken broth.

Drain and rinse beans, carrots and sweet corn, set aside.

In stockpot, add diced onions and saute on low for 1-2 minutes. Add chicken broth, remaining liquid and greek yogurt. Bring to a boil and stirring constantly until smooth.

Add to stock pot, whole can of stewed tomatoes, package of fajita seasoning, beans, carrots, sweet corn and chicken.

Reduce heat, add garlic powder, salt and pepper to taste. Simmer for 10-15 minutes.

Note: If you have picky eaters at home, I puree my beans and tomatoes prior to adding.

Additional add ins depending on tastes:
  • Hot Sauce
  • Diced Jalapenos
  • Diced Green Chilis
  • Use 1 can of Black Beans, 1 can Great Northern Beans
  • Reduced Fat Cheddar Cheese for topping
Unfortunately, Hillery had a family emergency (NOT the baby!) that has prevented her from snapping a pic of Erin's dish, but she assures you all that she loved it and will snap a pic and send it in very soon. I'll update when I get it.
 
Congrats, Erin! Keep playing with your food!


Nik's Eggplant Parmesan Casserole


So I had all this stuff I had to use up. Isn’t that how the best dishes are made?
The challenge: to use up ¾ of an eggplant I had along with an entire roasted spaghetti squash. To be fair, I didn’t really have a great plan for either when I bought them. They both just looked so gorgeous, sitting there in the farmers market just waiting for me to buy them. I’m a sucker for a plump piece of produce, ya know?
Anyway, since neither eggplant nor spaghetti squash are on the elder daughters “approved veggies” list, I knew this dish would be completely vegetarian so that the younger daughter could eat it.
Thinking about it, the kid is pretty easy to please. Bless her, she loves anything I cook for her. But I kept having Eggplant Parmesan on the brain. I wondered if the concept could translate into a casserole.
I call this “casserolizing” – the art of taking something that has never been a casserole…and making a casserole out of it. Here’s how this one goes down.
Nik’s Eggplant Parmesan Casserole
Ingredients:
  • 1 medium eggplant, cubed (you can remove the skin if you don’t like it.)
  • 1 small onion, cut into slivers
  • 1 green pepper, cut any way you like it (I diced mine)
  • The yield of one spaghetti squash (if you’re not sure how to cook it, click here)
  • ½ c. diced tomatoes (I used fresh you can also used diced)
  • Salt, pepper, Italian seasoning, to taste
  • 1 jar of light Alfredo sauce (which is what I used)
  • 1 c. Italian-blend shredded cheese
ALTERNATIVE: I like the “Parm” part of Eggplant Parm best so that’s why I went with Alfredo sauce. If you are a purist, use a tomato-based sauce and top with cheese.
Directions:
Preheat your oven to 350 degrees.
Spray your eggplant, onions and green pepper down with non-stick, season them however you like (I use salt, pepper and Italian seasoning) and put it onto a parchment-lined cookie sheet. Roast it about 25 minutes or so.
In a bowl, toss the roasted veggies with the spaghetti squash and tomatoes. Again, add seasoning if you like it as this is the best way to get flavor in there.
Add whatever sauce you are using and toss that until thoroughly mixed in.
Transfer to an small casserole dish (I used an 8x8) and top with cheese. Bake for about 20 minutes or until cheese is melted and as brown as you like it.
This dish was a hit with the younger kid! I liked it too. The ONLY critique I have is that spaghetti squash is slightly sweet and it’s hard to play off of that. I usually allow myself to be a bit heavy handed with the salt for that reason. It didn’t make the dish bad, I just wish I had seasoned it better, which is why there are a few steps in the directions above so you can avoid that!
On Facebook I asked Foodies to vote for their favorite pic of the dish and the one at the top of the post is the one that is winning! Here are the others.


...I think I'm going to decide that, in general, close-up shots of casseroles generally are NOT a good thing! :)


Ten-Minute Meal: Nik & Steak & Cheese Zoodles


This "as it happened" lunch is brought to you by...Nik! :) Seriously though...submitting a recipe for the contest is as easy as snapping a pic of one of your meals!
 

Hey friends! Are you getting together your entries for the 2ndannual Bariatric Foodie “Play With MY Food” recipe contest? (If not you should be. For simply sharing the recipe and a pic of one of your meals you could win a $50 Amazon gift card!)

If you need some inspiration, here’s a really quick and easy dish I made myself THIS very morning for lunch that is the perfect kind of recipe (and an example of what I mean by a decent food picture – this was taken with my phone).

Nik’s Steak & Cheese Zoodles
Ingredients:
  • 3-ish oz. leftover cooked steak or roast beef (NOTE: You don’t HAVE to use beef. If you’ve got leftover chicken make it chicken and cheese…seafood, make it seafood and cheese. You get where I’m going with this right?)
  • 1 oz. onion slivers
  • Zoodles (zucchini noodles I made using my spiral vegetable cutter)
  • Whatever random quick-cooking veggies you wanna throw in there (I had spinach so I used that)
  • Salt, pepper, garlic (or garlic powder)
  • 1 wedge Laughing Cow Light Garlic & Herb cheese
  • Grated Parmesan cheese

Directions:

Spray a skillet with non-stick set it over medium heat and let it get hot. Throw the steak and onions on there and get them cooking.

Meanwhile you can be cutting your zoodles. (It’s a quick, easy and, dare I say, fun process!)

Add zoodles to the pan and toss it around with the steak and onions. Let those go about a minute before adding the other veggies you intend to use. Add spices.

Once everything is tender (it only takes 3-ish minutes) throw in the Laughing Cow Light wedge (NOTE: you may want to dice it up. They don’t exactly “melt” easily). Toss throughout (I use tongs) allowing the temperature of the food to soften the cheese.

When ready to eat, top with Parmesan cheese and enjoy! These tasted like a steak & cheese sub - without the bread! And it literally took me 10 minutes to make.

So if you were hesitating to enter the contest because you thought you needed a "fancy" dish - don't! In fact most of the judges WANT simple and good recipes. So get yours together and submit by September 30 for a chance to win a $50 Amazon gift card! Plus you'll be helping to fill the contest e-book that will be available to everyone for FREE download.

Keep playing with your food!

Shrimp & "Grits" A La Nik

Shrimp & Faux Grits
 
Now for those of you who are new, I’d like to let you in on an important piece of information (that you probably already know): when I put the name of food is “quotations,” it means it’s not really that food. So “rice” is not rice and, in this case, those “grits” are not grits. We all on the same page now? Lovely!

Over the summer, while the girls live with their dad, my boyfriend and I are culinary explorers. Here in the city of Baltimore there are ample opportunities for us to flex our wings, too. We have two events every year called “Restaurant Week” where fancy shmancy restaurants offer a special menu for a set price so that us gourmet-deprived masses may taste fine dining at least once in our lives (#sarcasm).

This year I really could only afford to do one restaurant during the week (which was the first week of August) and so I perused the Restaurant Week website to see what different places had on the menu and noticed a trend: grits are all the rage right now.

Now if you’ll indulge me a food memory, grits were a big part of my upbringing. We had them for breakfast countless times. My mom liked to crumble bacon over them and put the perfect amount of butter, salt and pepper. As an obese person, I added my own touch: a tablespoon of bacon drippings (along with the butter) and two fried eggs.

Nowadays I do eat grits sometimes but not in the quantity or the preparation that I used to. But still, it tickled me to see restaurants reimagining what amounts to the U.S. version of “peasant food.” (Meaning that it’s what most of us eat and not what most gourmets have traditionally cooked, NOT that we are all peasants!)

Fast forward to last night, when I needed a quick and tasty dinner. It was the divas first day of school and I’d worked all day. Generally I cook ahead but in prepping for school I didn’t get a chance to. This is when I start to look to my arsenal of 30-minute meal ideas. And I came back to that idea of dinner grits!

I’m going to give you two ways to do this. For those of you who eat grits in moderation, I will give you that method. For those who’d rather skip the grits (for whatever reason), I’ll give you “grits.” (See what I did there?)

Shrimp & Grits a la Nik
(Makes enough for three non-ops, one post-op with a post-op lunch portion left over!)
Ingredients:
  • 1 small onion, diced
  • 1 green pepper, diced
  • 1 non-green (yellow, red, orange – your choice!) pepper, diced
  • 1 clove garlic, minced
  • ½ lb. shrimp, tails removed (I used frozen cooked ones but rinsed them to get them thawed enough to remove the tails)
  • 1 tomato (variety of your choice), diced
  • Salt and pepper
  • 3 tbsp. tomato paste (or less if you want a more liquidy sauce)
  • 1 tsp. Cajun seasoning blend
  • 3 cups of spinach (or more, because I felt like it wasn’t enough)
  • A package of grits (quick or traditional, your choice – I’ll tell you what to do with it in the instructions)
  • Freshly grated parmesan cheese
Directions:

Spray a large skillet generously with non-stick cooking spray and set it over medium heat. Allow it to get HOT. Add onion and peppers and cook for 1-2 minutes, until slightly softened. Add garlic and stir.

Add shrimp and tomato and stir again. If shrimp are frozen, semi-frozen or cold, sprinkle some salt over the entire thing (not a bunch, it’s mostly to draw the water out of the veggies) and cover the pan and allow the shrimp to cook about 5 minutes or so. If shrimp are already fully cooked/room temperature, proceed to the next step.

Add tomato paste and seasoning and stir through. Add the spinach to the top of the mixture, cover and drop the heat to medium-low and allow it to simmer about 10 minutes or so. Uncover and mix the cooked spinach into the rest of the sauce.

While the sauce is simmering, cook the appropriate portion of grits, according to the amounts on the package directions EXCEPT instead of water, use milk (the fat percentage is up to you. I don’t give the family grits often so I just use whole milk when I do) and add a bit of salt and pepper to the milk as it is simmering. Once the grits have thickened, add 1 heaping tablespoon of Parmesan cheese for each intended serving of grits (so if you’re making 4 servings, use 4 tablespoons of Parmesan cheese).

Now if you're not into the idea of eating regular grits, this would be delicious atop my Four Cheese Mashed Cauliflower or...you can make “grits.”

Nik’s “Grits”

(Makes 2 -3 servings, depending on your eating capacity and who else you are feeding)

Ingredients:
  • 2 c. water
  • 3 c. of cauliflower florets
  • ¼ - 1/3 c. low-fat cream soup of your choice (nearly any flavor works. I used cream of mushroom)
  • ¼ c. freshly grated Parmesan cheese
  • 2-3 tbsp. milk
  • Salt and pepper, to taste
Directions:

In a pot, bring water to a boil and add cauliflower florets. Cook until very, very soft (about 10-12 minutes).

Drain and then mash (in whatever manner you see fit – I use a good old potato masher). You should mash it so that the cauliflower no longer looks like florets. If you still see florets, keep mashing! TIP: Drain the cauliflower into a colander and then mash in the colander in the sink. It helps to remove more of the water.

Mix in cream soup, cheese and milk. For thinner “grits” use more soup and milk. For thicker “grits” use less cream soup/milk. Mix thoroughly. 

Now just because I am a visual eater, I went at them with my immersion blender. But you certainly don’t have to do that. If you let them sit a moment, they thicken up and are very tasty. I will say though that they DO NOT feel like regular grits in your mouth. This is an alternative, not a replacement! J

And of course here are an outtake of this meal (photo I did not choose for the cover shot)

Shrimp & Faux Grits
 
…and the boyfriend’s portion with regular grits


Cheesy Chicken & Brocolli Bake

Cheesy Chicken & Brocolli Bake - The final shot
For reasons unknown (probably climate change or something), Baltimore has been decidedly fall-like this week.

Unlike many of you, however, I consider it blasphemous to consume anything with pumpkin in it outside the months of September through December. So no pumpkin lattes or protein shakes or the like - yet. But I have been using my oven more, which is nice. Comfort food almost always comes from the oven.

And this easy bake is comfort food at its best. Now I made it from raw veggies (cauliflower, broccoli) but you can easily use frozen for a quick weeknight prep. The amounts listed yield this lovely little casserole dish (notice it isn't much bigger than the salad plate it's sitting next to) full of  yumminess.

Nik's Cheesy Chicken & Brocolli Bake

Ingredients:
  • 8 oz. chicken (I used thighs, use breasts if you like those better)
  • 1/2  a large head cauliflower, cut into florets OR 2 cups frozen cauliflower florets
  • 1 small head of broccoli OR 1 cup frozen broccoli florets
  • 8 oz. can reduced-fat cream of chicken soup
  • 1 cup whatever shredded cheese you like (I used Mexican blend)
  • 1/2 cup grated Parmesan cheese
  • Salt, pepper, onion powder, garlic powder, to taste
  • Optional: 1/2 an onion diced and/or more veggies (I didn't javascript:;use onions because it would have required another pan and I didn't want to dirty one!)
Directions:

Pre-heat your oven to 350 degrees. Season chicken thighs and place them on a baking sheet. Bake until done. Once done, remove the skins and transfer to a rack to drain of excess oil. If you are using chicken breasts, I'd advise the morning before you make this you use my meat marinating method (which makes it so tender that most newbies can even tolerate it) and then proceed to grill the chicken in whatever manner is easiest for you (I use my Foreman Grill).

While the chicken is baking set a small pot of water on to boil. When it is boiling, add both the cauliflower and broccoli florets and cook until fork tender, about 5-7 minutes. Drain.

Now here's where your personal style comes into it. I personally pick the broccoli out and mash the cauliflower in a large bowl then add the broccoli florets back in. If you're looking at this post going "Ain't nobody got time for that!" then it's perfectly fine to mash it all together. The broccoli will not yield willingly though!

Cut your chicken into the appropriate sized pieces and add it to the bowl and mix. Then add your soup and mix again. Transfer all this to your small casserole dish and top with grated cheese, then with Parmesan.

Bake for about 30 minutes or until cheese is as melty and brown as you like it.

This is a really easy, really comforting meal, especially if you're one of those people, like me, whose pursuit of protein almost always leaves you missing out on your veggies! Here's a few more shots I took of this dish. Enjoy!

Cheesy Chicken & Brocolli Bake


Cheesy Chicken & Brocolli Bake

Nik's Vegetarian "Meat" Sauce


Sorry about the stove...if I'd know you were coming over... ;)

So I thought it’d be nice, after all the flurry of the Pledge, to post about…food. Remember when we used to talk about food? Me too! Let’s start doing that again!

This is a quick one but, as always, there’s a story.

My youngest child has decided to become vegetarian. This is not the first time she’s done this. She’s never much cared for meat, especially meat that looks like meat. It bothers her deeply to think that she’s consuming an animal.

While I’m not vegetarian I respect the fact that she (at 12 years old) came to that decision for herself. But life is not easy for a vegetarian kid living in a meat consuming household. Very often it was hard to find that wonderful place in the middle of the Venn diagram that is my oldest child, a self-proclaimed “meatitarian” and my youngest.

But recently – EUREKA! – I found a ray of hope. Quite to my surprise my oldest likes Boca Burgers. That brings us to last night, when I wanted to make ONE dinner that feels like dinner. The eldest had been wanting spaghetti. While I could have made a veggie spaghetti (and grumbled while the oldest picked out most of the veggies and fed them to our beloved Basset Hound when she thought I wasn’t looking), I decided to try to build upon her like of Boca meat by using Boca crumbles instead of meat.

(NOTE: This isn’t a review for Boca products, but you can look them up for yourself here.)

Here’s the recipe. After I’ll tell you how it was received.

Nik’s Vegetarian Spaghetti & “Meat” Sauce

Ingredients:
  • 1 small onion, diced
  • 1 green pepper, diced
  • 1 clove garlic minced (or one heaping tsp of jarred minced garlic)
  • 12 oz. Boca crumbles (they come in a 12 oz. bag)
  • 1 jar low-sugar spaghetti sauce (I usually get the most basic kind and doctor it up myself, as you’ll see below)
  • 1 tsp. Italian seasoning (or, if you don’t have that but have dried basil, the same amount)
  • ½ tsp. red pepper flakes (less or none if you don’t like spicy stuff)


Optional (and had it just been me and The Younger, I would have used), a variety of colorful diced veggies like zucchini, yellow squash, red peppers, eggplant, really anything!

Directions:

Spray a pan with nonstick cooking spray, set it over medium heat and allow it to get hot.

Add onions and peppers (and any other veggies you’re using) and saute about 2-3 minutes, until they begin to soften.

Add the Boca crumbles and stir into the veggie mixture. Allow it to cook about 3-4 minutes.

Add spaghetti sauce and seasonings and stir. Bring it to a boil, then drop the heat down to medium-low, allowing it to simmer about 10-15 minutes more. The sauce should be a deeper shade of red when finished.

NOTE: This can be made with whatever ground meat substitute you like. I am trying to watch my younger daughter’s soy intake to make sure she doesn’t just eat soy as a meat replacement. I know that’s a concern for some of you as well.

NOW…I served this to them atop whole-wheat thin spaghetti. I always eat just the sauce, chili-style, with tons of grated Parmesan on top.

The Elder? She loved it! Interestingly, I didn’t tell her it was vegetarian. The fact that her sister was eating it should have clued her in but…14 year-olds are sometimes self-absorbed, so what can we do? I’m just glad I have a good fall-back dinner everyone can eat!

Italian Sausage & Lentil Soup


Thankfully I still have some of this so a better pic is forthcoming!

I have a confession to make.

I actually go out to eat quite a bit. Much as I love cooking, I also love the restaurant experience. Being six years out, the habits of a WLSer with regards to restaurant eating are pretty second nature. I usually never go to a restaurant where I can’t check out the food stats before-hand. I ask for no bread. I drink water until my meal, stop when I begin eating. We all know the drill.

Well last week I went to Carrabba’s for lunch and had this.


It’s their Italian Sausage & Lentil soup. It was quite yummy! It was a bit more caloric than most of you probably want to go for but it was a splurge for me that day!

Still…in my head, as I am eating, I’m thinking, “I have to figure out a way to make a lighter version of this!”

And that’s precisely what I did!

Nik’s Italian Sausage & Lentil Soup
(Best I can tell this makes 8, one-cup servings or thereabouts. If that's too much for you and your family, this recipe is pretty easy to halve!)

Ingredients

  • Olive oil non-stick cooking spray 
  • 1 medium onion, diced
  • 1 large tomato, cored and diced (or a can of diced tomatoes)
  • 2 c. whatever additional veggies you’d like, cut into small pieces (the original seemed to have green peppers and carrots. I just used yellow squash.)
  • 1 clove garlic, minced
  • 4 turkey or chicken Italian sausage links, casings removed
  • 1 lb. dry lentils (any color that moves you)
  • 1 tsp. extra – virgin olive oil (optional)
  • 32 oz. low-sodium chicken broth
  • ½ tsp. (or to taste) Italian seasoning
  • ¼ tsp. (more if you like spicy), red pepper flakes
  • 2 c. water
Directions

Spray large pot with olive oil cooking spray, set it over a medium flame and allow it to get hot.

Add diced onions and sautee about 2-3 minutes before adding remaining veggies, garlic and Italian sausage.

Break up Italian Sausage (as if you are browning ground beef) and cook thoroughly. At this point, if you wish, you can drain the meat/onion mixture of fat (depending on the type of sausage there may not be much).

Add the lentils to the pot and stir them through. Add the olive oil. (Note: This is a trick I use when I want olive oil flavor but not the olive oil calories. I cook the veggies in non-stick then add a small amount of olive oil later to get the flavor hit.)

Add the chicken broth, seasonings and water and cover, allowing the mixture to come to a boil. Then drop the heat to medium-low and allow the soup to cook until the lentils are tender, about 30 minutes.

So here’s how I think mine compares to the original. I love how the taste of the sausage comes through in this soup. Mine is a bit less salty than Carrabba’s was. (I even saved a bit of my soup from lunch to compare, so of this I am quite sure!) I played with the ratio of lentils to sausage a bit in this recipe so that there’s a bit more lentils than sausage in my bowl, but I like that! If you like it the other way around, knock back to ½ lb. of lentils. My soups also tend to resemble what Rachel Ray would call a "stoup" (stoop?), in that I don't leave a ton of excess liquid. Soups are one of those paradoxical post-op foods that make you break the "no eating and drinking together" rule so I try not to put myself in that situation!

Finally, this soup is crazy good the day you make it (especially with some fresh grated Parmesan on top) but it is insane the next day. What the heck happens to food when it sits in the fridge overnight? It’s like there’s a party in there!

At any rate, give this soup a try. I liked it. My picky eldest daughter liked it. My youngest has once again professed herself a vegetarian so I may have to find some vegetarian Italian sausage next time so she’ll eat it.


Related Posts Plugin for WordPress, Blogger...